Version 2.21
126 NPE Service Manual
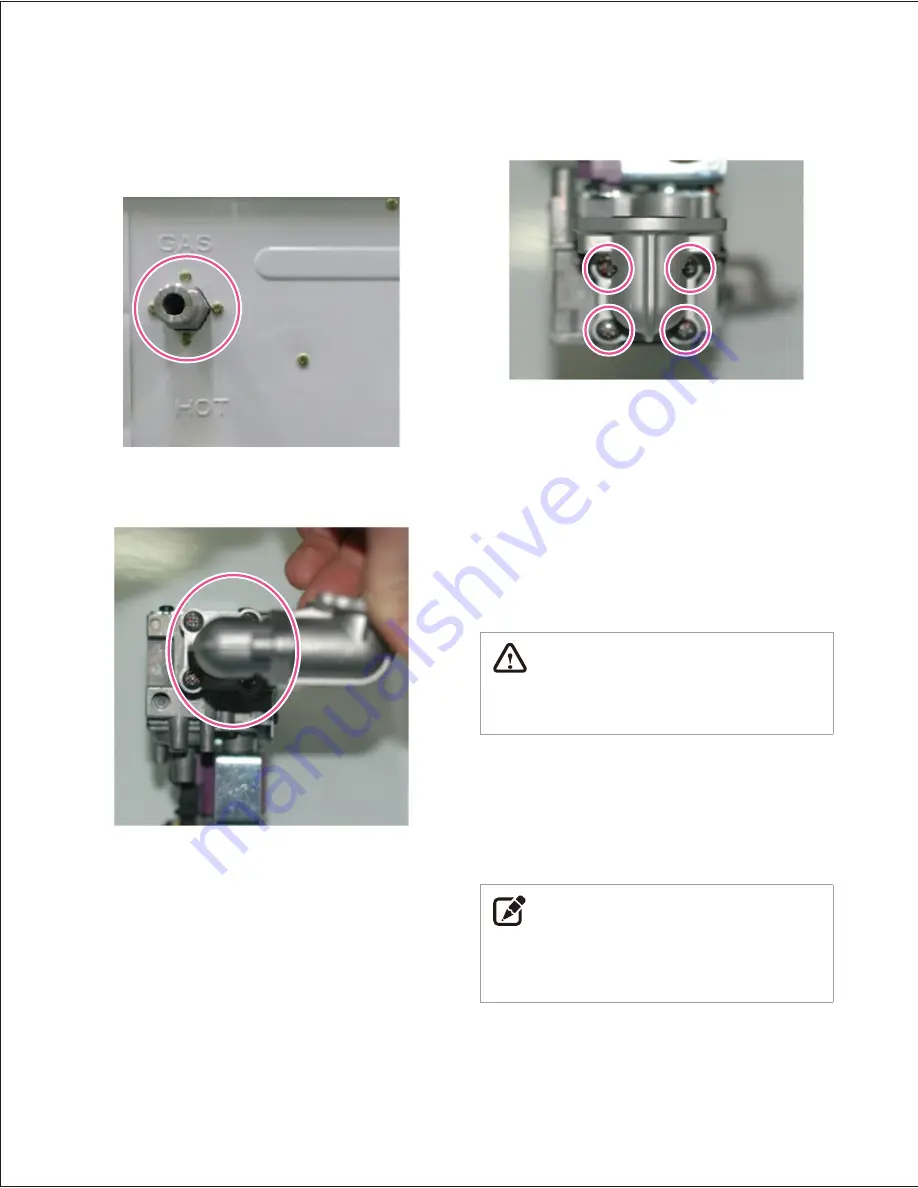
Figure 15
8. Remove the 4 screws directly from the bottom of the gas valve
to remove the elbow.
9. Replace the O-ring where the gas valve assembly attaches to
the elbow. Make sure the old O-ring is discarded.
10. Replace the old gas valve with the new part and reattach the
elbow and gas pipe to the gas valve.
11. Reconnect the gas valve assembly to the unit by using the
4 screws at the elbow and 2 screws at the gas pipe.
12. Reattach the gas valve wiring connector.
WARNING
Failure to correctly assemble the components according to
these in-structions may result in a gas leak or explosion.
13. Check that all gas connections are tightly sealed to ensure that
no gas leaks are present.
14. Turn on water supply, power supply, and gas supply to the
unit.
15. Verify the gas pressures to the unit with the values provided in
this Service Manual.
NOTE
Always replace the old O-rings and gaskets with new parts
to ensure tight seals between connections. Ensure that all
properly sized O-rings are used for the replacement.
6. Remove the 4 screws located at the bottom of the unit that are
attached to the gas valve.
7. Remove the 4 screws directly on the bottom of the gas valve to
remove the gas pipe.
Figure 14


