background image

Menu Mode   53

 Network management

This section allows you to manage all of the SimNet 

networks on your vessel, as well as all of the SimNet 

devices you have connected to those networks.

From the SimNet/NMEA2000 menu highlight “Network 

Management” and select it.

The Network Management window opens showing “Device 

Instance” and “System Instance”

 Device instance - 

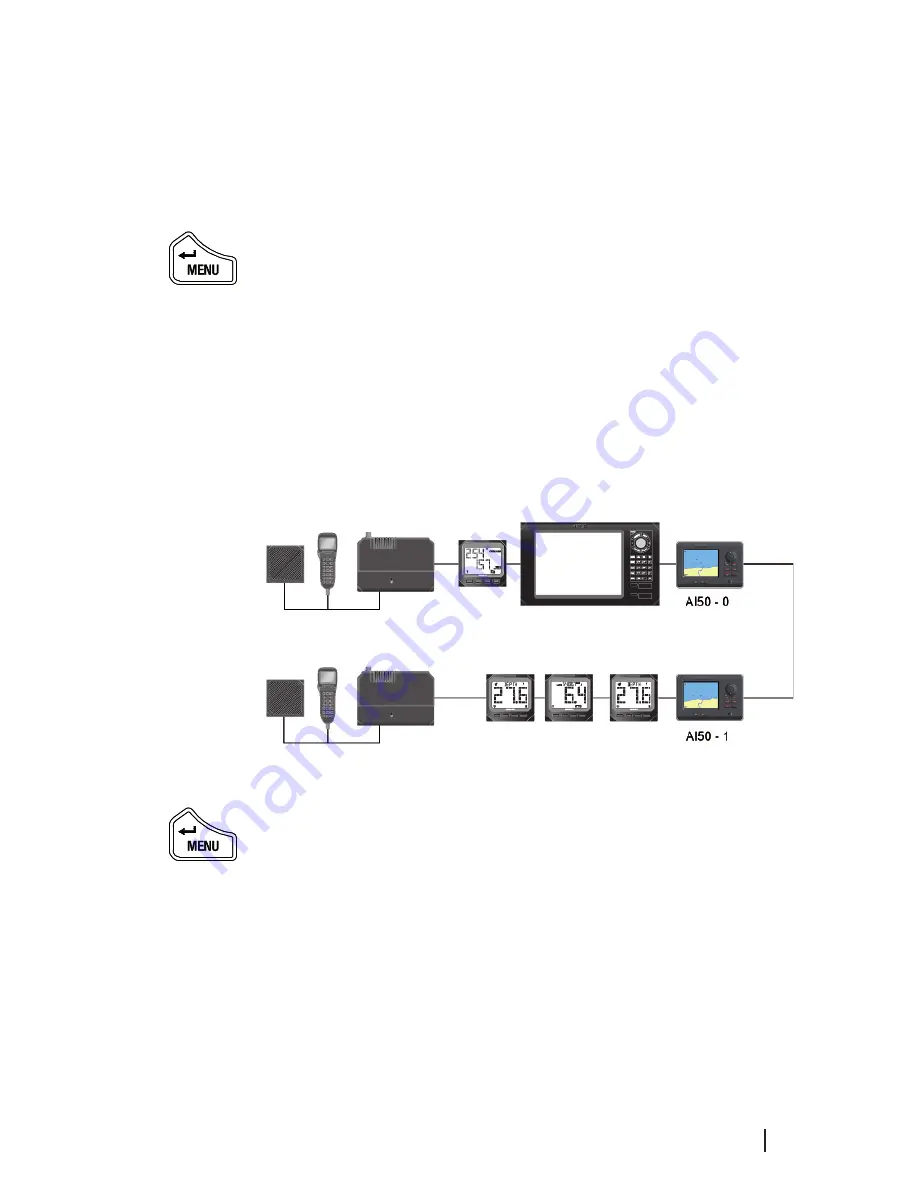
This option will normally be used on 

large complicated systems, where there maybe more than 

one radio system or AIS on the same SimNet bus. For 

example, the system may contain more than one AI50.

To prevent conflict across the network, these can each be 

assigned a unique device number between 0 and 255.

Figure 6.24 – Device Instance

From the Network Management menu, highlight “Device 

Instance” and select it. Scroll through the pre-defined 

numbers to the one of your choice, and select it to enter 

it into memory.

 System instance - 

A SimNet system can have a maximum 

of 50 devices or “Nodes” attached to it. If a large vessel 

has a requirement for more than 50 nodes, then a multiple 

network system is required. The system Instance allows 

the user to allocate a unique number between 0 and 15 

to each network, which allows the multiple networks to 

intercommunicate.

or

X

or

X

or

X

or

X

Summary of Contents for SIMRAD AI50

Page 1: ...MANUAL SIMRAD AI50 Class B Transceiver 988 0168 003 Iss 3 0 English ...

Page 2: ...ithout notice as part of our policy of continuous development and improvement No part of this publication may be reproduced stored in a retrieval system or transmitted in any form electronic or otherwise without prior permission from Navico UK Ltd No liability can be accepted for any inaccuracies or omissions in the publication although every care has been taken to make it as complete and accurate...

Page 3: ...2 2 Panel mounting 13 2 3 Bracket mounting 14 2 4 GPS antenna 14 2 5 VHF antenna 16 2 6 Power data cable 18 2 7 SimNet cable 18 2 8 SD card not supplied 19 3 Keypad Overview 21 3 1 Layout 21 3 2 PWR Lights key powering on off 22 3 3 Navigation keys 22 Display mode 22 Menu mode 22 Data entry mode 23 3 4 Zoom keys 23 3 5 ENTER MENU 23 3 6 INFO STATUS 23 3 7 TRACK CLR TRK 23 ...

Page 4: ...iguration 27 5 1 Window display convention 27 5 2 Initial start up sequence 28 5 3 Ship configuration procedure 29 MMSI Entry 30 Vessel type entry 32 Vessel dimensions GPS reference 32 Call sign entry 34 Vessel name entry 34 6 Menu Mode 35 6 1 General 35 6 2 Display mode settings 35 Coastline detail 35 Tracking offset 36 Display offset 36 Show range rings 37 6 3 Display settings 37 Display brightn...

Page 5: ...1 Collision alarms 42 Lost vessel alarms 45 Favorites alarm 46 6 6 System setup 46 Units of measure 46 Set local time 47 Ship configuration 48 Key beeps 48 Set language 48 Data logging 49 Transmit enable 51 Reset options 51 6 7 SimNet NMEA2000 52 Data sources 52 Network management 53 Network list 54 Remote enable 54 DSC Radio select 54 6 8 Product info 55 ...

Page 6: ...el 61 Other vessel s info reduced list 61 Other vessel full list 62 Other vessel minimal list 62 7 9 Features for vessel information 63 7 10 Making a DSC call map mode 63 7 11 Text mode 64 Changing the sort order 65 7 12 Making a DSC call text mode 65 7 13 Tracking individual vessels 65 7 14 Tracking your own vessel 66 7 15 Clearing down all trails 66 7 16 Light adjustment short cut 67 7 17 KeyLoc...

Page 7: ...2 8 3 BIIT alarm 73 8 4 Lost vessel alarm 2 73 8 5 Favorites alarm 74 8 6 Loss of compass heading data 74 8 7 Safety message alarm 75 9 Appendix 77 9 1 Maintenance 77 9 2 Troubleshooting 77 9 3 Accessories 78 9 4 Product specifications 78 9 5 Dimensions 80 9 6 Service and warranty 80 9 7 Declaration of Conformity EU 81 10 Index 83 ...

Page 8: ...8 Contents Blank page ...

Page 9: ... shore based stations to see you even at night or in poor visibility With safety in mind it is very easy to initiate calls to target vessels via a networked DSC VHF Radio The AI50 can be flush mounted or bracket mounted and be located at any convenient position such as the helm pod or at the navigation table The AI50 uses a sophisticated automatic digital time sharing technology which enable the e...

Page 10: ... a vessel on the screen is the position of the most recent transmission and may not be the current position 1 2 About this manual The manual combines operating and installation information for the AI50 Operation is sub divided into main working categories for easy reference 1 3 SimNet NMEA2000 SimNet is Simrad s proprietary high speed data bus network complete with NMEA2000 It provides intelligent...

Page 11: ... been designed to survive the rigours of the marine environment It has a tough sealed body that is fully waterproof and houses an integral Li Ion rechargeable battery that is automatically charged whenever it is placed in its cradle For further information on the WR20 and other Simrad Products visit our web site at www simradyachting com ...

Page 12: ...12 Introduction Blank page ...

Page 13: ...ood ventilation Decide how and where you are going to run the cabling from the rear of the unit The AI50 is very simple to install however the performance of the equipment is directly affected by the quality of the installation Please read these instructions carefully before attempting installation If in any doubt consult a qualified marine electronics engineer 2 2 Panel mounting The transceiver r...

Page 14: ...e template Assemble case gasket to the rear of the AI50 unit Place the AI50 unit in the cut out and fasten with 4 self tapping screws into 2 5mm holes Carefully remove 4 corners 3 left and 3 right supplied from the moulding rosette Note they are numbered 1 and 2 on rear Place the 4 snap fit removable corner covers into place No 1 is placed in the bottom left and top right position No 2 is placed i...

Page 15: ... to the antenna with the four screws thread the cable down the center hole and through the pole Thread the pole into the mounting base before attaching the pole to the superstructure DO NOT connect your antenna using further extension cables or remove the connector as this may degrade the reception to a point where it may not function correctly To minimize interference place the antenna in a posit...

Page 16: ...nnas not exceeding 3dBi gain Failure to observe these recommendations may expose those within the MPE Maximum Permitted Exposure radius of 1m 3ft to RF absorption levels that exceed the FCC safe limits The most important factor in the performance of any AIS transceiver will be the quality and positioning of the antenna As the range of VHF signals are governed by line of sight the antenna should be...

Page 17: ... but also power could be reflected back into the AI50 unit reducing its performance The quality of any connections and integrity of the cable will directly affect the performance of the radio Poor soldering or corrosion of the terminals can impair performance We recommend that screw or crimp terminal type connectors are not used for any through deck fittings a good quality waterproof solder termin...

Page 18: ...ble has two wires one red and one black Connect the red cable to 12V via a 2 Amp fuse and the black cable to 0V Data cable The data cable is used for connectivity to AIS enabled chart plotters with NMEA0183 HS interface The Data cable is screened and has four wires For connection data refer to the following table Signal Color Comment Out ve Orange Out ve Blue In ve Yellow Not Used In ve Green Not ...

Page 19: ... of equipment If the spare socket is not used insert the supplied blanking plug 2 8 SD card not supplied The SD card slot is situated on the reverse of the unit under a water resistant cover Figure 2 5 SD Card Access Cover DO NOT insert or remove the SD card while the AI50 is turned on Locate and undo the two retaining screws and carefully remove the cover to reveal the SD card slot With the SD ca...

Page 20: ...20 Installation Replace the cover and screw back into place making sure not to over tighten the screws The use of high speed SD cards is not recommended Use only Class 1 SD cards ...

Page 21: ...R MENU INFO STATUS HOME DSC PWR Lights VIEW DISPLAY TRACK CLR TRK Zoom Out Zoom In To obtain the functions printed on the keys in white text requires a single push of that key To obtain the functions printed on the keys in red text requires you to press and hold that key for a couple of seconds 1 2 3 4 5 6 7 8 9 1 7 6 5 4 8 9 3 2 ...

Page 22: ...3 2 Power down message 3 3 Navigation keys The circular 8 way NavPad Figure 3 1 Item 1 can operate in a variety of ways depending on which mode the unit is in Display mode The NavPad keys are used to position the cursor around the screen By using a combination of keys for example pressing S and W together will make the cursor move diagonally up and to the left Menu mode The ST keys are used to hig...

Page 23: ...ft corner When navigating within a menu once an item has been highlighted pressing the ENTER MENU key or the X key will select that item or sub menu In data entry mode the ENTER MENU key is used to enter that data into the systems memory 3 6 INFO STATUS A short press allows you to view the received information of a vessel that has been highlighted using the cursor Press and holding the INFO STATUS...

Page 24: ... NORTHUP COGUP Press and hold VIEW DISPLAY to access Text Mode in which the map is replaced by a list of target vessels and their details While in Text Mode short presses of the VIEW DISPLAY key will cycle through the predefined order in which the vessels are sorted Press and hold again to restore map view 3 10 PWR backlight adjustment Short presses of the PWR key will cycle through the preset lig...

Page 25: ...ious menu or mode Press and hold the W key will return you to the Map Mode All user setup data falls into one of the following categories Tick box Pre defined list Alpha numeric entry 4 3 Data entry mode During data entry the ST keys are used cycle through a pre defined list before selecting a value or used in conjunction with the WX keys to move around the alpha numeric characters on the screen F...

Page 26: ... go further into a highlighted menu or sub menu or to select an item in that menu Once a change has been made pressing ENTER MENU saves that change to the AI50 s memory With a tick box the ENTER MENU key simply turns the option on or off ticked or un ticked or X or X ...

Page 27: ...the Title Bars will be Blue In general alert windows it will be Yellow and in windows displaying serious alarms it will be Red Information area The middle portion of the window will show the information menu or graphic relevant to the title displayed and will be grey Instruction bar The lower bar in the window is known as the Instruction Bar This bar will inform you of what action to perform relev...

Page 28: ...ult is English Figure 5 1 Select language Once selected press ENTER MENU to continue The display changes to show a warning regarding good seamanship Figure 5 2 Start Up Screen Press W to clear this window and continue If you have not previously configured the unit a new Information window appears asking if you wish to configure the AI50 for full operation now The default value is Yes Figure 5 3 Co...

Page 29: ...as been completed Your AI50 will only operate as a receiver until you have fully completed the ship configuration as described in Section 5 3 5 3 Ship configuration procedure From Map Mode select Menu Mode scroll down the menu and select System Setup Scroll down to System Setup menu and select Ship Configuration A more detailed procedure is explained further on in this chapter All values selected ...

Page 30: ...dy to enter your MMSI number Figure 5 6 MMSI Entry display Using the NavPad keys highlight the first number of your MMSI and press the ENTER MENU key to select it The first number appears in the display and the cursor moves on to the second Repeat this procedure until every number has been entered If you have made an incorrect entry highlight or and pressing ENTER MENU move the cursor onto the pos...

Page 31: ...ake you to the Vessel Configuration Information window where you can continue entering the remaining ships configuration information If the two entered MMSI numbers do not match a message indicating this will be shown Figure 5 8 MMSI mismatch warning Clearing the display will revert you back to the Configuration Request window as shown in Figure 5 3 to start again If you need to cancel the input m...

Page 32: ...onfiguration list Vessel type entry Highlight Vessel type and select it The default value Not Set will be highlighted Figure 5 11 Vessel Type Entry Screen The available choices for vessel type are Not Set default Pleasure Craft Sailing Vessel Military Diving Ops Dredging Tow Large Load Towing Fishing When you have made your choice select it to save it into the AI50 s memory Vessel dimensions GPS r...

Page 33: ...on entry error Enter the required dimensions of your vessel in metres with reference to the GPS antenna using the same method of entry as described during MMSI entry Once you have entered a dimension the cursor will advance to the next one When complete highlight OK and select it to accept your entry The display returns to the vessel configuration Information window If you have made an incorrect e...

Page 34: ...scribed in MMSI Entry earlier in this section Vessel name entry Select Vessel Name A window opens identical to the call sign entry window figure 5 14 but with Vessel Name Entry in the title bar Enter your vessel s name using the same method of entry as described for MMSI entry When complete highlight the OK button and select it to save it Once the Vessel Name has been entered the display returns t...

Page 35: ...display looks when in operation From the Main menu highlight Display Mode and select it A sub menu opens displaying various options and their current status Figure 6 2 Display Mode Options Coastline detail This option allows you to turn the coastline detail on and off The default value for this option is on and a tick is shown in the box To change its value simply select it The coastline map is a ...

Page 36: ...g your vessel back to the centre again The default value is off to turn it on simply select it and a tick will appear When set to on your vessel is no longer maintained at the centre of the display and will be allowed to track away Display offset This option allows you to turn the display offset on or off The default value is off to turn it on simply select it and a tick will appear Your vessel is...

Page 37: ... to the influences of the wind and tide Therefore if no compass is connected to the system this mode will automatically appear as COG Up Show range rings This option allows you to turn the range rings on or off The default option for this value is off To turn it on or off simply select it When set to off the range rings disappear from the display however the overall range across the width of the s...

Page 38: ...etween 0 100 Highlight Keypad Brightness and select it This opens a box with the current value in Scroll through the pre defined values for a suitable level then select it Keypad color This option allows you to change the color of the keypad backlighting Highlight Keypad Color and select it This opens a box with the current selected color To change it between White or Red simply select it Display ...

Page 39: ...thin VHF range To set the alarm refer to section 8 5 There are two methods for adding vessels to your list Adding an entry The first way to add an entry is from the main menu Highlight Favorites List and select it A window will open showing the current list of favorites Figure 6 6 Favorites list non selectable Highlight Add New Favorite and select it The display changes showing the two available d...

Page 40: ...ded to the list with just an MMSI number but cannot be added with just the vessel name Unlike your own vessels MMSI number this MMSI can be changed edited or deleted once entered If an entry is inserted without the name the next time that vessel is in range the name will be inserted automatically If a name already exists in that field then it will not be overwritten The second way is from within M...

Page 41: ...3 and editing the Vessel Name is described in section 5 3 Delete entry From the Favorites List highlight Select Favorite and select it Highlight the item you wish to delete and select it A window opens showing three choices MMSI Vessel Name and DELETE Highlight DELETE and select it 6 5 Alarm setup This section allows you to activate deactivate and setup parameters of the various safety alarms on y...

Page 42: ... at sea they are CPA TCPA Guard Zone Lost Vessel Alarm From the Alarm Setup menu highlight Collision Alarm and select it A window open showing the activation status and values The default is Not Active Figure 6 11 Collision Alarms CPA TCPA When you activate the CPA TCPA Alarm from within the Alarm Setup Menu the CPA TCPA will be calculated for all AIS equipped vessels in your VHF range CPA Closest...

Page 43: ...ly the user can react to manoeuvre their own vessel to avoid a collision To activate the CPA TCPA alarm highlight it and select it A tick appears in the box indicate the alarm is now active and using the values shown Highlight the CPA Value you wish to change then select it Figure 6 12 CPA TCPA values Scroll through the predefined values and select the most appropriate one 30ft 8 1nm or equivalent...

Page 44: ...gered if you have enabled it on during setup To activate the Guard Zone alarm highlight it and simply select it A tick will appear in the box to indicate the alarm is now active and using the values shown To activate the Audible Visual Warning highlight it select it A tick will appear in the box to indicate the alarm is now active GZ Radius To change GZ Radius highlight it then select it The value...

Page 45: ...dible and visual alarm each time a vessel is lost from AI50 reception To activate the Audible Visual Warning highlight it and simply select it A tick appears in the box indicating the alarm is now active and using the value shown Lost vessel persistence When a vessel has been lost from AI50 reception its icon will change to a lost vessel icon Refer to section 7 2 Lost vessel persistence is the use...

Page 46: ...ighlight System Setup and select it A sub menu window opens showing the following choices Units of Measure Set Local Time Ship Configuration Key Beeps Set Language Data Logging Transmit Enable Reset Options Units of measure This section allows you to change the units the AI50 displays for both for distance and speed The options are as follows Distance in Nautical Miles default Miles Kilometres Spe...

Page 47: ...em Setup menu highlight Set Local Time and select it A window opens displaying Time Offset where the default value is 0 Hours Figure 6 16 Set Local Time As there is only one choice Time offset will already be highlighted simply select it then scroll through the pre defined values to the appropriate offset and select it again in order to store it This will only affect the time being displayed in th...

Page 48: ... key is pressed From the System Setup menu highlight Key Beeps and select it The default option for this value is on To turn it off or on simply select it Set language This section allows you to change the operating language of your AI50 to a language of your choice From the System Setup menu highlight Set Language and select it The display changes to show a list of available languages with Englis...

Page 49: ...dow opens displaying the data logging options as shown Figure 6 18 Logging menu Highlight Log File Name and select it Scroll through the predefined file names AISLOG1 to AISLOG10 and select the one you wish to use Highlight Enable Logging and select it to turn it on A tick will appear in the box and the file name will be greyed out All data for your voyage will now be stored under this file name I...

Page 50: ...ly before powering down all data could be lost Disabling a log file will not delete any of the data stored on it Playback log To playback a data log on your AI50 you have to select the correct data file name for the voyage you wish to replay From the System Setup menu highlight Data Logging and select it A window opens displaying the options as shown previously in figure 6 18 Highlight Log File Na...

Page 51: ...efault value for this option is On To turn it off or on simply select it Reset options Selecting this option will reset all system variables back to their factory default settings except for the ship s configuration From the System Setup menu highlight Reset Options and select it A window opens showing Reset Options already highlighted Figure 6 21 Reset Option To continue with a system reset selec...

Page 52: ...s This section allows you to select a SimNet NMEA2000 data source to provide compass heading information The data source must be able to supply magnetic compass heading From the SimNet NMEA2000 menu highlight Data Source and select it As there is only one choice Heading will already be highlighted simply select it Figure 6 23 Data Source menu Scroll through the available SimNet data sources to the...

Page 53: ...stem may contain more than one AI50 To prevent conflict across the network these can each be assigned a unique device number between 0 and 255 Figure 6 24 Device Instance From the Network Management menu highlight Device Instance and select it Scroll through the pre defined numbers to the one of your choice and select it to enter it into memory System instance A SimNet system can have a maximum of...

Page 54: ...ou to Enable or Disable the Simrad WR20 Remote Commander handset from controlling the AI50 From the SimNet NMEA2000 menu highlight Remote Enable and select it The default value for this option is enabled and a tick is shown in the box To change it between enable or disable simply select it DSC Radio select If a compatible DCS radio is installed on the SimNet network the AI50 will enable the user t...

Page 55: ...0 s Unique Identifier Software version and Ship Configuration information From the Main menu select Product Info and select it A window opens showing the first page of information to view the second page press the W key Figure 6 25 Product Info 1 Figure 6 26 Product Info 2 or X or X ...

Page 56: ...56 Menu Mode Blank page ...

Page 57: ... different icons for each vessel state they are as follows Your COG will be shown as a dashed line emanating from the centre of your vessel s icon whilst the line coming from the front of the arrow head will be your heading If a vessel displaying one of these icons goes into an alarm state then the icon will turn red Transmit Legend Selected Target Own Vessel Range Rings Coastline map Display rang...

Page 58: ...he range across the display If you wish to zoom in or out on vessels in a particular area of the display place the cursor on your selected area then press and hold either of the zoom keys The display will zoom in or out at that point depending on which zoom key is pressed If your own vessel is still in view it will be shown as a small circle You can set your screen to display any of the 12 ranges ...

Page 59: ...view N H and C Figure 7 2 View Modes The HDG Up option will only be available when the unit is interfaced to a suitable source of Compass Heading information through the SimNet port 7 5 Coast line detail The coast line detail is drawn from internally stored worldwide maps It can be toggled on off from within Display Mode options in the Main Menu see section 6 2 The coastline map is a visual aid to...

Page 60: ...t key Press and holding the cursor key will allow it to accelerate and move rapidly across the screen 7 7 Transmit legend This is a small circle situated in the bottom right hand corner of the display and informs the user about the transceiver status When the AI50 starts to transmit your vessels data the transmit legend will turn green for 1 second If there is an internal fault it will turn red wi...

Page 61: ...and a highlighted box will appear Press the INFO STATUS key once the display changes to show you a summary of that vessel s information Figure 7 5 Shortened List After approximately 10 seconds the list will change to the minimum and display just the vessel s name when available otherwise it will display the vessels MMSI number STATUS INFO STATUS INFO STATUS INFO STATUS INFO STATUS INFO STATUS INFO...

Page 62: ... this vessel using a suitable DSC VHF Radio If attached press and hold the HOME DSC key Refer to section 7 10 Other vessel minimal list Press the INFO STATUS key a third time and just the MMSI or name will be displayed Figure 7 7 Vessels MMSI displayed Pressing the INFO STATUS key for a fourth time will return you to the Map Mode and turn off information on the currently selected vessel STATUS INF...

Page 63: ...mat a Routine Individual DSC call A Creating DSC Call window opens showing the MMSI number and name of the vessel you intend to call If this is correct and you wish to continue press ENTER MENU or X to send the call The Routine DSC Call window opens confirming that the call has been created and sent to the VHF radio If you wish to cancel the DSC call at this stage press the W key and the display w...

Page 64: ... At the top just under the title bar are the Data Headings these are MMSI NAME COG SOG DISTANCE CPA TCPA POS LAT POS LON UTC HDG ROT CALLSIGN IMO No TYPE DEST ETA Each consecutive line below the headings holds the voyage static data for a vessel Because this information does not fit on the screen use the WX keys to scroll across the page and use the ST to scroll down the page DISPLAY VIEW DISPLAY ...

Page 65: ...me method as that described in Section 7 10 once the vessel has been selected To return to Map view press and hold the VIEW DISPLAY key again 7 13 Tracking individual vessels To track a selected vessel place the cursor over it to highlight it and press the TRACK CLR TRK key once That icon will turn Bold and tracking will start immediately although a trail may not be noticeable until the vessel has...

Page 66: ...our vessel has moved sufficiently Figure 7 10 Tracking your own vessel If Tracking Offset is not active when you select TRACK CLR TRK your vessel will be shown as a small circle at the centre of the display If Tracking Offset is already active when you select TRACK CLR TRK your vessel will be shown as a distinctive boat icon at its current GPS location on the display See section 6 2 7 15 Clearing ...

Page 67: ...50 is powered down For further lighting options refer to section 6 3 7 17 KeyLock function The AI50 has the ability to lock the keypad to prevent accidental key presses Lock To lock the keypad press POWER once A window will open and display the following message Figure 7 11 Keypad lock message Pressing ENTER MENU will lock the keypad and the screen will revert back to its previous display the keyp...

Page 68: ...ss ENTER MENU within 2 seconds to unlock the keypad The screen will revert back to its previous display and the icon will disappear from the screen The lock and Unlock messages will only remain on screen for a few seconds ...

Page 69: ...el 1 is the highest priority alarm which require immediate action This alarm status if not acted upon with great urgency could result in loss or serious damage to your vessel and or loss of life Level 2 high priority requires prompt attention If this alarm status is not acted upon with some urgency it could possibly develop into a Level 1 Alarm resulting in loss or serious damage to your vessel an...

Page 70: ...Closest Point of Approach is the calculated distance of how close a vessel will pass TCPA Time to Closest Point of Approach is the calculated time to reach the CPA The CPA TCPA alarm values are set by the user as described in section 6 5 These are based on the last calculated COG and SOG assuming the vessel continues on the same course at the same speed It is the responsibility of the user to dete...

Page 71: ...f the vessel which caused the alarm to activate will turn red indicating an alarm condition still exists Figure 8 2 Collision Alarm view It is the responsibility of the vessel s captain to determine what action to take in this situation in order to avoid a collision Once action has been taken and the calculated values increase beyond the limits as set in the Collision Alarm menu the vessel s icon ...

Page 72: ...7 2 It will retain its previous color and bold outlines and flash at a rate of once every second indicating that this condition still exists The icon will remain on the display in this state for 10 minutes before being erased However if reception from the lost vessel s AIS is re established the icon will return to its previous state Guard zone alarm This is a Level 2 alarm The guard zone is determ...

Page 73: ...e bottom right hand corner of the display flashes red and a text message informs the user about the transceiver status The BIIT message will remain there until the fault is cleared by the AI50 circuitry or the unit has been repaired If the unit is powered down with a BIIT fault still active the fault type will be saved to memory and displayed the next time the AI50 is turned on 8 4 Lost vessel ala...

Page 74: ...e ship alert To confirm and clear this alarm press W this will close the window and return you to current display 8 6 Loss of compass heading data This is a Level 3 alarm and will only activate if the SimNet NMEA2000 data for the ships compass is lost An audible alarm will sound and a Loss of Compass alarm window will open showing details of the lost compass and any other compatible compass units ...

Page 75: ...ng system that allows approved users to broadcast safety messages that will appear as text in the AIS display This is a Level 3 alarm and will activate if a safety message is received from another vessel over the AIS network An audible alarm will sound and a Safety Message Alarm window will open displaying the received information and the safety message An example is shown here Figure 8 5 Example ...

Page 76: ...76 Alarms Blank page ...

Page 77: ...n Faulty connector to power Fuse has blown Check power connection Replace fuse and check power supply No picture on display Unit not powered up Light level set too low Press PWR key Increase light level See section 3 10 and 6 3 No mapping detail Coastline detail not active Activate coastline detail see section 6 2 1 No GPS Position data Antenna or cable problem Check antenna cable and connections ...

Page 78: ...EC62287 1 GPS Receiver Receiver type Integral 16 channel receiver EMC IEC60945 Power Voltage 10 8 15 6VDC Current 1A SimNet NMEA2000 Network load 1 Backlighting Keypad LED Red or White Display Type VGA TFT 102mm 4in Connectors VHF Antenna PL259 GPS Antenna SMB Compass mounting Safe distance 0 3m Environmental Waterproofing IP67 Temperature range Operational 15 C to 55 C Storage 40 C to 85 C Physic...

Page 79: ...osition Report 129039 AClass B Position Report 129040 Class B Extended Position Report 129792 DGNSS Broadcast Binary Message 129793 UTC and Date Report 129794 Class A Static and Voyage Related Data 129795 Addressed Binary Message 129796 Acknowledge 129797 Binary Broadcast Message 129798 SAR Aircraft Position Report 129800 UTC Date Enquiry 129801 Addressed Safety Message 129802 Broadcast Safety Mes...

Page 80: ...2 GPS Antenna dimensions 9 6 Service and warranty If it is necessary to have a unit repaired please contact your local authorized dealer For worldwide warranty details and a list of authorised Simrad agents please refer to the Warranty Card supplied with this unit ...

Page 81: ...lige krav og øvrige relevante krav i direktiv 1999 5 EF German Hiermit erklärt Simrad Limited Margate dass sich dieses AI50 in Übereinstimmung mit den grundlegenden Anforderungen und den anderen relevanten Vorschriften der Richtlinie 1999 5 EG befindet BMWi Greek Με την παρουσα Simrad Limited Margate δηλωνει οτι AI50 συμμορφωνεται προς τις ουσιωδεις απαιτησεις και τις λοιπες σχετικες διαταξεις της...

Page 82: ...82 Appendix Blank page ...

Page 83: ...ntenance 75 specifications 76 CPA TCPA 42 43 63 68 70 cursor 58 D data formats 25 data logging disabling 50 enabling 49 playback 50 data sources 52 display brightness 38 palette 38 display nomenclature 55 display offset 36 DSC call 61 63 DSC Radio 54 E ENTER MENU 23 25 F favorites list add to 39 60 delete from 41 editing 41 G GPS reference 33 GZ Radius 44 H HDG UP 57 HOME DSC 24 60 61 I INFO STATU...

Page 84: ...EA2000 network compass data source 52 device instance 52 network list 53 system instance 53 SimNet NMEA2000 PGNs 77 sort order 63 system reset 51 system setup 46 T text mode 62 time offset 47 TRACK CLR TRK 23 63 64 tracking clear all tracks 64 clear tracks 63 individual vessels 63 own vessel 64 tracking offset 36 transmit enable disable 50 transmit legend 58 troubleshooting 75 turning on off 22 U ...

Reviews: