background image


ng frequencies with the upper audio 

cordings now available. It works with personal computers running Microsoft 

ile phones, computers, etc. 

ries products. Using any of these combinations will yield one of the best high-fidelity systems available 

ft duster or soft brush, but be careful when using cleaning or polishing agents - they may 

 there are any questions about the audio system, please consult the dealer who is there to help and advise. 


Instructions for use 

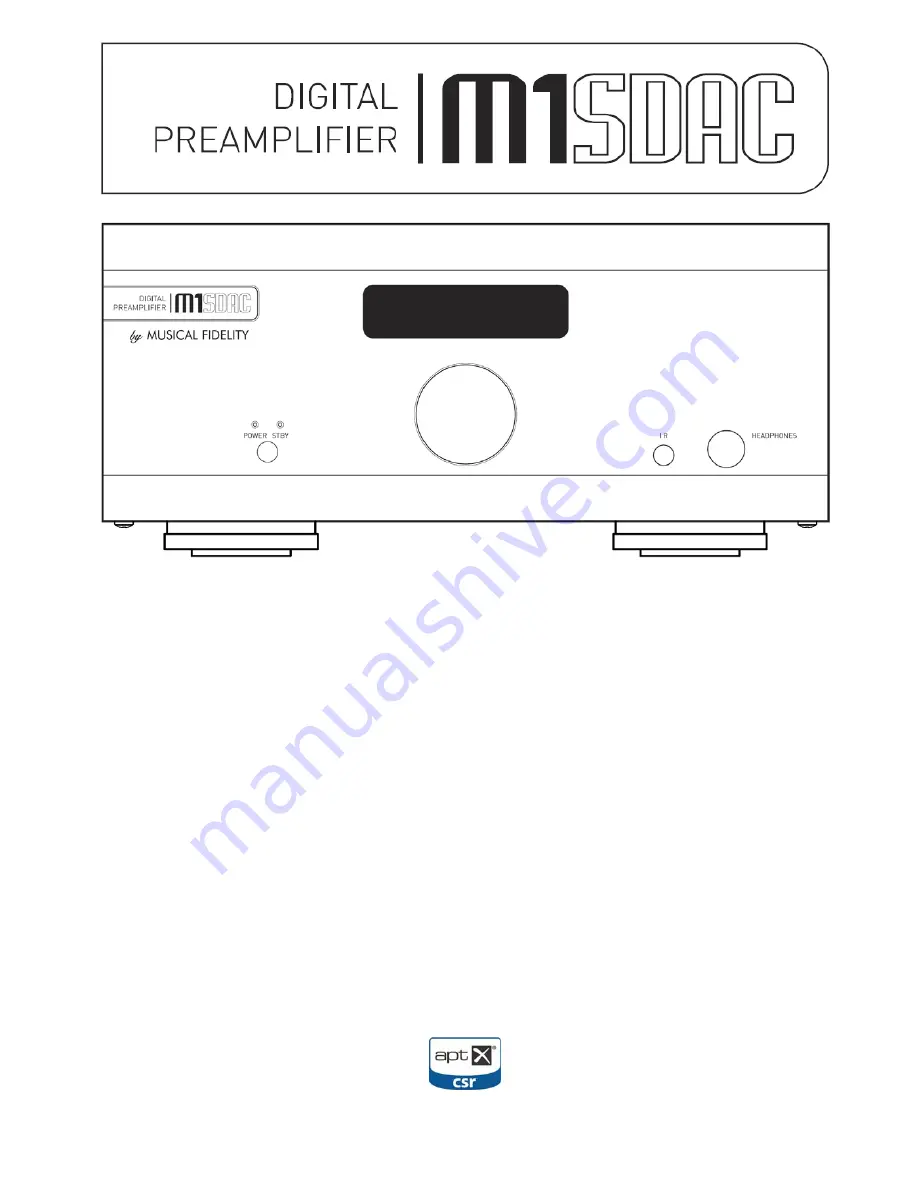
Thank you for purchasing the Musical Fidelity M1 SDAC.


The M1 SDAC consists of a 32 bit DAC and a sample rate converter which asynchronously up-samples all incoming 
data rates to 192 kHz. This moves the digital artefacts to well outside the audio band, allowing easy removal without 
detriment to the top end of the audio band. Our well tuned filtering circuit gives immeasurably small jitter, noise and 
distortion artefacts allowing astounding imaging, detail and transparency, to deliver all music types exactly as the 
artist originally intended. This new design now takes into account different sampli
bandwidth now extending to 90 kHz for 192 kHz natively sampled input signals.  

The M1 SDAC fully asynchronous USB input copes with files up to 24-bit 192 kHz sample rate input. This takes full 
advantage of the higher quality re
Windows®, Linux and Apple® OS.  

An aptX® capable Bluetooth A2DP receiver has been included. aptX® is a high quality Bluetooth link. It features full 
bandwidth sound, for wireless connection to Bluetooth-capable products, such as mob
The Bluetooth receiver is also backward-compatible with non-aptX® Bluetooth devices. 

 M1 SDAC has been carefully designed to be partnered with other M1, M3 and M6 products. It also matches well with 
M8 and M1 se
at any price.  

Used carefully, it should give many years of outstanding musical reproduction. 

Dust regularly with a so
harm the surface finish. 

If


Summary of Contents for M1 SDAC

Page 1: ...urably small jitter noise and distortion artefacts allowing astounding imaging detail and transparency to deliver all music types exactly as the artist originally intended This new design now takes into account different sampli bandwidth now extending to 90 kHz for 192 kHz natively sampled input signals The M1 SDAC fully asynchronous USB input copes with files up to 24 bit 192 kHz sample rate inpu...

Page 2: ......

Page 3: ...e control information 9 Operation Switch on and operation Analogue inputs and outputs Digital inputs Digital outputs and analogue to digital conversion Bluetooth USB input Rename inputs 10 11 12 13 14 15 16 17 18 Apple OS X USB Setup 19 Linux USB Setup 20 Windows XP Service Pack 3 21 Driver install 22 26 Settings 27 Driver Uninstall 28 29 Windows Vista and 7 Driver install 30 33 Settings 34 Uninst...

Page 4: ...ce may not correspond with the coloured markings identifying the terminals in the plug proceed as follows The wire which is coloured green and yellow must be connected to the terminal in the plug which is marked with the letter E or coloured green or green and yellow or by the earth symbol The wire which is coloured brown must be connected to the terminal which is marked with the letter L or colou...

Page 5: ... before further use Entry of liquid into the M1 SDAC is dangerous and may cause electric shock or fire hazard Do not place the unit near direct heat sources such as radiators direct sunlight or other equipment Do not remove any covers or try to gain access to the inside There are no user adjustments or fuses to change without qualification Refer all service work to an authorised Musical Fidelity a...

Page 6: ...ACHGERECHTE ENTSORGUNG Das auf der Geräterückseite angebrachte Label deutet darauf hin dass das Produkt nicht mit konventionellem Hauskehricht entsorgt werden darf Um Schäden und Verschmutzungen an Umwelt und Mensch zu vermeiden muss das Produkt fachgerecht entsorgt und von anderem Abfall getrennt werden Wenden Sie sich bei Fragen hierzu an Ihren Fachhändler oder an eine öffentliche Informationsst...

Page 7: ...a good quality Toslink cable for optimum signal transfer Note If connecting to Home Theatre Processor TV or DVD Blue Ray or similar Home Theatre digital sources it may be necessary to change the digital output of the source to 16 bit stereo PCM or similar which is the format the M1 SDAC will understand Please refer to the source s manual for information on how to do this The M1 SDAC does not recog...

Page 8: ...13 14 15 16 17 18 19 6 BLUETOOTH RP SMA antenna socket 7 USB asynchronous digital input 8 AES BALANCED digital input 9 TRIGGER in 3 5mm mono jack 10 TRIGGER out 3 5mm mono jack 11 AUX 1 analogue input left and right 12 AUX 2 analogue input left and right 13 RCA PRE OUTPUTS left and right 14 OPTICAL digital output 15 COAXIAL digital output 16 OPTICAL digital input 17 COAXIAL digital input 1 18 COAX...

Page 9: ...Please dispose of used batteries in accordance to local battery disposal regulations REMOTE CONTROL HANDSET DAC blue buttons red power CD player grey buttons POWER On or standby DAC only 0 9 Buttons Used to select track numbers on CD player BLUETOOTH select DAC Bluetooth receiver COAX1 selects COAX1 input OPTICAL selects optical input SCAN plays first 10 seconds of each track REPEAT repeats whole ...

Page 10: ...nt volume setting Volume and buttons on remote perform the same function Adjustment is in 0 5dB steps for single presses and speeds up if button is held down The setting is remembered if switching off and on again Changing the selected input Rotary Control As input selector Pressing the rotary selector in enters the select input menu This menu allows one to select an input from a list A tick is sh...

Page 11: ...rotate control until AUXILLIARY 2 is next to the flashing square Then press the volume control to confirm the input The screen will change to show the new selected input AUXILIARY 2 Analogue AUXILIARY 2 The chosen input is remembered even if the mains is removed Outputs Headphones and PRE OUTs When headphones are plugged in the PRE OUTS will mute effectively muting signal to speakers and unit will...

Page 12: ...D input press AES button on the remote control To select from the front panel press the volume control in to access the source select menu and rotate control until COAXIAL 1 is next to the flashing square Then press the volume control to confirm the input The screen will change to show the new selected input AES BALANCED 44 1kHz 192kHz With valid SPDIF signal present on a selected digital input th...

Page 13: ...DIF or USB inputs at the same sample rate as it comes into the DAC This means the digital outputs are not up sampled or reprocessed in any way The level of the digital outputs is not affected by the volume control The Bluetooth digital output is also available when selected and is output at 96 kHz The USB digital output is also available when selected and is output at native original input rate N ...

Page 14: ...e M1 SDAC This needs to be done every time a new device is introduced to the M1 SDAC The M1 SDAC stores information for up to 16 Bluetooth devices The M1 SDAC must be turned on with blue POWER LED and display lit it is not actually necessary to switch to Bluetooth input at this point but it is easier to see when a valid link is established The display will show no link This means that the unit doe...

Page 15: ...sconnect the M1 SDAC from the Bluetooth device press and hold the Bluetooth button Until the display shows to cancel disconnection press any button or to continue with disconnecting press OK or press volume control in All devs removed Forget all devs Confirm OK The M1 SDAC will prompt if the device is to be Forgotten or not This is best used to forget devices that are not likely to be used again w...

Page 16: ...X 10 6 4 or later see P 19 No other drivers are required for the above operating systems For PCs running Widows XP Vista and 7 a driver disk CD is required This is supplied with the M1 SDAC Consult the reseller dealer if the driver disk CD is missing Windows XP SP3 see P 22 p 21 if Windows XP does not have Service Pack 3 installed Windows Vista 7 or later see P 30 Earlier operating systems are not...

Page 17: ...nput can then be given a new name Input the letters characters desired by pressing the alphanumeric keys on the M1 SDAC remote Pressing the 2 button once for example produces A AUXILIARY 1 and then quickly pressing 2 button twice more gives after a short pause the cursor moves over ready for next letter input COAXIAL 1 AUXILIARY 1 C All the number keys 0 9 function in a similar manner to produce t...

Page 18: ... left on the CD player display will respond to the key presses This is normal will not harm the CD player and may be ignored Once the renaming process is complete the CD may be reinserted into the player and or the player turned back on again The CD player may now be used as normal Factory state The M1 SDAC can be reset to factory default This makes it easy to reset all input names and all level m...

Page 19: ... be chosen as the default audio device Go to Apple System preferences Sound then Output tab to get to the sound window as shown below Select the MF USB 2 0 Audio Out entry as your output device The MF USB Audio output is now ready for use with your favourite media player software N B You may still need to set 3rd party software to use the M1 SDAC for playback Consult software instructions for deta...

Page 20: ...utions please consult the distribution support website documentation To enable the device as the default output player it is necessary to set it up as such in the Sound dialogue box To do this click on the speaker icon in the top taskbar and then click on Sound settings The box below will appear Select the Output tab and highlight the MF USB 2 0 Audio Out as the output device Close the box and the...

Page 21: ...Windows XP driver To check service pack updates click on start button click on RUN then type winver in the OPEN box Click OK A dialogue box similar to the one below indicates service pack 3 is indeed installed by the line stating Version 5 1 Build 2600 xpsp_3_gdr 101209 1647 Service Pack 3 If service pack 3 is not installed please use the Microsoft Updates feature website or consult your computer ...

Page 22: ... of your computer It will auto run if CD auto run is enabled on your computer Note If for any reason it does not auto run use Windows explorer or My Computer to find your CD ROM often D Open the CDROM by double clicking it and then double click on MF USB 192 V1 56 EXE Click Yes Click Yes and the welcome screen will show Click Next The install program will take a look at the system configuration to...

Page 23: ...ason the unit is not plugged in or not detected the message below will pop up Check the device is plugged in and switched on if applicable and press Next Click Install to Confirm install location There is usually no reason to change the offered destination folder ...

Page 24: ...ssue 4 Page 24 of 47 The setup program will copy over files required for the installation The below message will show Please click Continue Anyway The display now shows Setup was completed and Preinstallation successful Click Next The installer then shows ...

Page 25: ...d up by the Windows system A dialogue box should shortly pop up as below Select the 3rd option No not this time then click Next Select Install the software automatically Recommended Click Next The Found New Hardware Wizard will appear for Musical Fidelity MF USB 2 0 Audio out then a sub window Hardware Installation appears ...

Page 26: ...ies the driver files into the correct places in its system directory When copying is completed the following box will appear Click Finish A pop up on the task bar says Your new hardware is installed and ready to use This indicates the unit has been recognised correctly by the computer and is ready for use ...

Page 27: ...EL In control panel click on Sounds and Audio Devices Properties In the Audio tab make sure the MF USB 2 0 Audio Output option is selected as the Default device under Sound playback Click Apply and OK You may now use your favourite media player software to play all system software supported file format tracks up to and including 24 bits at 192 kHz sample rate N B You may still need to set 3rd part...

Page 28: ...Windows XP uninstalling software To remove the driver and its associated software go to Windows Control Panel Click on MF USB 2 0 Audio Out USB Audio Driver then click Remove The uninstaller runs showing Click Uninstall The files are removed click Next ...

Page 29: ...DRIVER UNINSTALL WINDOWS XP Issue 4 Page 29 of 47 Click Finish Driver removal is now complete ...

Page 30: ...he Musical Fidelity MF USB Audio driver disk into the CDROM of your computer It will auto run if CD auto run is enabled on your computer Note If for any reason it does not auto run use Windows explorer or Computer under Windows button to find your CD ROM often D Open the CDROM by double clicking it and then double click on MF USB 192 V1 56 EXE Click Run MF USB Audio Click Yes Click Yes If a User A...

Page 31: ...k Next The install program will take a look at the system configuration to prepare for setup If for any reason the unit is not plugged in or not detected the message below will pop up Check the device is plugged in and switched on if applicable and press Next ...

Page 32: ... confirm install location There is usually no reason to change the offered destination folder The setup program will copy over files required for the installation The display now shows Setup was completed and Preinstallation successful Click Next The installer then shows ...

Page 33: ...INDOWS VISTA 7 Issue 4 Page 33 of 47 Click Finish A pop up on the task bar says Your new hardware is installed and ready to use This indicates the unit has been recognised correctly by the computer and is ready for use ...

Page 34: ...ROL PANEL In control panel click on Sounds and Audio Devices Properties In the Audio tab make sure the MF USB 2 0 Audio Output option is selected as the Default device under Sound playback Click Apply and OK You may now use your favourite media player software to play all system software supported file format tracks up to and including 24 bits at 192 kHz sample rate N B You may still need to set 3...

Page 35: ...Windows 7 uninstalling software To remove the driver and associated software go to Control Panel Programs and Features Click on MF USB 2 0 Audio Out USB Audio Driver then click uninstall The uninstaller runs showing Click Uninstall The files are removed click Next ...

Page 36: ...UNINSTALL WINDOWS VISTA 7 Issue 4 Page 36 of 47 Click Finish Driver removal is now complete ...

Page 37: ... not a real time operating system and so does not make absolute guarantees of the time and priorities given to task execution This means that under certain circumstances particularly on older hardware it is possible that the operating system fails to deliver samples to the audio device in time for it to send them out when it needs them If on average the PC is fast enough but on occasion it does no...

Page 38: ...Start Firmware Upgrade The MF USB Audio new firmware is sent to the MF USB 2 0 Audio Out and if the operation is successful then the MF USB Audio reboots with the new firmware A firmware upgrade does not erase the original factory firmware image If an upgrade fails then the factory firmware continues to run as before if an upgrade succeeds the new firmware is run in preference to the factory image...

Page 39: ...ere The Audio2 USB model exposes an internal clock source This source is programmed by the USB driver to the current sample rate which is shown in the window here The actual MF USB 2 0 Audio Out hardware has separate high precision clocks for multiples of 44100Hz and 48000Hz respectively the appropriate selection is made automatically by the firmware and is not directly controlled by the USB drive...

Page 40: ... selected Check connections and make sure they are secure See software section for relevant OS setup information Please check device is listed in device manager Windows or in Sound audio devices for MAC OS X Make sure the Musical Fidelity USB audio device is selected as the default OUTPUT device Check USB port functions with another device Not detected when connected to USB USB Cable faulty USB no...

Page 41: ...DR aptX 16 bit 44 1 48 kHz dependant on connected device Carrier frequency 2 402 to 2 480 GHz ISM band Transmission power 2dBm min to 2dBm max Class 2 up to 30M 90ft dependant on connected device Receiver IF 1 5 MHz centre frequency Antenna socket type RP SMA Antenna input impedance 50 ohms Line level outputs 1 pair line level RCA phono sockets left and right 1 6 25mm Stereo headphone Jack Digital...

Page 42: ...obile phone or Bluetooth enabled computer The device contained within the M1 SDAC is Class 2 which works up to 90ft 30 Meters assuming clear line of sight with a similarly specified Class 2 transmitter devices Walls partitions and local interference may reduce this range somewhat If the device phone computer etc to be linked has a different class Bluetooth device that can manage e g only 15ft 5 Me...

Page 43: ...trademarks or trademarks of Microsoft Corporation in the United States and or other countries Mac and Mac OS are trademarks of Apple Inc registered in the U S and other countries The aptX software is copyright CSR plc or its group companies All rights reserved The aptX mark and the aptX logo are trade marks of CSR plc or one of its group companies and may be registered in one or more jurisdictions...

Page 44: ...Issue 4 Page 44 of 47 For listening thoughts and observations ...

Page 45: ...Issue 4 Page 45 of 47 For listening thoughts and observations ...

Page 46: ...Issue 4 Page 46 of 47 For listening thoughts and observations ...

Page 47: ...Issue 4 Page 47 of 47 For listening thoughts and observations ...

Reviews: