27
Overview of Components
BAT1
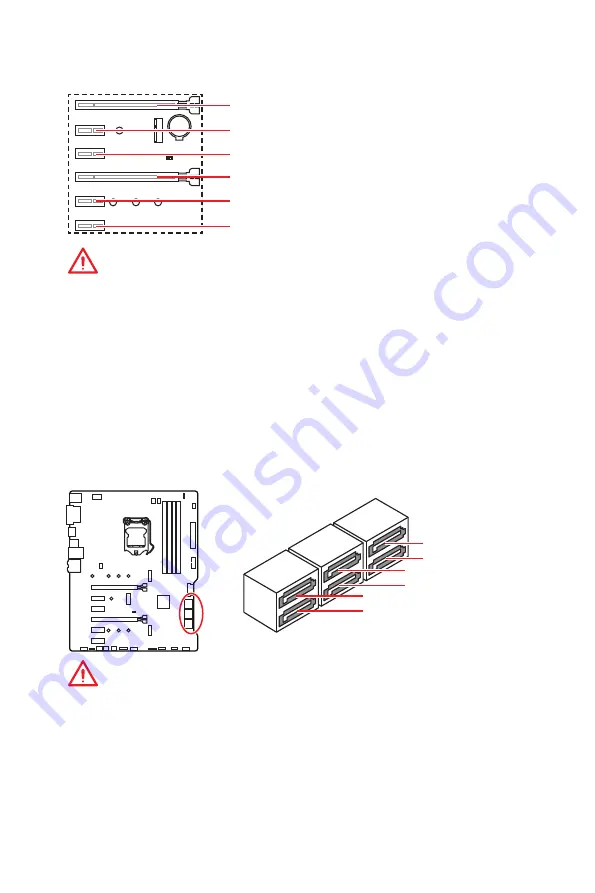
PCI_E1~6: PCIe Expansion Slots
PCI_E1
: PCIe 3.0 x16 (CPU lanes)
PCI_E2
: PCIe 3.0 x1 (PCH lanes)
PCI_E3
: PCIe 3.0 x1 (PCH lanes)
PCI_E5
: PCIe 3.0 x1 (PCH lanes)
PCI_E4
: PCIe 3.0 x4 (PCH lanes)
PCI_E6
: PCIe 3.0 x1 (PCH lanes)
Important
y
If you install a large and heavy graphics card, you need to use a tool such as
MSI
Gaming Series Graphics Card Bolster
to support its weight and to prevent deformation
of the slot.
y
For a single PCIe x16 expansion card installation with optimum performance, using
the
PCI_E1
slot is recommended.
y
When adding or removing expansion cards, always turn off the power supply and
unplug the power supply power cable from the power outlet. Read the expansion
card
’
s documentation to check for any necessary additional hardware or software
changes.
SATA1~6: SATA 6Gb/s Connectors
These connectors are SATA 6Gb/s interface ports. Each connector can connect to one
SATA device.
Important
y
Please do not fold the SATA cable at a 90-degree angle. Data loss may result during
transmission otherwise.
y
SATA cables have identical plugs on either sides of the cable. However, it is
recommended that the flat connector be connected to the motherboard for space
saving purposes.
y
The SATA2 will be unavailable when installing M.2 SATA device into M2_1 slot.
y
The SATA5 & SATA6 will be unavailable when installing M.2 PCIe/ SATA device into
M2_2 slot.
SATA1
SATA3
SATA2
SATA4
SATA5
SATA6
Summary of Contents for MPG Z390 GAMING PLUS
Page 2: ...2 Quick Start https youtu be 4ce91YC3Oww Installing a Processor 1 2 3 6 4 5 7 8 9 ...
Page 5: ...5 Quick Start BAT1 Installing the Motherboard 1 2 ...
Page 6: ...6 Quick Start Installing SATA Drives http youtu be RZsMpqxythc 1 2 3 4 5 ...
Page 7: ...7 Quick Start 1 Installing a Graphics Card http youtu be mG0GZpr9w_A 2 3 4 5 6 ...
Page 8: ...8 Quick Start Connecting Peripheral Devices ...
Page 9: ...9 Quick Start Connecting the Power Connectors http youtu be gkDYyR_83I4 ATX_PWR1 CPU_PWR1 ...


