A-5
nVIDIA SATA RAID
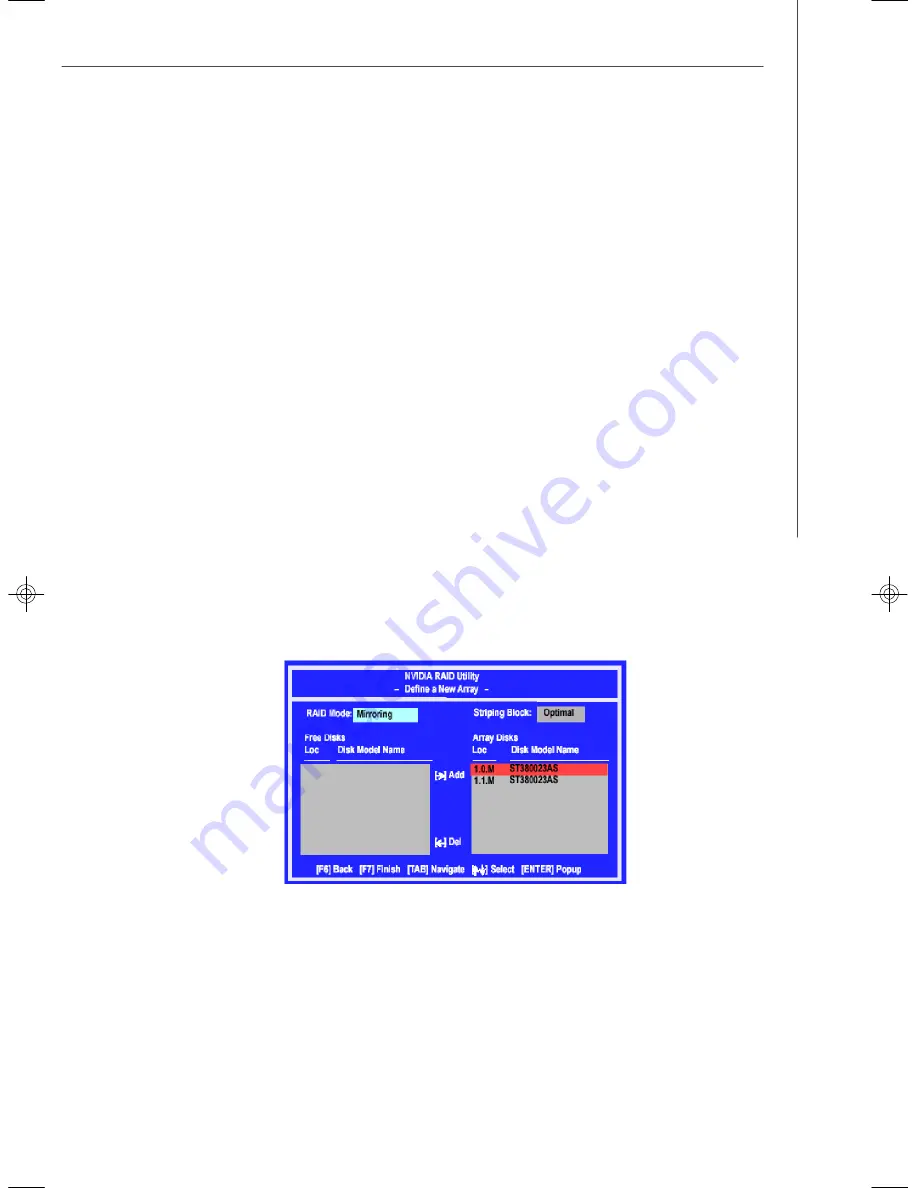
Using the Define a New Array Window
If necessary, press the tab key to move from field to field until the appropriate field is
highlighted.
•
Selecting the RAID Mode
By default, this is set to [Mirroring]. To change to a different RAID mode, press the
down arrow key until the mode that you want appears in the RAID Mode box
—
either
[Mirroring], [Striping].
•
Selecting the Striping Block Size
Striping Block
size is given in kilobytes, and affects how data is arranged on the
disk. It is recommended to leave this value at the default [Optimal], which is 32KB, but
the values can be between [4 KB] and [128 KB].
•
Assigning the Disks
The disks that you enabled from the RAID Config BIOS setup page appear in the
Free
Disks
block. These are the drives that are available for use as RAID array disks.
To designate a free disk to be used as a RAID array disk,
1.
Tab to the
Free Disks
section. The first disk in the list is selected.
2.
Move it from the Free Disks block to the Array Disks block by pressing the right
arrow key (-->). The first disk in the list is moved, and the next disk in the list is
selected and ready to be moved.
3.
Continue pressing the right-arrow key (<-- ) until all the disks that you want to use
as RAID array disks appear in the
Array Disks
block.
It shows that two disks have been assigned as RAID1 array disks in the figure
above.
9184v1.0-Appendix A(nVIDIA SATA RAID).p65
2007/4/19,
下午
04:57
5


