32
Note:
●
If the microscope is used in a manner not specified by the manufacturer, the warranty may be void.
● To avoid getting wet, do not use the microscope near water.
8.5 Bulb replacement
●
The lamp and the lamphouse may become very hot during and after a period of operation.
Risk of burn – do not touch the lamp during or immediately after period of operation.
Make sure the lamp has cooled sufficiently before attempting to replace the lamp.
●
In order to prevent electric shock, always turn the power switch off and unplug the power cord
before installing or replacing the bulb.
8.5.1 Replacing the 6V 30W halogen module or the two different LED modules (Panthera C2)
●
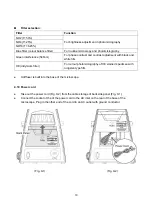
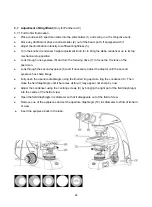
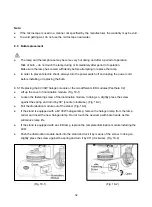
Lift up the cover of illumination module. (Fig. 18-1)
●
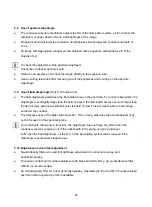
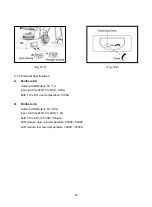
Loosen the fastening screw of the illumination module. In doing so, slightly press the screw
against the spring and turn it by 90° (counter clockwise). (Fig. 18-2)
●
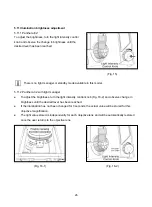
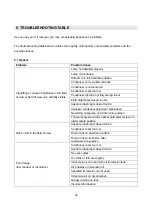
Pull the illumination module out of the stand. (Fig. 18-3)
●
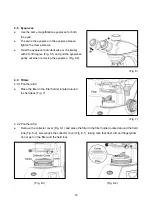
If the stand is equipped with a 6V 30W halogen lamp, remove the halogen lamp from the lamp
carrier and insert the new halogen lamp. Do not touch the new lamp with bare hands as this
will reduce lamp life.
●
If the stand is equipped with an LED lamp, replace the complete illumination module including the
LED.
●
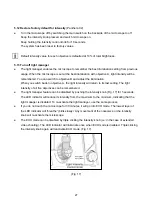
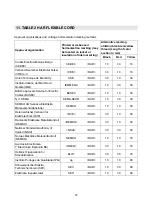
Push the illumination module back into the stand and lock it by means of the screw. In doing so,
slightly press the screw against the spring and turn it by 90° (clockwise). (Fig. 18-4)
(Fig. 18-1)
(Fig. 18-2)

