background image

49-2000696  Rev. 0

23

¡Ahorre tiempo y dinero! Primero revise los cuadros que aparecen en las siguientes páginas y es posible que no 
necesite solicitar reparaciones.

CONSEJOS PARA LA SOLUCIÓN DE PROBLEMAS

Problema

Causa Posible

Qué Hacer

Mi horno nuevo 
no cocina como el 
anterior. ¿Hay algún 
problema con las 
configuraciones de 
temperatura?

Su horno nuevo cuenta con un sistema de 
cocción diferente con relación al anterior y, 
por lo tanto, es posible que cocine de forma 
diferente.

En los primeros usos, use los tiempos y temperaturas de 
su receta con cuidado. 

La comida no se 
hornea de forma 
apropiada

Controles del horno configurados de forma 
incorrecta.

Consulte la sección Modos de Cocción.

La posición del estante es incorrecta o el 
estante no está nivelado.

Consulte la sección Modos de Cocción.

Uso de una cacerola incorrecta o de una 
cacerola de tamaño incorrecto.

Consulte la sección Utensilios.

Sustitución de ingredientes

Sustituir ingredientes puede modificar el resultado de la 
receta.

La comida no asa de 
forma apropiada

Controles del horno configurados de forma 
incorrecta.

Asegúrese de seleccionar la temperatura para asar de 
forma adecuada.

Se usó una posición incorrecta del estante.

Consulte la sección Modos de Cocción.

Se cocinó comida en una olla caliente.

Asegúrese de que el utensilio esté frío

Utensilio de cocina inadecuado para asar.

Use una olla específicamente diseñada para asar

El papel de aluminio usado para la olla y 
la rejilla para asar no se ajustó ni cortó de 
forma apropiada, según lo recomendado.

Si usará papel de aluminio, deberá usarse conforme con 
las aberturas de la olla.

En algunas áreas, es posible que el nivel de 
corriente (voltaje) sea bajo.

Precaliente el elemento para asar durante 10 minutos.

El horno no funciona o 
parece no funcionar

Es posible que un fusible de su hogar se 
haya quemado o que el disyuntor se haya 
desconectado.

Reemplace el fusible o reinicie el disyuntor.

Controles del horno configurados de forma 
incorrecta.

Consulte la sección Uso del Horno.

Sonido de 
“chisporroteo” o 
“traqueo”

Éste es el sonido de metal calentándose o 
enfriándose durante las funciones de cocción 
y limpieza..

Esto es normal.

¿Por qué la estufa hace 
un sonido de “clic” 
cuando uso el horno?

Su estufa fue diseñada para mantener un 
control más ajustado sobre la temperatura 
del horno. Es posible que escuche que los 
elementos de calentamiento del horno hagan 
sonidos de “clic” con mayor frecuencia 
que con hornos más antiguos para lograr 
mejores resultados durante los ciclos de 
horneado, asado, convección y limpieza 
automática.

Esto es normal.

El reloj y el 
temporizador no 
funcionan

Es posible que un fusible de su hogar se 
haya quemado o que el disyuntor se haya 
desconectado.

Reemplace el fusible o reinicie el disyuntor.

La luz del horno no 
funciona

La lámpara está rota o presenta defectos.

Llame al servicio técnico.

La luz de funcionamiento del interruptor está 
rota.

Llame al servicio técnico.

El horno produce 
ruidos cuando está 
apagado luego del uso 
con vapor

El ciclo de descarga realiza dos bombeos 
para eliminar agua del sistema de vapor.

Esto es normal.

Summary of Contents for ZMB9031

Page 1: ...c Steam Oven MONOGRAM COM Pour obtenir une version française de ce manuel d instructions visitez notre site monogram com Para consultar una version en español de este manual de instrucciones visite nuestro sitio de internet monogram com ...

Page 2: ...FORMATION 2 CONSUMER SUPPORT 3 SAFETY INFORMATION 4 BEFORE YOU START 6 FEATURES 7 USING THE OVEN 8 Oven Controls 8 Traditional Cooking Modes 11 Cookware Guidelines for Traditional Modes 11 Oven Racks 11 Steam Cooking Modes 12 Cookware Guidelines for Steam Modes 13 Aluminum Foil and Oven Liners 14 Timed Cooking 14 Probe 15 Recipe Function 17 CARE AND CLEANING Oven Exterior 19 Oven Interior 19 Water...

Page 3: ... REMOTE CONNECTIVITY For assistance with wireless network connectivity for models with remote enable visit our website at monogram com connect or call 800 444 1845 in the US PARTS AND ACCESSORIES Individuals qualified to service their own appliances can have parts or accessories sent directly to their homes VISA MasterCard and Discover cards are accepted Order on line today 24 hours every day In t...

Page 4: ...ring and after use do not touch or let clothing or other flammable materials contact any interior area of the oven allow sufficient time for cooling first Other surfaces of the appliance may become hot enough to cause burns Potentially hot surfaces include the oven vent opening surfaces near the opening and crevices around the oven door Ŷ R QRW KHDW XQRSHQHG IRRG FRQWDLQHUV 3UHVVXUH could build up...

Page 5: ... follow the manufacturer s directions Ŷ 3XOOLQJ RXW WKH VWDQGDUG UDFNV WR WKHLU VWRS ORFNV or the extension rack to its fully open position is a convenience in lifting heavy foods It is also a precaution against burns from touching hot surfaces of the door or oven walls Ŷ R QRW OHDYH LWHPV VXFK DV SDSHU FRRNLQJ XWHQVLOV RU food in the oven when not in use Items stored in an oven can ignite Ŷ 1HYHU...

Page 6: ... are designed for use in the steam cook and steam reheat modes Temperatures above 300 F can damage this cookware Conditioning the Oven Ŷ 5HPRYH DOO LQWHUQDO SDFNDJLQJ Ŷ 7KH RYHQ VKRXOG EH WKRURXJKO FOHDQHG ZLWK VRDS DQG water and carefully rinsed Ŷ W LV LPSRUWDQW WKDW RX FRQGLWLRQ WKH RYHQ EHIRUH XVLQJ LW for cooking and baking Ŷ RQGLWLRQLQJ ZLOO EXUQ RII DQ PDQXIDFWXULQJ UHVLGXH DQG ensure you ge...

Page 7: ...OH ODQJXDJH RSWLRQV Press SELECT Temperature 3UHVV ŻŹ DQG Ÿź WR FKRRVH IURP DYDLODEOH WHPSHUDWXUH units Press SELECT Clock 3UHVV ŻŹ WR FKRRVH IURP DYDLODEOH WLPH VHWWLQJV 3UHVV SELECT 3UHVV ŻŹ WR FKRRVH DP RU SP 3UHVV SELECT 6HW WKH WLPH E SUHVVLQJ Ÿź DQG SELECT Date 3UHVV Ÿź WR FKRRVH IURP WKH DYDLODEOH GDWH RSWLRQV Day Month Year Year Month Day Month Day Year Press SELECT to confirm your selecti...

Page 8: ...nd return to the mode menu Alternatively use the power button to quickly exit a cooking mode and return to the clock screen The cooking temperature can be adjusted while in a cooking mode by using the arrow keys Adding 5 Minutes of Steam Traditional cooking modes will display an additional indicator on the screen once the oven has heated above 212 F This indicates the 5 minute added steam feature ...

Page 9: ...n will turn on Press the and set a cook time If Delay start is available for that cooking mode you will be prompted to confirm the time of day for cooking to END Selecting a time that is further out than the current time plus the cook time duration will result in the oven delaying the start of the cooking mode This can be used with convection bake and the steam cooking modes NOTE When using the de...

Page 10: ...ights on or off Ŷ 7KH RYHQ OLJKWV ZLOO WXUQ RQ DXWRPDWLFDOO ZKHQ WKH GRRU is opened Ŷ KHQ D FRRNLQJ PRGH KDV VWDUWHG WKH RYHQ OLJKWV ZLOO turn on automatically Ŷ KHQ D FRRNLQJ PRGH LV ILQLVKHG RU FDQFHOHG WKH OLJKW will turn off NOTE The light will automatically turn off after three minutes unless it was turned on by pressing To turn the light back on press or open the door Changing the Cooking Mo...

Page 11: ...ghly while also producing surface browning Use lower broil temperatures for thicker cuts of meat and or foods that you would like cooked all the way through Broil The Broil mode uses heat from the upper element To use this mode select broil from the traditional cooking menu enter a temperature and then press SELECT It is not necessary to preheat when using this mode Convection Broil The Convection...

Page 12: ... from the available options by navigating with the arrow keys and then pressing SELECT Ŷ 7KH VWHDP FRRNLQJ IXQFWLRQV FDQ EH SDXVHG DW DQ time by pressing SELECT Press SELECT again for the function to start Ŷ 7KH VXSSRUW IHHW RQ WKH ERWWRP RI WKH WDEOH WRS UDFN ZLOO help keep the hot tray off of the counter when food is removed from the oven NOTES Do NOT place cookware directly on the oven bottom C...

Page 13: ...bread and pastries using this function is from 370 F 180 C to 410 F 210 C NOTE If you re using this function to cook consecutive dishes ensure that the oven has cooled before starting to cook the next dish 5 Minute Steam Function The 5 Minute Steam Function is for use with traditional cooking modes Convection Bake Convection Roast Convection Broil and Broil Ɣ GGLQJ VWHDP WR WKH RYHQ FDYLW ZLOO DVV...

Page 14: ...ELECT 3 Based on the times provided for total cook time and end time the oven will calculate the correct start time The oven will turn on and off automatically NOTE The maximum cooking time that can be set is 12 hours 4 A series of beeps will indicate when the end time has been reached and the oven will automatically switch off To change the cooking time and end time during cooking or before the c...

Page 15: ... 3ULRU WR WXUQLQJ WKH RYHQ RQ UHPRYH WKH SOXJ DQG LQVHUW the probe connection all the way in Ɣ 7KH SUREH VKRXOG FOLFN LQWR SODFH NOTE The probe may not work if it is connected when the oven is already turned on Keep the temperature probe plug in a safe place when using the temperature probe as this will need to be re inserted for use in other cooking modes WARNING Consuming undercooked food can re...

Page 16: ...and all probe cooking details appear on the screen Ŷ RRNLQJ PRGH Ŷ 7HPSHUDWXUH Ŷ QG RI FRRNLQJ WLPH Ŷ 7RWDO FRRNLQJ WLPH NOTE After cooking has started the oven temperature FDQ EH FKDQJHG DW DQ WLPH E SUHVVLQJ Ÿź The probe temperature setting cannot be changed once cooking as started The maximum internal food temperature that you can set is 174 F 6 Once the set probe temperature is reached the ove...

Page 17: ...af Pan 1 No 40 Steam Convect 350 Rolls Sandwich Metal Baking Sheet 1 No 25 Steam Convect 350 Rolls Dinner Metal Baking Sheet 1 No 20 Steam Convect 350 Meat Fish KLFNHQ 2QH R UHDVW Boneless Large Solid Pan 2 No 26 Steam Convect 350 KLFNHQ 7ZR R UHDVWV Boneless Large Solid Pan 2 No 34 Steam Convect 350 Chicken Whole 4 6 lbs Oven Safe Dish 1 No 60 Steam Convect 375 Clams Steamed Perforated Pan 2 No 1...

Page 18: ...ou to quickly access your favorite recipes KHQ D UHFLSH KDV EHHQ VHOHFWHG SUHVV Ÿ DQG WKHQ SELECT KDQJH WKH FRRNLQJ WLPH E SUHVVLQJ Ÿź DQG SELECT VHOHFWLQJ µSAVE and pressing SELECT the recipe ZLOO EH VDYHG LQ WKH µFAVORITES list of recipes NOTE If the time is changed and not saved immediately at the end of the recipe a message appears which asks whether you want to save it 4 To start the recipe p...

Page 19: ...uld be wiped up immediately Let hot surfaces cool then clean and rinse Manual Cleaning Do not use oven cleaners abrasive cleaners strong liquid cleansers steel wool scouring pads or cleaning powders on the interior of the oven Clean with a mild soap and water or vinegar and water solution Rinse with clean water and dry with a soft cloth When cleaning surfaces make sure that they are at room temper...

Page 20: ...voir and close the door Fill the reservoir with fresh water each time before starting a steam mode The oven is now ready for a new cooking cycle IMPORTANT If the electricity is interrupted during a steam mode the oven requires you to complete a discharge cycle once it turns back on PROBE The temperature probe may be cleaned with soap and water or a soap filled scouring pad Cool the temperature pro...

Page 21: ...e door at the top 2 Starting on the left side with the door at the same angle as the removal position seat the indentation of the hinge arm into the bottom edge of the hinge slot The notch in the hinge arm must be fully seated into the bottom of the slot Repeat for right side 3 Fully open the door If the door will not fully open the indentation is not seated correctly in the bottom edge of the slo...

Page 22: ...lacement bulb with a clean towel or facial tissue with the prongs facing down Align the two prongs in the ceramic holder pressing gently until the bulb is securely in the ceramic socket OLJQ WKH IUDPH JDVNHW DQG JODVV LQ D KRUL RQWDO position and rotate them into place on the oven wall taking care not to pinch the silicone gasket seal 8 Re insert the screws that were previously removed 9 Reconnect...

Page 23: ...on the broiling pan and grid has not been fitted properly and slit as recommended If using aluminum foil conform to pan slits In some areas the power voltage may be low Preheat the broil element for 10 minutes Oven does not work or appears not to work A fuse in your home may be blown or the circuit breaker tripped Replace the fuse or reset the circuit breaker Oven controls improperly set See the U...

Page 24: ...age or surge Reset the clock If the oven was in use you must reset it by pressing the Cancel Off pad setting the clock and resetting any cooking function Burning or oily odor emitting from the vent This is normal in a new oven and will disappear in time To speed the process see Conditioning the Oven section Strong odor An odor from the insulation around the inside of the oven is normal for the fir...

Page 25: ...y or fitness for a particular purpose are limited to one year or the shortest period allowed by law This limited warranty is extended to the original purchaser and any succeeding owner for products purchased IRU KRPH XVH ZLWKLQ WKH 86 I WKH SURGXFW LV ORFDWHG LQ DQ DUHD ZKHUH VHUYLFH E DQ XWKRUL HG 6HUYLFHU LV QRW DYDLODEOH RX PD EH UHVSRQVLEOH IRU D WULS FKDUJH RU RX PD EH UHTXLUHG WR EULQJ WKH S...

Page 26: ...lug Reservoir Cleaning Supplies CitruShine Stainless Steel Wipes Stainless Steel Appliance Cleaner Looking For Something More Monogram offers a variety of accessories to improve your cooking and maintenance experiences Refer to the Consumer Support page for phone numbers and website information The following products and more are available ACCESSSORIES ...

Page 27: ...49 2000696 Rev 0 27 NOTES ...

Page 28: ...49 2000696 Rev 0 03 20 GEA Printed in Italy ...

Page 29: ...MANUEL D UTILISATION Four de cuisson à la vapeur électrique et encastré de 30 po MONOGRAM COM ...

Page 30: ...NSOMMATEUR 3 CONSIGNES DE SÉCURITÉ 4 AVANT DE COMMENCER 6 CARACTÉRISTIQUES 7 UTILISATION DU FOUR 8 Commandes du four 8 Modes de cuisson traditionnelle 11 Conseils pour le mode de cuisson traditionnelle 11 Grilles du four 11 Modes de cuisson à la vapeur 12 Conseils de cuisson pour les modes à la vapeur 13 Papier d aluminium et doublures de four 14 Cuisson minutée 14 Sonde 15 Fonction recettes 17 EN...

Page 31: ...STANCE Pour de l assistance concernant la connexion à un réseau sans fil modèles équipés de cette fonction visitez notre site sur monogram com connect aux États Unis seulement PIÈCES ET ACCESSOIRES Les personnes qualifiées pour réparer leurs propres appareils peuvent commander des pièces détachées et des accessoires et les faire envoyer directement à leur domicile les cartes VISA MasterCard et Dis...

Page 32: ...four se refroidir suffisamment D autres surfaces de l électroménager peuvent devenir suffisamment chaudes pour causer des brûlures De possibles surfaces très chaudes sont les évents du four les surfaces près des ouvertures et des interstices autour de la porte du four Ŷ 1H IDLWHV SDV FKDXIIHU GH FRQWHQDQWV GH QRXUULWXUH IHUPpV La pression pourrait faire exploser le contenant et ainsi causer des bl...

Page 33: ... OHXU position d arrêt ou la grille d extension à sa pleine position d ouverture constitue une commodité facilitant le soulèvement des articles lourds Cela prévient aussi le risque de brûlure suivant le contact avec les surfaces chaudes des parois ou de la porte du four Ŷ 1H ODLVVH GHV DUWLFOHV WHOV TXH GX SDSLHU GHV XVWHQVLOHV casseroles etc ou des aliments dans le four lorsqu il n est pas utilis...

Page 34: ...es modes de cuisson et de réchauffage à la vapeur Les températures supérieures à 300 F peuvent endommager cette batterie de cuisine Conditionnement du four Ŷ 5HWLUH WRXV OHV HPEDOODJHV LQWpULHXUV Ŷ H IRXU GRLW rWUH QHWWR p j IRQG DYHF GX VDYRQ HW GH O HDX SXLV rincé avec soin Ŷ O HVW LPSRUWDQW GH FRQGLWLRQQHU OH IRXU DYDQW GH O XWLOLVHU SRXU OD cuisson Ŷ H FRQGLWLRQQHPHQW EU OHUD WRXW UpVLGX GH ID...

Page 35: ...H ODQJXH 3UHVVH SELECT Temperature température 3UHVVH ŻŹ HW Ÿź SRXU FKRLVLU XQH XQLWp GH WHPSpUDWXUH Pressez SELECT Clock horloge 3UHVVH Ÿź SRXU FKRLVLU XQH RSWLRQ GH WHPSV 3UHVVH 6 7 3UHVVH ŻŹ SRXU FKRLVLU DP RX SP 3UHVVH SELECT 5pJOH OH WHPSV HQ SUHVVDQW Ÿź HW SELECT Date 3UHVVH Ÿź SRXU FKRLVLU XQH GHV RSWLRQV GH GDWH VXLYDQWHV Day Month Year jour mois année Year Month Day année mois jour Month ...

Page 36: ...ion depuis une pause pour annuler le mode de cuisson et retourner au menu des modes Vous pouvez aussi utiliser le bouton Marche Arrêt pour quitter rapidement un mode de cuisson et retourner à l affichage de l horloge On peut modifier la température de cuisson en cours de mode de cuisson à l aide des touches fléchées Ajout de 5 minutes de vapeur Les modes de cuisson traditionnelle vont afficher un ...

Page 37: ...n et non avec le nettoyage à la vapeur 7 Démarrage différé Delay Start On utilise cette fonction avec le temps de cuisson pour différer l allumage du four Pressez et réglez le temps de cuisson Si la fonction Delay Start est disponible pour ce mode de cuisson on vous demandera de confirmer l heure du jour pour cuire jusqu à END fin Sélectionner une heure plus éloignée que l heure courante additionn...

Page 38: ...PDWLTXHPHQW ORUVTXH OD porte est ouverte Ŷ RUV GX GpPDUUDJH G XQ PRGH GH FXLVVRQ OHV ODPSHV GX IRXU s allument automatiquement Ŷ RUVTX XQ PRGH GH FXLVVRQ HVW WHUPLQp RX DQQXOp OHV ODPSHV s éteignent REMARQUE La lampe s éteint automatiquement après trois minutes sauf si elle a été allumée en pressant Pour rallumer la lampe pressez ou ouvrez la porte Changer le mode de cuisson Ŷ 2Q SHXW PHWWUH OD FX...

Page 39: ...e grillage plus basses pour les coupes de viandes plus épaisses ou les aliments cuits de part en part Grillage sans convection Le mode de grillage sans convection Broil utilise la chaleur de l élément supérieur Pour utiliser ce mode sélectionnez Broil depuis le menu de cuisson traditionnelle entrez une température puis pressez SELECT Le préchauffage n est pas nécessaire avec ce mode Grillage par c...

Page 40: ...XFKHV fléchées pour vous rendre sur le mode désiré puis pressez SELECT Ŷ 9RXV SRXYH PHWWUH OHV PRGHV GH FXLVVRQ j OD YDSHXU HQ pause en tout temps en pressant SELECT Pressez SELECT de nouveau pour redémarrer la fonction Ŷ HV SLHGV GH OD JULOOH GH WDEOH DLGHURQW j JDUGHU OH SODWHDX chaud à distance du comptoir lors du retrait des aliments du four REMARQUES Ne placez PAS les ustensiles casseroles et...

Page 41: ...C à 410 F 210 C REMARQUE Si vous utilisez cette fonction pour cuire plusieurs plats consécutifs assurez vous que le four s est refroidi avant de procéder avec le plat suivant Fonction de cuisson à la vapeur 5 minutes Cette fonction est utilisée avec des modes de cuisson traditionnelle cuisson par convection Convection Bake U WLVVDJH SDU FRQYHFWLRQ RQYHFWLRQ 5RDVW JULOODJH SDU FRQYHFWLRQ RQYHFWLRQ ...

Page 42: ...épart à partir des temps saisis pour le temps de cuisson total et la fin de la cuisson Le four s allumera et s éteindra automatiquement REMARQUE Le réglage maximal du temps de cuisson est de 12 heures 4 Une série de bips signaleront l expiration du temps et le four s éteindra automatiquement Pour modifier le temps de cuisson et l heure de fin pendant la cuisson ou avant le démarrage du mode de cui...

Page 43: ...connexion de la sonde jusqu au bout Ɣ D VRQGH GHYUDLW V HQFOHQFKHU HQ SODFH REMARQUE La sonde pourrait ne pas fonctionner si elle est connectée alors que le four est déjà allumé Gardez le bouchon de la sonde dans un endroit sûr lorsque vous utilisez la sonde car il devra être réinséré pour utilisation avec d autres modes de cuisson AVERTISSEMENT La consommation d aliments insuffisamment cuits pose...

Page 44: ...er sur l écran Ŷ H PRGH GH FXLVVRQ Ŷ D WHPSpUDWXUH Ŷ D ILQ GX WHPSV GH FXLVVRQ Ŷ H WHPSV GH FXLVVRQ WRWDO REMARQUE Après le démarrage de la cuisson on peut PRGLILHU OD WHPSpUDWXUH GX IRXU HQ WRXW WHPSV DYHF Ÿź Une fois la cuisson démarrée le réglage de la température de la sonde ne peut pas être modifié La température interne maximale que vous pouvez régler pour l aliment est de 174 F 6 Une fois a...

Page 45: ...Non 40 Steam Convect 350 Pain mollet sandwich 7 OH PpWDO 1 Non 25 Steam Convect 350 Pain mollet dîner 7 OH PpWDO 1 Non 20 Steam Convect 350 Viande Poisson Poulet poitrine 6 8 oz désossée Grande casserole entière 2 Non 26 Steam Convect 350 Poulet 2 poitrines 6 8 oz désossée Grande casserole entière 2 Non 34 Steam Convect 350 Poulet entier 4 6 lb Sûr pour le four 1 Non 60 Steam Convect 375 Palourdes...

Page 46: ... préférées 8QH IRLV XQH UHFHWWH VpOHFWLRQQpH SUHVVH Ÿ SXLV SELECT 0RGLILH OH WHPSV GH FXLVVRQ DYHF Ÿź SXLV SUHVVH SELECT 3 En sélectionnant SAVE et pressant SELECT la recette sera sauvegardée dans la liste de recettes de l option FAVORITES REMARQUE Si le temps est modifié sans être immédiatement sauvegardé à la fin de la recette un message vous demandera si vous souhaitez le sauvegarder 4 Pour dém...

Page 47: ...auser de la décoloration et doivent être essuyés immédiatement Laissez refroidir les surfaces chaudes puis nettoyez et rincez Nettoyage manuel N utilisez pas des nettoyants pour le four des nettoyants abrasifs des nettoyants liquides corrosifs de la laine d acier des tampons à récurer ou des poudres de nettoyage sur l intérieur du four Nettoyez avec du savon doux et de l eau ou une solution d eau ...

Page 48: ...r remplissez le réservoir avec de l eau fraîche à chaque fois Le four est maintenant prêt pour un nouveau cycle de cuisson IMPORTANT Si l électricité est interrompue pendant un mode vapeur le four vous demandera de procéder à un cycle d évacuation une fois qu il se rallumera SONDE La sonde de température doit être nettoyée au savon et à l eau ou avec un tampon à récurer rempli de savon Laissez ref...

Page 49: ... Q FRPPHQoDQW GX F Wp JDXFKH DYHF OD SRUWH GDQV O DQJOH GH la position de retrait placez l encoche du bras de charnière dans le bord inférieur de la fente de la charnière L encoche doit être complètement insérée dans le bas de la fente 5pSpWHU GH FKDTXH F Wp 3 Ouvrez la porte complètement Si la porte n est pas totalement ouverte l échancrure ne reposera pas à fond sur le bord inférieur de la fente...

Page 50: ...es vers le bas Alignez les deux broches dans le support en céramique appuyant délicatement jusqu à ce que l ampoule repose correctement dans le logement en céramique 7 Alignez le cadre le joint d étanchéité et le verre selon une position horizontale et tournez les en place sur la paroi du four tout en prenant soin de ne pas pincer le joint d étanchéité en silicone 8 Réinstallez les vis précédemmen...

Page 51: ...été placée selon les recommandations Si vous utilisez du papier d aluminium conformez vous aux fentes de la casserole Dans certaines régions la tension électrique volts peut être faible Préchauffez l élément de grillage durant 10 minutes Le four ne fonctionne pas ou semble ne pas fonctionner Un fusible de votre domicile peut être grillé ou le disjoncteur a été déclenché Remplacez le fusible ou rée...

Page 52: ...surintensité Réactivez l horloge Si le four était en marche vous devez le réactiver en pressant sur la touche Cancel Off annuler arrêter régler l horloge et réactivez toute fonction de cuisson qui était en cours Une odeur de brûlé ou d huile est émise par l évent Cela est normal avec un four neuf et l odeur disparaît avec le temps Pour accélérer le processus voyez la section Conditionnement du fou...

Page 53: ...ectueuse en raison d un vice de fabrication Ce qui n est pas couvert par Monogram Brochez votre reçu ici Pour obtenir le service sous ga rantie vous devrez fournir la preuve de l achat original EXCLUSION DES GARANTIES IMPLICITES Votre seul et unique recours consiste dans la réparation du produit tel que stipulé dans la présente garantie limitée Toute garantie implicite y compris les garanties impl...

Page 54: ...voir Articles de nettoyage Lingettes pour acier inoxydable CitruShine Nettoyant pour électroménagers en acier inoxydable 9RXV rWHV j OD UHFKHUFKH G DXWUHV DUWLFOHV Monogram propose une variété d accessoires afin d améliorer votre expérience de cuisson et d entretien Reportez vous à la page du Soutien au consommateur pour des renseignements sur l accessibilité téléphonique et en ligne Les produits ...

Page 55: ...49 2000696 Rev 0 27 NOTES ...

Page 56: ...49 2000696 Rev 0 03 20 GEA Ptinted in Italy ...

Page 57: ...MANUAL DEL PROPIETARIO Horno Eléctrico a Vapor Empotrado de 30 MONOGRAM COM ...

Page 58: ...LIENTE 3 INFORMACIÓN DE SEGURIDAD 4 ANTES DE COMENZAR 6 FUNCIONES 7 USO DEL HORNO 8 Controles del Horno 8 Modos de Cocción Tradicionales 11 Pautas del Utensilio para Modos Tradicionales 11 Estantes del Horno 11 Modos de Cocción con Vapor 12 Pautas del Utensilio para Modos con Vapor 13 Papel de Aluminio y Revestimientos para Horno 14 Cocción por Tiempo 14 Sonda 15 Función de Recetas 17 CUIDADO Y LI...

Page 59: ...61 3344 CONECTIVIDAD REMOTA Para recibir asistencia en relación a la conectividad de su red inalámbrica para modelos con activación remota visite nuestro sitio web en monogram com connect PIEZAS Y ACCESORIOS Individuos calificados para realizar el servicio técnico de sus propios electrodomésticos podrán solicitar el envío de piezas o accesorios directamente a sus hogares se aceptan las tarjetas VI...

Page 60: ...RV VH WUHSDQ VREUH HO KRUQR SDUD OOHJDU D estos artículos podrían sufrir lesiones graves Ŷ 8VH VyOR PDQJRV GH ROODV VHFDV ORV PDQJRV K PHGRV sobre superficies calientes pueden producir quemaduras debido al vapor No deje que los mangos de las ollas toquen los elementos que están calientes No use una toalla u otra tela voluminosa para reemplazar el mango de las cacerolas Ŷ 1XQFD XVH HO HOHFWURGRPpVW...

Page 61: ...RV HVWDQWHV GHO KRUQR HQ OD XELFDFLyQ GHVHDGD mientras éste se encuentra frío Si es necesario mover el estante mientras el horno está caliente evite que el mango de la olla tenga contacto con el elemento calentador en el horno Ŷ O XVDU ODV EROVDV SDUD FRFLQDU R GRUDU HQ HO KRUQR VLJD ODV instrucciones del fabricante Ŷ V FRQYHQLHQWH HPSXMDU KDFLD DIXHUD ORV HVWDQWHV estándares hasta el tope o empuj...

Page 62: ...ción con vapor y en los modos de recalentamiento con vapor Las temperaturas superiores a 300 F podrán dañar este utensilio Acondicionamiento del Horno Ŷ 5HWLUH WRGR HO HPEDODMH LQWHULRU Ŷ O KRUQR VH GHEHUi OLPSLDU HQ VX WRWDOLGDG FRQ DJXD jabón y se deberá enjuagar con cuidado Ŷ V LPSRUWDQWH TXH DFRQGLFLRQH HO KRUQR DQWHV GH XVDUOR para cocinar y hornear Ŷ O DFRQGLFLRQDPLHQWR KDUi TXH VH TXHPH FXD...

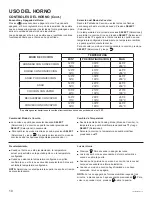
Page 63: ...RQLEOHV Presione SELECT Seleccionar Temperatura 3UHVLRQH ŻŹ Ÿź SDUD HOHJLU HQWUH ODV XQLGDGHV GH temperatura disponibles Presione SELECT Seleccionar Reloj 3UHVLRQH ŻŹSDUD HOHJLU HQWUH ODV FRQILJXUDFLRQHV KRUDULDV disponibles Presione SELECT 6HOHFFLRQDU 3UHVLRQH ŻŹ SDUD elegir am o pm Presione SELECT Seleccionar Configure la KRUD SUHVLRQDQGR Ÿź SELECT Seleccionar Fecha 3UHVLRQH Ÿź SDUD HOHJLU HQWUH...

Page 64: ...etida desde una pausa para cancelar el modo de cocción y regresar al menú del modo De forma alternativa use el botón de encendido para salir rápidamente de un modo de cocción y regresar a la pantalla del reloj La temperatura de cocción se podrá ajustar mientras se encuentre en un modo de cocción usando las teclas con flechas Agregar 5 Minutos de Vapor Los modos de cocción tradicionales exhibirán u...

Page 65: ...se podrá usar con los modos de cocción y no en la limpieza con vapor 7 Inicio con Retraso Se usa con Cook Time Tiempo de Cocción para retrasar el momento de encendido del horno Presione la tecla y configure un tiempo de cocción Si el inicio con retraso está disponible para el modo de cocción se le indicará que confirme la hora del día de FINALIZACIÓN de la cocción Seleccionar un tiempo más prolong...

Page 66: ... Horno Ŷ 3UHVLRQH Para encender o apagar las luces Ŷ DV OXFHV GHO KRUQR VH HQFHQGHUiQ GH IRUPD DXWRPiWLFD cuando se abra la puerta Ŷ XDQGR VH KD D LQLFLDGR XQ PRGR GH FRFFLyQ ODV OXFHV GHO horno se encenderán de forma automática Ŷ XDQGR XQ PRGR GH FRFFLyQ KD D ILQDOL DGR R VH KD D cancelado la luz se apagará NOTA La luz se apagará de forma automática luego de tres minutos a menos que se haya encen...

Page 67: ...e asado más bajas para cortes de carne más gruesos y o comidas que desee que queden completamente cocinadas Asar El modo Broil Asar utiliza calor desde el elemento superior Para usar este modo seleccione la opción de hornear desde el menú de cocción tradicional ingrese una temperatura y luego presione SELECT Seleccionar No es necesario realizar el precalentamiento al usar este modo Asar por Convec...

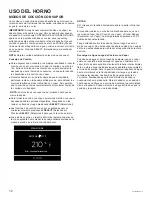
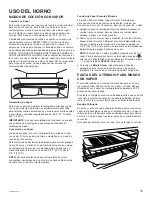
Page 68: ...ponibles navegando con las teclas con flechas y luego presionando SELECT Seleccionar Ŷ DV IXQFLRQHV GH FRFFLyQ FRQ YDSRU VH SRGUiQ SDXVDU HQ cualquier momento presionando SELECT Seleccionar Presione SELECT Seleccionar para que la función se inicie Ŷ RV SLHV GH VRSRUWH HQ OD SDUWH LQIHULRU GHO HVWDQWH VXSHULRU GH la mesa ayudarán a mantener la bandeja caliente alejada de la mesada cuando se retire ...

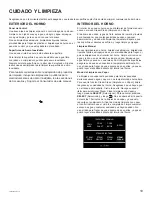
Page 69: ...F 180 C hasta 410 F 210 C NOTA Si usará esta función para cocinar platos de forma consecutiva asegúrese de que el horno se haya enfriado antes de comenzar a cocinar el siguiente plato Función de Vapor Durante 5 Minutos La función 5 Minute Steam Vapor Durante 5 Minutos es para uso con modos de cocción tradicionales Hornear por Convección Dorar por Convección Asar por Convección y Asar Ɣ JUHJDU YDSR...

Page 70: ...e SELECT Seleccionar 3 La cocción continua y la información de cocción automática se muestra en la pantalla Ŷ 0RGR GH FRFFLyQ Ŷ 7HPSHUDWXUD Ŷ LQ GHO WLHPSR GH FRFFLyQ Ŷ 7LHPSR GH FRFFLyQ WRWDO UHVWDQWH 4 Una serie de pitidos indicará cuándo se ha alcanzado el tiempo de finalización y el horno se apagará de forma automática Configuración de los Tiempos de Inicio y Finalización en algunos modos de c...

Page 71: ...HO KRUQR UHWLUH HO HQFKXIH H LQVHUWH OD conexión de la sonda totalmente hasta dentro Ɣ D VRQGD GHEHUi KDFHU XQ FOLF HQ VX SRVLFLyQ NOTA La sonda no podrá funcionar si se encuentra conectada cuando el horno ya está encendido Mantenga el cable de la sonda de temperatura en un lugar seguro al usar la sonda de temperatura ya que será necesario volver a insertarlo para su uso con otros modos de cocción...

Page 72: ...Ŷ LQ GHO WLHPSR GH FRFFLyQ Ŷ 7LHPSR GH FRFFLyQ WRWDO NOTA Una vez iniciada la cocción la temperatura del horno se SRGUi FDPELDU HQ FXDOTXLHU PRPHQWR SUHVLRQDQGR Ÿź La configuración de temperatura de la sonda no se podrá cambiar una vez que se haya iniciado la cocción La temperatura interna máxima de la comida que se puede configurar es 174 F 6 Una vez que se alcance la temperatura configurada de l...

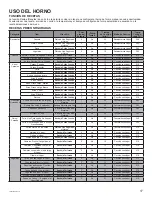
Page 73: ...No 40 Convección con Vapor 350 Arrollados Sándwich Bandeja de Horneado Metálica 1 No 25 Convección con Vapor 350 Arrollados Cena Bandeja de Horneado Metálica 1 No 20 Convección con Vapor 350 Carne Pescado Pollo Una Pechuga de 6 a 8 onzas Deshuesada Bandeja Sólida Grande 2 No 26 Convección con Vapor 350 Pollo Dos Pechugas de 6 a 8 onzas Deshuesadas Bandeja Sólida Grande 2 No 34 Convección con Vapor...

Page 74: ...cceder rápidamente a sus recetas favoritas XDQGR VH KD D VHOHFFLRQDGR XQD UHFHWD SUHVLRQH Ÿ luego SELECT Seleccionar DPELH HO WLHPSR GH FRFFLyQ SUHVLRQDQGR Ÿź SELECT Seleccionar 3 Al seleccionar SAVE Guardar y presionar SELECT Seleccionar la receta será guardada en la lista de recetas de FAVORITES Favoritos NOTA Si se modifica el tiempo y no se guarda de forma inmediata al final de la receta apare...

Page 75: ...de inmediato Espere a que las superficies calientes se enfríen y luego limpie y enjuague Limpieza Manual No use limpiadores de horno limpiadores abrasivos limpiadores líquidos fuertes estropajos de acero almohadillas para fregar ni polvos limpiadores en el interior del horno Limpie el mismo con agua y jabón o una solución de vinagre y agua Enjuague con agua limpia y seque con una tela seca Al limp...

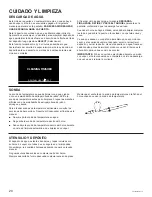
Page 76: ...agua fresca en cada ocasión antes de iniciar el modo con vapor El horno está ahora listo para un nuevo ciclo de cocción IMPORTANTE Si hay un corte de electricidad durante un modo con vapor el horno requerirá que complete un ciclo de descarga una vez que se reinicie la corriente SONDA La sonda de temperatura se puede limpiar con agua y jabón o con una almohadilla de estropajo llena de jabón Enfríe ...

Page 77: ...rior 2 Comenzando desde el lado izquierdo con la puerta en el mismo ángulo de la posición de retiro apoye la hendidura del brazo de la bisagra en el extremo inferior de la ranura de la bisagra La abertura en el brazo de la bisagra deberá estar totalmente apoyada en la parte inferior de la ranura Repita el procedimiento del lado derecho 3 Abra la puerta totalmente Si la puerta no se abre totalmente...

Page 78: ... con las clavijas hacia abajo Aliñe las dos clavijas en el soporte de cerámica presionando suavemente hasta que la lámpara quede asegurada en la ficha de cerámica 7 Alinee el marco la junta y el vidrio en posición horizontal y gire los mismos hasta su posición sobre la pared del horno teniendo cuidado de no pellizcar el sellado de la junta de silicona 8 Vuelva a insertar los tornillos que fueron r...

Page 79: ...y la rejilla para asar no se ajustó ni cortó de forma apropiada según lo recomendado Si usará papel de aluminio deberá usarse conforme con las aberturas de la olla En algunas áreas es posible que el nivel de corriente voltaje sea bajo Precaliente el elemento para asar durante 10 minutos El horno no funciona o parece no funcionar Es posible que un fusible de su hogar se haya quemado o que el disyun...

Page 80: ... SETTINGS Configuraciones Corte de corriente el reloj parpadea Corte o exceso de corriente Reinicie el reloj Si el horno se encontraba en uso deberá reiniciar el mismo presionando la tecla Cancel Off configurando el reloj y reiniciando cualquier función de cocción Olor a quemado o aceite desde la ventilación Esto es normal en un horno nuevo y desaparecerá con el tiempo Para acelerar el proceso con...

Page 81: ... parte de la electrodoméstico que presente fallas debido a defectos de fabricación Garante GE Appliances a Haier company Louisville KY 40225 Garante en Canadá MC COMMERCIAL INC Burlington ON L7R 5B6 EXCLUSIÓN DE GARANTÍAS IMPLÍCITAS Su única y exclusiva alternativa es la reparación del producto como se indica en esta Garantía Limitada Las garantías implícitas incluyendo garantías implícitas de com...

Page 82: ...epósito Suministros de Limpieza Limpiadores de Acero Inoxidable CitruShine Limpiador de Electrodomésticos de Acero Inoxidable Busca Algo Más Monogram ofrece una variedad de accesorios para mejorar sus experiencias de cocción y mantenimiento Para acceder a números telefónicos e información de sitios Web consulte la página de Soporte para el Consumidor Estos y otros productos están disponibles ACCES...

Page 83: ...49 2000696 Rev 0 27 NOTAS ...

Page 84: ...28 49 2000696 Rev 0 49 2000696 Rev 0 03 20 GEA Printed in Italy ...

Reviews: