background image


Original Version: German 

Translation of Original Version 

Version: 1.6 

76609409EN-BA-MG3D-V1_6.docx 1/82 

2010-08-02 

MIYACHI EUROPE CORPORATION

www.miyachieurope.com

Lindberghstr. 1   D-82178 Puchheim
Tel. +49-89-839403-0 Fax: +49-89-839403-10


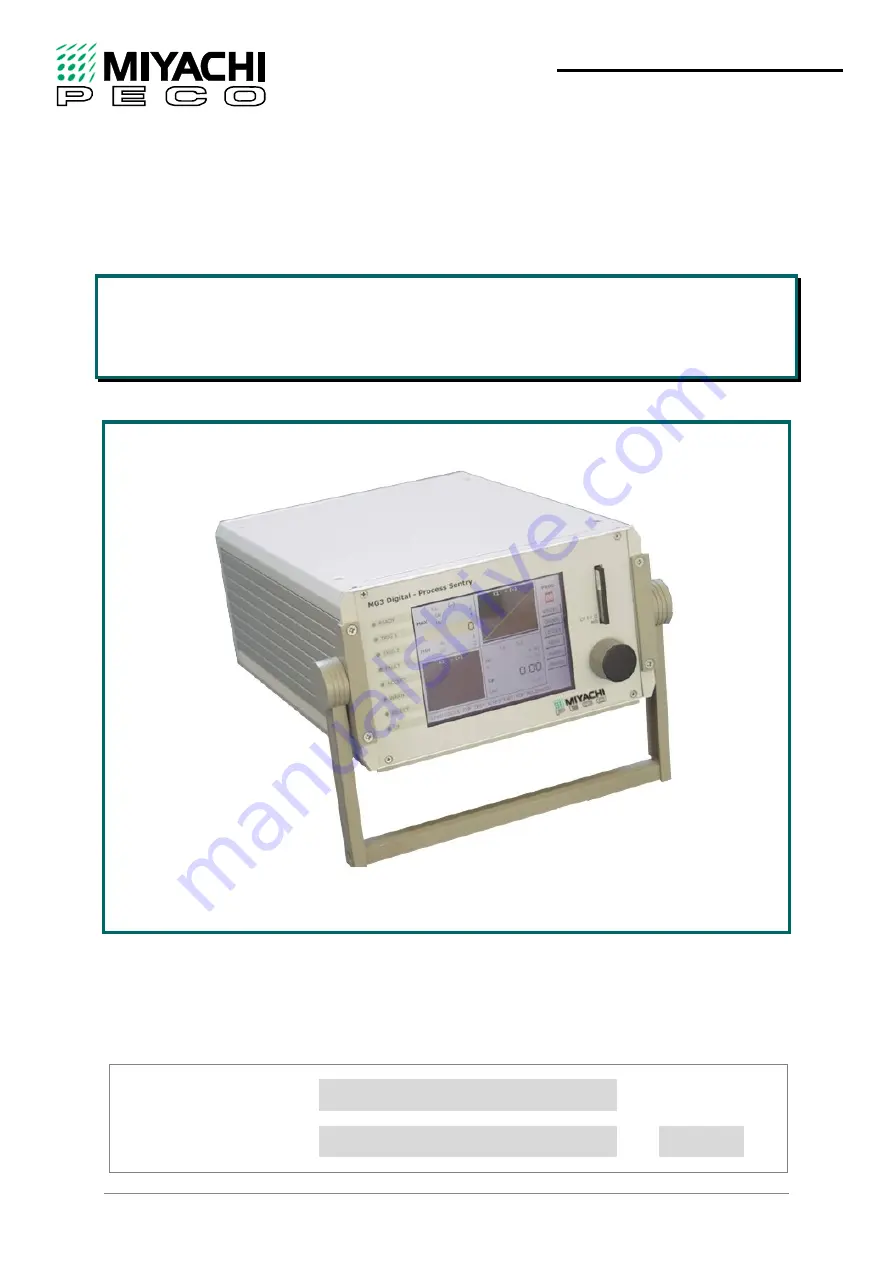
Operating Instructions 


MG3D 

Digital Measuring Unit 


Annex: Safety 

Regulations 

General References on Resistance Welding 
Contact Addresses 


Order number: 


Year: 


Serial number: 


Summary of Contents for MG3 Digital

Page 1: ...82 2010 08 02 MIYACHI EUROPE CORPORATION www miyachieurope com Lindberghstr 1 D 82178 Puchheim Tel 49 89 839403 0 Fax 49 89 839403 10 Operating Instructions MG3D Digital Measuring Unit Annex Safety Regulations General References on Resistance Welding Contact Addresses Order number Year Serial number ...

Page 2: ...essure Force Measurement values field bus 1 1a 2005 03 Miyachi Peco 1 2a 2005 09 Safety regulations separate and div small changes 1 3 2006 05 Diagrams 6 10 added declaration by the manufacturer 1 3a 2007 04 Declaration of Conformity 1 3b 2008 07 Symbols changed 1 4 2009 09 New design Spanish only 1 5 2010 03 Flow diagrams new 1 6 2010 08 CE new Machinery Directives Copyright 2010 Miyachi Europe G...

Page 3: ...3 1 5 Establishing Connections for Displacement Measurement 21 3 2 Initial Commissioning 22 3 2 1 Preconditions 22 3 2 2 Starting up 22 4 Operation 23 4 1 Measuring Instrument MG3D What is What 23 4 1 1 LED Status Displays 23 4 1 2 Screen Display 24 4 1 2 1 Display Windows Quadrant 1 to 4 25 4 1 2 2 Menu Bar 25 4 1 2 3 Program Display 25 4 1 2 4 Measuring Mode 25 4 1 2 5 Status Bar 25 4 1 3 Board ...

Page 4: ...lel 68 6 3 Flow Chart Channel 1 and Channel 2 Parallel but Current 1 and Current 2 do not Overlap 69 6 4 Flow Chart Channel 1 or Channel 2 alone With Too Short Measuring Interval70 6 5 Flow Chart Channel 1 and Channel 2 With Parallel Measuring Within the Evaluation Time of the Respective Channel That Measures First 71 6 6 Flow Chart Parts Detection and Current Measuring 72 6 7 Flow Chart Part Dete...

Page 5: ...ation carefully before using the individual elements of the AWS welding system Information These device specific operating instructions should help you familiarize yourself with the unit and take advantage of its application possibilities when used as directed The Operating Instructions contain important notes to help operate the unit safely properly and economically Observing the notes will help ...

Page 6: ...holder is made through a CAN interface In its standard version measuring instrument MG3 Digital is equipped with a 2 channel current measuring and voltage measuring card with appropriate internal periphery in a portable housing A combined path force and temperature measuring card can supplement the standard version Please contact our sales department for further details After applying mains the me...

Page 7: ...tage value peak value of voltage voltage integral u x t and further power in variances energy resistance in variances weld time ms Counter Up and down counter with prewarning and final value signal output Measuring range current Coil x 1 2 5 20 100 500 kA peak value Coil x 10 0 2 0 5 2 10 50 kA peak value Measuring range voltage 0 5 2 5 10 50 V peak value Measurement accuracy 1 5 of upper limit of...

Page 8: ... C to 40 C Relative humidity max 70 Dimensions 19 WxHxD 280 x 140 x 340 mm Opt 19 3HU Weight ca 5 3 kg approx 11 7 lbs 2 3 Maximum Cycle and Memory Times Conditions 1000 measurements each time with consistent time voltage current No limit value pre warning or overrun outputs should be activated Validity Program versions Display V1 2 7 PPC V1 119 DSP V1 4 Information These specifications only apply...

Page 9: ... ms 93 790 ms 75 1100 ms 54 Graphic display waveforms I U P W Logging on 1580 ms 37 1650 ms 36 1690 ms 35 1840 ms 32 2140 ms 28 Tbl 1 Maximum cycle for AC active Maximum cycle for DC current All specifications for active ready output inquiries Current display DC current in ms Measuring time 23 ms 50 ms 100 ms 250 ms 500 ms Quadrant 1 4 numerical Logging on 130 ms 461 170 ms 352 190 ms 315 340 ms 1...

Page 10: ... 85 869ms 69 1210ms 49 Graphic display waveforms I U P W Logging on 1738ms 34 1815ms 33 1859ms 32 2024ms 29 2354ms 25 Tbl 3 Maximum cycle of AC without Maximum cycle for DC current All specifications without active ready output inquiries Current display DC current in ms Measuring time 23 ms 50 ms 100 ms 250 ms 500 ms Quadrant 1 4 numerical Logging on 143 ms 419 187 ms 320 209 ms 287 374 ms 160 662...

Page 11: ...tFlash card Saving on MicroDrive with full buffer approx 2500 numerical measuring values duration approx 50 s Program selection loading times Internal selection Quadrant 1 4 graphical I 1 U 2 P 3 W 4 duration approx 3000 ms Quadrant 1 4 numerical duration approx 600 ms External selection Quadrant 1 4 numerical Quadrant 1 4 graphical I 1 U 2 P 3 W 4 Main image renewal on approx 600 ms approx 3000 m...

Page 12: ...p for setting up the equipment The tilt angle of the measuring instrument front panel can be adjusted by means the stirrup for taking a non dazzling reading of the screen Fig 1 MG3Digital with stirrup Remove measuring instrument MG3 Digital from the packing and set it up at the designated place Pull apart both caps at the stirrup s pivot points Fig 1 Adjust desired position ...

Page 13: ...ith a standard device See enclosures Connection diagram 767 00590 4 X55 Control inputs from peripheral equipment 5 X54 Control outputs to peripheral equipment 6 X38 opt Inputs and outputs extended I O 7 X31 opt Connecting terminal for position encoding system 2 fold and force sensing device 8 X13 UK1 Input channel 1 for voltage measurement 9 X21 IK1 Input channel 1 for current measurement 10 X14 U...

Page 14: ...urrent signal lasts that is registered in the course of the measuring time 14 ACCEPT 1 Signal waiting as long as parameters monitored with limit values are within limit value tolerance 15 REJECT 1 Signal waiting as soon as monitored parameter is outside of limit value tolerance 16 Overflow 1 and 2 Signal waiting if a set measuring range is exceeded by the measured parameter 17 Zero current 1 Signa...

Page 15: ...eter values during continuously waiting trigger signal are overwritten by newly arriving measurements without evaluation and transfer 17 Not ready 1 and 2 A signal disables parameter value acquisition ready output at X54 pin 1 goes to LOW 18 Set ACCEPT outputs clear faults 1 and 2 This signal disables all REJECT and limit value outputs all ACCEPT outputs are set 21 Save log file 1 22 Counter reset...

Page 16: ...terminal Common plus terminal for PIN 14 13 11 12 10 9 8 7 6 5 4 3 30 29 28 27 26 25 24 23 19 Common 1 1 Common plus terminal 10 30 V for PIN 16 and 20 20 16 Path Abort Current High Path Abort Current Low 1 1 Output active on High is enabled if cutoff value is exceeded Output active on Low is enabled if cutoff value is exceeded 25 Parts Detection Low active 1 if limit values are not reached or exc...

Page 17: ...ing with rising slope cooling time with dropping slope 46 Null Sinking 1 Setting Null Sinking 1 with rising slope zeroing with rising slope cooling time with dropping slope 47 Parts Detection 2 Setting to parts detection HWScan Measured value evaluated and part set to min 2 max 2 48 Parts Detection 1 Setting to parts detection HWScan Measured value evaluated and part set to min 1 max 1 49 Start Me...

Page 18: ...2 3 1 2 6 Connector X60 and X61 CANopen Connection with standard RS232 extension cable 1 1 Pin Name Function 1 Free 2 CAN_L Low level 3 CAN_GND Ground 4 Free 5 CAN_SHLD Circuit shield 6 Free 7 CAN_H High level 8 9 CAN Baud rates 1MB s 800 kB s 500 kB s 250 kB s 125 kB s 50 kB s 20 kB s 10 kB s ...

Page 19: ...lves Take care to position the threaded holes as close to the electrodes as possible without compromising their stability Fig 3 Connection example Fig 4 Connection example Connect the red cable terminal to the welding head pole Fig 3 at the position provided for this purpose Connect the black cable terminal to the welding head pole Fig 4 at the position provided for this purpose Insert the 5 pole ...

Page 20: ...d Fig 6 Fig 5 Flap toroid coil example with side marking Fig 6 Toroid coil example with side marking Direction of current and therefore coil installation direction is important in order to ensure correct current reading Ensure that the correct coil fitting position is selected during installation Fig 7 Application example with a built in flap toroid coil Install the flap toroid coil or toroid coil...

Page 21: ...from the welding head to ensure that the measuring result is correct Ensure that the displacement measuring system is attached to the welding head with a non conductive material e g polyamide Fig 8 Built on disconnected displacement measuring system Attach the displacement measuring system to the welding head using non conductive material Fig 8 Connect the displacement measuring system to the supp...

Page 22: ...ket for non heating appliances at the rear of measuring instrument MG3 Digital See section 3 1 1 Fig 2 1 Check to see whether the CompactFlash card CF card is plugged in Plug in the CF card into the slot provided for that on the front panel 3 2 2 Starting up Switch on the main switch on the rear side of measuring instrument MG3 Digital See section 3 1 1 Fig 2 16 After initialization lasting for ap...

Page 23: ... the CompactFlash CF card s type I or II or for a MicroDrive MD 4 Knob pushbutton combination 4 1 1 LED Status Displays LED Status Displays signalize Measuring instrument MG3 Digital ready for measurement READY Measurement activity on channel 1 or 2 TRIG1 TRIG2 Measuring instrument MG3 Digital overflow metering range FAULT Measurement within set limit values ACCEPT Measurement outside set warning ...

Page 24: ...2 Q2 3 Menu bar 4 Program number selection 5 Button Single measurement ON SINGLE 6 Button permanent measurement RUN 7 Button to logging LOGGER 8 Button to configuration menu MENU 9 Button to parameter overview PARAM 10 Button to analysis LIMITS 11 Display current meas mode SINGLE 12 Status bar for status help and fault messages 13 Display window quadrant 4 Q4 14 Display window quadrant 3 Q3 ...

Page 25: ... is not reached or exceeded red the current set limit value is not reached or exceeded grey measurement was invalid range overflow 4 1 2 2 Menu Bar The menu bar comprises the Readout setting of the current program number 1 99 Display of the current measuring mode SINGLE CONT Switches for selecting displays and measuring mode 4 1 2 3 Program Display The program displays informs you about the number...

Page 26: ... A rotary movement selects the menu items Depressing the knob pushbutton combination enables the selected element switch selection field quadrant etc Grayed option points or parameters are disabled and cannot be selected Input fields are Buttons that trigger a certain action when depressed Switches that have two switching conditions Selection fields that allow selection from a list of options Entr...

Page 27: ...Structure System Counter Printer Password General View Distance Pressure Force Copy Analysis Numeric Display Graphical Display SPC Values SPC Chart Histogram Logger Parameters Envelope waveform Compare Reference waveform Monitoring envelope waveform Welding Limits Menu Maindisplay Tbl 5 Menu structure ...

Page 28: ...t button MAIN by means of the knob pushbutton combination in the menu bar and press button Select button MENU with the knob pushbutton combination and depress button Screen SETTINGS opens Select button GENERAL with the knob pushbutton combination and depress button Screen GENERAL opens You have following setting options Contrast Influences screen representation Set contrast such that you achieve b...

Page 29: ...rrespond to the set rate of your PC laptop serial interface You can set the transmission rate from 9600 Baud to 115200 Baud LIST SEPARATOR DECIMAL SIGN The MG3 Digital stores its data in a CSV compatible data format For instance to have Excel read this data the sign for the last separator decimal sign on the MG3 Digital and the sign for the last separator decimal sign on your PC must check Note If...

Page 30: ... ensure that these quadrant windows are configured the same for each program as the SPC card will otherwise be reset Deactivation of this option is therefore advantageous when rapidly switching programs and utilizing the SPC charts as the main display need only be configured once Next select button SYSTEM with the knob pushbutton combination and depress button Screen SYSTEM opens This screen displ...

Page 31: ...pment front panel light shortly Select button RAM RESET with the knob pushbutton combination and depress button Screen RAM RESET opens allowing you to reset RAM and MG3 Digital to its standard original values Use RAM RESET only if you have no other choice left Before resetting save your set parameters to the compact flash card Loss of data If you perform RAM RESET all set parameters will be lost C...

Page 32: ...easuring channel 1 or 2 that needs to be configured FILTER For isolating disturbances you can enable disable a low pass filter frequency range 0 1 25 kHz To enable this function you need to select the box beside the word FILTER with the knob pushbutton combination and check the box Recommended setting for inverter controller 1 5 of inverter frequency 1 kHz inverter Æ 200 Hz 20 kHz inverter Æ 4 kHz...

Page 33: ...8 TRIGGER The value in field TRIGGER determines the current the force value that must be input in order to start the measuring process The range can be set between 0 to 100 related to the upper limit of the effective range Recommended setting 4 0 At inverter 1 0 I FALL LEVEL Specifies the value of falling current in of Is to which the on time tw is counted MEAS TIME For single weld measurement you...

Page 34: ...n Set the measuring range end value for the voltage subsequently to the next greatest value which suits the measured voltage For constant voltage control Set the next greatest measuring range end value for the voltage which suits the set voltage on the welding current source Enter 500kA for the current Conduct a test measurement welding operation Set the measuring range end value for the current s...

Page 35: ...channel 1 not connected I channel 2 not connected Representation Shunt current I channel 1 converted shunt voltage kA Welding position voltage U channel 1 V Shunt voltage U channel 2 V I channel 2 empty The shunt resistance value must be set if the correct shunt current is to be obtained The device converts the shunt value into the equivalent current The lowest measurable shunt voltage is 50mV for...

Page 36: ...elding position voltage X shunt voltage ON OFF 0 1 25kHz Measuring mode X Coil Shunt Current profile X Point Seam Option Trigger source X Current Force trigger 0 penetration Trigger X 0 100 of measuring range end value I fall value X shunt current X X shunt voltage 10 95 from peak value Measuring time X 1 2000 DC 1 5000 AC ms Measuring pause X 0 2000 ms Current type X AC DC Current X shunt current...

Page 37: ...ed and logged on any valid triggering Procedure Select button SINGLE with the knob pushbutton combination and depress button Measuring instrument MG3 Digital will change to the single measurement mode now This is indicated through the green window lettered SINGLE In single measurement mode the equipment switches to hold after triggering The display SINGLE is grayed Readiness for measurement is onl...

Page 38: ... combination and depress button Screen VIEW opens and now you may perform all necessary settings Setting the display window QUADRANT Here you select the display window 1 4 quadrant to be configured CHANNEL The channel number set determines the channel that shall be represented in the display window selected Only one measured categories can be selected per channel and window in each case MODE You d...

Page 39: ...placement Measuring digital or analog Preparations Connect the displacement measuring system as described in section 3 1 5 Select button MENU with the knob pushbutton combination and depress button Select button DISTANCE with the knob pushbutton combination and depress button Screen DISTANCE opens and now you may perform all necessary settings Configuring displacement measurement CHANNEL Select th...

Page 40: ...m a reference run prior to first measurement after any change on the electrodes after any change on the welding head Caution Right above you can toggle between PART and FINBAL WELD TO When button ON OFF is enabled the welding current is switched off as soon as the welding head has reached the displacement preset in the adjacent input field FINAL When button ON OFF is enabled the sinking path displ...

Page 41: ...you may perform all necessary settings Configuring pressure force measurement ON OFF Enables disables pressure or force measurement Both buttons are software latched against each other so that only one quantity can be measured MIN MAX Values for the minimum maximum permissible pressure or force If both values are zero the monitoring is deactivated SENSOR TYPE Pressure sensor Pressure sensors with ...

Page 42: ...Determining Limit Values Preparations Select button MENU with the knob pushbutton combination and depress button Select button LIMITS with the knob pushbutton combination and depress button Screen LIMITS opens and now you may perform all necessary settings Notes You can determine maximum two values to be monitored per channel Evaluation of the limit values after each measurement The evaluation res...

Page 43: ...n combination and depress button Select button LIMITS with the knob pushbutton combination and depress button Screen LIMITS opens Select button ENVELOPE with the knob pushbutton combination and depress button Screen MONITORING ENVELOPE WAVEFORMS opens and now you can generate a reference waveform and an envelope waveform by yourself or load an envelope waveform Generating a reference waveform Sele...

Page 44: ... Enabling the ACCEPT ALL button draws on every triggered waveform to form the mean value until the value NO is zero I_001 ref File designation for the reference waveform generated Reference waveforms have the file extension REF The reference waveform is automatically stored on the compact flash card when all measurements were performed An envelope waveform is formed from a reference waveform and i...

Page 45: ...FORM opens and now you can generate an envelope waveform with the reference waveform loaded Select button INTERVAL with the knob pushbutton combination and depress button You will now see a white vertical line that you can move by rotating the knob pushbutton combination Select the position at which the monitoring interval or time slot should commence and press the button You will now see a second...

Page 46: ... upper limit value for the envelope waveform in the input field Exit screen OFFSET with OK Now the envelope waveform is finally configured and can be saved now or be changed once again Select button SAVE with the knob pushbutton combination again and depress button Screen INPUT WAVEFORM NO opens Now enter a number for the envelope waveform in the input field If this file number has been assigned a...

Page 47: ...o whether you wish to load the envelope waveform last processed if no CompactFlash card is plugged in Simply acknowledge with OK if you wish to do this ON OFF Envelope waveform monitoring is activated by pressing the button 2nd envelope waveform A maximum of two envelope waveforms can be loaded These independently monitor a signal sequence You can return to the limit value setting with the LIMITS ...

Page 48: ...is determined with the button Scaling is automatically selected if the button is pressed which generates the best image of the current envelope waveform The ZOOM enlargement mode is activated if the button is not pressed The line is activated Note Press AUTOSCALE and the selected measurement variable is automatically and optimally adapted to suit the diagram This function can also be utilized to a...

Page 49: ...bles Y X A range can be determined with Y and X which will subsequently be enlarged A white line appears if Y or X is selected Turn the knob button to offset the line Press the button to set the limit A second white line appears simultaneously which initially lies on top of the first line Turn the knob button again until the second line has reached the limit Press the button and the diagram is ill...

Page 50: ...d now you may perform all necessary settings Enter number of source program into input field SOURCE In the input field DESTINATION enter the number of the first target program and the number of the last target program which the source program and all parameters shall be copied to Finally depress button COPY This will initiate the copy process Copying a channel Select the channel to which others ar...

Page 51: ... INPUT FILE NO opens Enter a file number into the input field Finally depress button OK This will initiate the saving process Parameter data have the file extension PAR Loading all programs and parameters Select button SELECT ALL with the knob pushbutton combination and depress button Screen SELECT FILE opens Select a file from the files list Finally depress button OK This will initiate the loadin...

Page 52: ...e numerical direction or zero numerical direction is reached Procedure Select button MENU with the knob pushbutton combination and depress button Select button COUNTER with the knob pushbutton combination and depress button Screen COUNTER opens and now you may perform all necessary settings ON OFF Enables disables the counter for the respective channel MODE Indicates counting direction Plus counts...

Page 53: ...ary measurement variable is illustrated in the heading The viewing enlarging and memory menu is activated if the button is not pressed The double arrow next to the button is activated Note Press AUTO SCALING and the selected measurement variable is automatically and optimally adapted to suit the diagram This function can also be utilized to achieve a clear representation again DOUBLE ARROW Select ...

Page 54: ...tion The last variable entered becomes the primary measurement variable to which the Y axis scaling relates The primary variable can be recognized by the fact that it is shown in the heading and illustrated in blue in the legend Enlarging menu Zoom YMAX YMIN Press YMAX or YMIN to determine the upper or lower Y axis scale value for the primary measurement variable selected in the PEN field XMAX XMI...

Page 55: ...he diagram is illustrated in an enlarged version Cursor menu Select the double arrow to reach the CURSOR level Select one of the four possible measurement variables and press the button A crosshair cursor appears on the display in the color allocated to the measurement variable The cursor can be moved on the graph by turning the knob button The value pair belonging to every measurement value is di...

Page 56: ... Select a measurement variable and press the button Allocate the measurement series a number under which it should be saved The files are saved in the Waveform directory with the suffix CRV The respective formula symbol of the measurement variable in question precedes the file name The double arrow pointing upwards enables you to move one level higher again You can return to the quadrant view agai...

Page 57: ...ENU with the knob pushbutton combination and depress button Select button PRINTER with the knob pushbutton combination and depress button Screen PRINTER opens and now you may perform all necessary settings MODE You select the printing mode through the selection field Possible printing modes are off function deactivated all all measurements poor poor measurement prewarning measurement with active p...

Page 58: ...on combination and depress button Screen PASSWORD opens and now you may perform all necessary settings LOGOUT You can logout through this button You can only carry out changes having logged on with the correct password CHANGE If you have correctly logged on you can change the password STATE Indicates whether you are authorized for access or not Note Password on delivery 0000 If you should have for...

Page 59: ...e If the compact flash card is nearly full you will be asked to change the card QUERY The display mode for logged data is determined with this selection field Possible display modes are all measurements rejected measurements last measurement detailed CH Select between channel 1 2 or 1 2 only for mode last measurement VAL Select here the value that you want to be shown Notes The overall status of a...

Page 60: ...a log file and logging commences anew The log file has the file suffix log and has a format compatible with csv in which time date counter number program number measurement values and status information on the measurement are saved in the form of a table The overall measurement status is illustrated with the following symbols V positive measurement no pre warning X negative measurement positive me...

Page 61: ...is only readable in languages with an ANSI compatible syntax 5 17 Analyzing Accept Reject Ratio Procedure Select button MAIN with the knob pushbutton combination and depress button Select button ANALYSIS with the knob pushbutton combination and depress button Screen ANALYSIS opens and now you may perform all necessary settings RESET Depressing button RESET will reset all counters for the selected ...

Page 62: ...te them generously A display window must be in display mode SPC chart As soon as the window is in SPC chart mode evaluation of the measured values starts It closes as soon as the display window is reconfigured In the SPC chart display calculation is carried out within sequential measurement intervals Configure a display window for the SPC chart mode See section 5 5 Note In the SPC chart you can se...

Page 63: ...ns and now you may perform all necessary settings SAMPLES Through this selection field you determine the number of measurements for a sample which shall establish the statistic The value in input field SAMPLES must be 1 Colors The colors in the histogram have the following meaning GREEN LINE average value Xavg YELLOW LINES marginals RED LINE limits BLUE LINE standard deviation S 3 sigma ...

Page 64: ... be enabled i e the button for monitoring must be ON See section 5 8 A large number of measurements must be recorded with the statistical evaluation enabled The more measurements have been recorded and the larger the number of samples the more precise the result of limit value determination will be In the histogram you can see average and standard deviation values calculated of all measured values...

Page 65: ...S Here you can select the limit value calculation mode You can choose 2S 1S 3S 2S 4S 3S 5S 4S 6S 5S 99 95 The first value is standard deviation S and the second value is the deviation of pre warning RESCALE Adapts graphic to window RESET If you depress this button the statistical calculation will be reset ...

Page 66: ...ssed continuously for longer than 3 seconds for this purpose The LED on the CompactFlash card illuminates for a few seconds if the screenshot has been successfully realized and a message is generated in the status line The files have the prefix SSH_xxx and suffix bmp and receive a number which is incremental with the screenshot 5 22 Registering the Device It may be necessary to register the device...

Page 67: ...gering as long as the ready signal is low measuring interval During this measuring interval data is calculated compared and transferred to the display and further interfaces In the following chapter flow charts illustrate the time sequence of the signals by a number of examples 6 1 Flow Chart Channel 1 or Channel 2 alone high high high low low low Dia1 MG3 Current Output outputs limit values accep...

Page 68: ...ng sequence programm takeover after evaluation external programm changeover Reject 2 Output Reject 1 Output Outputs limit values pre warn value Current 1 Output Current 2 Output Ready Output Current 1 Current 2 measuring delay adjusted measuring time channel1 adjusted measuring time channnel 2 no new measuring possible Both measuring times need to be set generously enough so that they overlap in a...

Page 69: ...urrent channel 2 Start of evaluation of the first current is delayed as a result A parallel 2 channel measurement of the second current can be realized here because the Ready signal remains high Evaluation subsequently follows for both channels within the measuring pause Dia3 MG3 high high high high high high high high low low low low low low low low Current 1 Output Current 2 Output Ready Output ...

Page 70: ...lue Ready Output Current signal Current 1 or Current 2 Current 1 or Current 2 measuring delay Ready for new measuring no measuring possible adjusted measuring time wrong measuring Current starts though ready is not active Outputs undetermined Misadjusted flow Should a new flow cycle start within the measuring interval already the outputs are undetermined and lead to wrong results Remedy Adjust mea...

Page 71: ...ond channel starts measuring without ready signal being high Remedy Extend channel 1 measuring time such that it overlaps with the second measuring time Dia5 MG high low high low high low high low high low high low Current 1 Output Current 2 Output Ready Output Outputs Current 1 Current 2 measuring delay Ready for new measuring adjusted measuring time channel 1 no new measuring possible wrong meas...

Page 72: ...nt Measuring Dia6 MG3 high high high high high high low low low low low low high low high low different outputs Welding cylinder Current Output Outputs Part detection Ready Output Current Signal Evaluation Part detection Start Part detection Inputs Control Part detection measuring delay Ready for new measuring adjusted measuring time no new measuring possible ...

Page 73: ...he current for the primary channel has ended or the part detection signals are interrupted Upper example Channel 1 commences Channel 1 is finished and waits on channel 2 because the part detection signal for channel 2 is still active The channel sequence is irrelevant during this Dia7 MG3 New sequence Current 2 Current 1 Part evaluation 1 Part available1 Start part 1 Part evaluation 2 Part availab...

Page 74: ...ring delay Ready for new measuring no measuring possible adjusted measuring time Change of program best during measuring interval Change can be made after current initiation earliest 6 9 Connection to field bus system The MG3 can communicate with a control or master computer via CAN Bus The CANopen log is utilized for this purpose The MG3 acts as a CANopen slave Detailed instructions can be found ...

Page 75: ...ion 2 Part evaluation 1 Start part detection 2 Start part detection 1 Evaluation of IO complete 0 no part available 1 part available X38 50 Input X38 49 Input X38 48 Input X38 47 Input IK1 input current coil X38 25 Output X38 26 Output X54 2 output X54 8 output X54 outputs X54 17 output X54 21 output IK2 input current coil X54 1 output from here new sequence start measuring part detection ch2 X38 ...

Page 76: ...tart part detection2 Start part detection1 0 no part available 1 part available X38 50 Input X38 49 Input X38 48 Input X38 47 Input IK1 Input current coil X38 25 Output X38 26 Output X54 2 output X54 8 output does not actuate X54 outputs X54 17 output X54 21 output Current signal 2 of coil not available X54 1 output frome here new sequence start measuring part detection ch2 X38 49 part evaluation ...

Page 77: ...010 4011 4012 4013 4014 4015 4016 4017 4018 4019 4020 CAN Timeout data read Data transfer overloaded possible causes measuring interval too short too intensive rotary transducer Actuation during highly frequented measurements 4021 CAN Timeout data write Data transfer overloaded possible causes measuring interval too short too intensive rotary transducer Actuation during highly frequented measureme...

Page 78: ...1 Channel Displacement 581021 Power cable 1 770 60 170 Voltage measuring cable 1 770 60 152 Toroidal coil 70 mm 1 770 60 178 Coil measuring cable 3 m 1 770 66 309 CompactFlash 128 MB 1 766 09 409 Operating Instructions MG3D 1 770 66 186 Displacement sensor ST1278 1 766 09 162 Sensor cable 1 channel 1 7 2 3 MG3 Digital W2 Article number Designation Quantity 866 00 501 MG3 Digital 2 Channel Displace...

Page 79: ...Operating Instructions MG3 Digital Appendix 76609409EN BA MG3D V1_6 docx 79 82 2010 08 02 7 3 Enclosures 7 3 1 Connection diagram Interface MG3D 767 00590 E ...

Page 80: ...Operating Instructions MG3 Digital Appendix 76609409EN BA MG3D V1_6 docx 80 82 2010 08 02 7 3 2 Connection diagram X38 Inputs Outputs 767 00 591 E ...

Page 81: ...roid coil example with side marking 20 Fig 7 Application example with a built in flap toroid coil 20 Fig 8 Built on disconnected displacement measuring system 21 Fig 9 MG3 Digital Front view 22 Fig 10 Control panel MG3 Digital 23 Fig 11 Screen Display 24 Fig 12 Schematic connection scheme for special shunt operating mode 35 8 2 Tables Tbl 1 Maximum cycle for AC active 9 Tbl 2 Maximum cycle for DC ...

Page 82: ...age Measurement 19 F Flow Chart 2 channel part detection with current 75 Flow Chart Channel 1 and Channel 2 Parallel 68 Flow Chart Channel 1 and Channel 2 Parallel but Current 1 and Current 2 do not Overlap 69 Flow Chart Channel 1 and Channel 2 With Parallel Measuring Within the Evaluation Time of the Respective Channel That Measures First 71 Flow Chart Channel 1 or Channel 2 alone 67 Flow Chart C...

Reviews: