


7
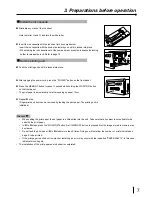
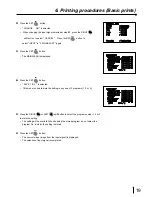
Install the ink cassette
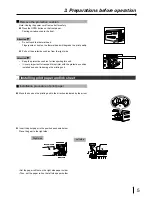
1
Eliminate any slack of the ink sheet.
Hold the roller
A
and
B
and turn the white roller.
2
Insert the ink cassette with the ink sheet into its compartment.
Insert the ink cassette with the knob side toward you until it is locked into place.
• When taking the ink cassette out of the compartment, press the ink cassette locking
holder to release the lock. Refer to page 12.
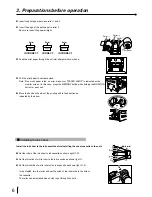
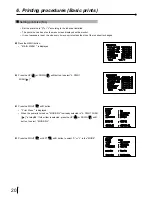
Set the printing unit
1
Push the printing unit until it is locked into place.
2
After plugging the power cord, press the " POWER" button on the front panel.
3
Press the MEMORY button for about 1 second while holding the MONITOR button
on the front panel .
• The print paper is automatically cut after sending by about 10cm.
4
Repeat
3
step.
(Fingerprints and dust can be removed by feeding the print paper. The printing unit is
initialized.)
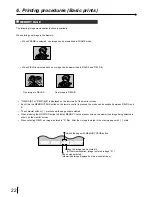
3. Preparations before operation
Attention
•
When setting the print paper, the set paper is a little pulled into the unit. Take care that any object is not pulled into the
unit with the print paper.
•
In
3
to
4
steps, press the "MONITOR" button first. If MEMORY button is pressed first, the image stored in memory may
be cleared.
•
Do not feed the print paper (
3
to
4
steps) more than 2 times. Doing so will not allow the number of prints indicated on
page 8 to be printed.
•
If the print paper is pulled out too much at installing, an error may occur with the indication "PAPER JAM 12". In this case,
initialize this unit again.
• The installation of the print paper and ink sheet is completed.


