background image

80


Trademark and License Information

LICENSOR’S SUPPLIERS DO NOT MAKE OR PASS ON TO END USER OR ANY OTHER THIRD PARTY, ANY 
EXPRESS, IMPLIED OR STATUTORY WARRANTY OR REPRESENTATION ON BEHALF OF SUCH SUPPLIERS, 
INCLUDING, BUT NOT LIMITED TO THE IMPLIED WARRANTIES OF NON-INFRINGEMENT, TITLE, MERCHANTABIL-
ITY OR FITNESS FOR A PARTICULAR PURPOSE.

Digital Light Processing

®

 and DLP

®

 are registered trademarks of Texas Instruments.

Manufactured under license from Dolby Laboratories.  Dolby is a trademark of Dolby Laboratories.

ENERGY STAR

®

 and the ENERGY STAR mark are registered U.S. marks.  ENERGY STAR is a registered mark owned 

by the U.S. government.

HDMI

 the HDMI logo and High-Definition Multimedia Interface are trademarks or registered trademarks of HDMI 

Licensing LLC.

  Imaging Science Foundation Certified Calibration Controls

The software in this TV is based in part on the work of the Independent JPEG Group, copyright © 1991-1998, Thomas 

G. Lane, all rights reserved.

x.v.Color

 and the 

x.v.Color

 logo are trademarks of Sony Corporation.

ChannelView™, DeepField™ Imager, Easy Connect™, NetCommand®, PerfectColor™, PerfecTint™, Plush 1080p® 
5G, SharpEdge™, Smooth120Hz™ are trademarks of Mitsubishi Digital Electronics America, Inc.

Trademark and License Information

Summary of Contents for WD-60737

Page 1: ...Consumer Relations at 800 332 2119 For information on System Reset please see the back cover To order replacement or additional remote controls or lamp cartridges visit our website at www mitsuparts com or call 800 553 7278 837 Series IR emitter cables for NetCommand home theater control are available for purchase from Mitsubishi Call 800 553 7278 and request either part number 242D483020 two ende...

Page 2: ...E COVER OR BACK NO USER SERVICEABLE PARTS INSIDE REFER SERVICING TO QUALIFIED SERVICE PERSONNEL TV WEIGHT This TV is heavy Exercise extreme care when lifting or moving it Lift or move the TV with a minimum of two adults To prevent damage to the TV avoid jarring or moving it while it is turned on Always power off your TV unplug the power cord and discon nect all cables before moving it WARNING To r...

Page 3: ...us Display 23 TV Signals and Display Formats 24 3D Video 25 Using the TV with a Personal Computer 26 Camera Images and Music Files 28 Introduction to Home Theater Control 31 4 TV Menus Main Menu 32 Menu Navigation 32 Adjust 33 Captions 37 Initial 38 Inputs 40 Lock 42 5 NetCommand IR Control About NetCommand IR Control 45 IR Emitter Placement 46 Initial NetCommand Setup 47 Operating NetCommand Cont...

Page 4: ...5B403001 Important Information About Your TV Installation and Operating Notes Custom cabinet installation must allow for proper air circulation around the television NOTE TO CATV SYSTEM INSTALLER THIS REMINDER IS PROVIDED TO CALL THE CATV SYSTEM INSTALLER S ATTENTION TO ARTICLE 820 40 OF THE NEC THAT PRO VIDES GUIDELINES FOR THE PROPER GROUNDING AND IN PARTICULAR SPECIFIES THAT THE CABLE GROUND SH...

Page 5: ...ipod bracket or table specified by the manufacturer or sold with the apparatus When a cart is used use caution when moving the cart apparatus combination to avoid injury from tip over 13 Unplug this apparatus during lightning storms or when unused for long periods of time 14 Refer all servicing to qualified service personnel Servicing is required when the apparatus has been damaged in any way such...

Page 6: ... stereo signals The HDMI inputs can also accept a variety of PC signals and resolutions These inputs support HDMI 1 3 Deep Color up to 36 bits and the x v Color extended color gamut Used with an adapter these HDMI inputs also accept compatible digital DVI video signals HDMI inputs provide additional high performance high definition connections for maximum flexibility in your choice of home theater...

Page 7: ...dicator and confirm that TV mode is active To change press the side button additional times to activate TV mode GUIDE MENU INFO BACK TV Aim the remote control 2 at the TV and press the POWER key Wait for the Welcome screen GUIDE MENU INFO BACK Press 3 if you wish to change the menu language to Español Press 4 to highlight EXIT Press ENTER to clear the menu 1 Remote Control 2 Two AA Batteries 3 Bas...

Page 8: ...annel CHANNEL DOWN TV Controls Note To operate other audio video devices using the TV s remote control See Appendix A Programming the Remote Control For HDMI devices compatible with the TV s HDMI Control feature see Appendix C 837 Series See page 45 for NetCommand IR Learn ing of device keys For use of specific keys with NetCom mand controlled devices see Special Operation Methods page 48 The MORE...

Page 9: ...oments for the status indi cator to stop blinking and press POWER to turn the TV on again Key Off Steady On Slow Blinking Fast Blinking LED Color TV Condition None TV is powered off Normal operation Green TV is powered on Normal operation Green TV powered off auto on TV Timer is set Normal operation TV can be turned on at any time Green TV just powered off and lamp is cooling Sixty seconds after t...

Page 10: ...age 52 Press 6 BACK to close the New Device Found screen The TV will then display the New Device Found screen for the next connection it finds Using the ANT Antenna Input If using an antenna or direct cable service no cable box connect the incoming coaxial cable to the TV s ANT input Refer to page 18 You must save channels to memory with a channel scan to enable reception of all available high def...

Page 11: ...OUTPUT jack and the right red AVR AUDIO OUTPUT jack For an HDMI A V receiver select AVR from the list of device types if the A V receiver is not recognized automatically HDMI CEC Devices Compatible with the TV s HDMI Control Feature Compatible CEC enabled HDMI devices are often recognized auto matically by the TV HDMI Control may allow you to control some functions of a CEC enabled device See Appe...

Page 12: ... Cable Only Press GUIDE to display ChannelView channel listings highlight a channel number and press ENTER to tune Watching DVDs or Videos TV Connected to a DVD Player DVR or VCR Press ACTIVITY and select a movie source from the Activity menu If you named devices during Auto Input Sensing select the input from the Watch Movie group Activity menu DVD input selected Basic TV Operation TV Tips Turnin...

Page 13: ...name of the adjustment you want Press 4 to change the setting Other TV Features Activate Audio Lock to control your sound system with the TV s remote control left in TV mode See page 59 To set the TV Clock see page 38 Set the TV Clock if you plan to use the TV Timer page 38 or ChannelView page 22 features To set parental controls see the Lock menu page 42 To change the input names that appear in t...

Page 14: ...HDMI over component video and choose component video over composite video Picture Quality For best picture quality route signals directly from the input device to the TV whenever possible Surround Sound For best surround sound audio quality route audio signal cables or HDMI cables from the source device directly to your A V receiver or sound system IMPORTANT Accessory items such as cables adapters...

Page 15: ...e device to the TV 1 5 8 3 4 9 2 6 10 HDMI page 17 AVR Audio OUTPUT page 20 DVI PC INPUT page 18 DIGITAL Audio OUTPUT page 20 VIDEO composite video page 19 Y Pb Pr component video page 17 ANT page 18 IR NetCommand Output page 46 Offered on 837 series 3D GLASSES EMITTER page 25 7 Convenience Inputs Main Connection Panel Using an Audio Only Device Keep an unused RCA style con nector in the Y VIDEO j...

Page 16: ...nputs use these jacks for left and right analog audio 7 AVR AUDIO OUTPUT Use AVR AUDIO OUTPUT to send analog audio of the current program to an analog A V surround sound receiver or stereo system Digital audio from digital channels and HDMI devices is converted to analog audio by the TV for output on this jack This is the only audio connection needed to the TV if using an analog A V receiver or st...

Page 17: ...s can receive digital stereo audio signals only To hear digital surround sound from an HDMI device connect the device s HDMI or digital audio output directly to your A V receiver See the Owner s Guides for those devices for instructions Y Pb Pr Component Video Device HDTV Cable Box Satellite Receiver DVD Blu ray Player If your source device has an HDMI output use the connections for HDMI devices d...

Page 18: ...MI DVI OUT AUDIO R L Digital DVI device TV main panel Audio cables DVI to HDMI cable Antenna or Cable TV Service Connect the incoming cable to the TV s ANT input Pb Pr Pb Pr INPUT 2 INPUT 1 480i 480p 720p 1080i 3D GLASSES EMITTER ANT RS 232C IR NetCommand Output R ANT ANT IN OUT Cable TV service UHF antenna VHF antenna TV main panel Not recommeded Other connection types provide better quality audi...

Page 19: ...e or VCR or DVD Recorder to a Cable Box Required Two way RF splitter Three coaxial cables Right and left audio cables Composite or component video cables Video and audio cables required to connect the TV to the cable box Notes Use composite video if only if component video or HDMI are unavailable For an HDMI connec tion between the TV and recorder see page 17 When using this connection configurati...

Page 20: ... and switching between digital sound and analog stereo sound from the TV A V Receiver with HDMI Output Required One HDMI to HDMI cable This option allows you to view content from devices connected to an A V receiver The A V receiver can send audio and video to the TV over a single HDMI cable You can use an HDMI connection as described here in addition to an audio connection from the TV s audio out...

Page 21: ...off after the length of time you set To set the TV to turn on at a certain time of day see the Initial Timer menu on page 38 Setting the Sleep Timer Press 1 MORE on the remote control The TV s MORE menu will display Press 2 CANCEL SLEEP repeatedly to increase the time in 30 minute increments The maximum is 120 minutes Press 3 BACK or wait five seconds without pressing any keys for the message to d...

Page 22: ... then 9 AUDIO Press 2 to show the Speakers option The Speak ers option will display only if there is a recognized audio device on an audio or HDMI output Press 3 to select either AV Receiver Head phones or TV Disconnecting an Analog A V Receiver When you disconnect an analog A V receiver change the Speakers setting to TV to hear sound from the TV speakers Change the setting using the remote con tr...

Page 23: ...it al source Stereo Surround Anal og source Stereo Stereo SAP SAP 13 Available language digital source antenna only 14 Signal strength indicator digital source antenna only Status Display 5 402 101 KABC Monday Night Football TV PG DLSV St Louis vs Tampa Bay played in Tampa for 1 3 2 4 6 7 Sleep 30 min 8 13 14 Tuesday 9 10 PM Surround English HD 1080i Standard 12 11 10 9 GUIDE MENU INFO BACK ACTIVI...

Page 24: ...creen by cropping the top and bottom useful for reducing the letter box top and bottom bars of non anamorphic DVD images Zoom Enlarges the picture to fill the screen by cropping the sides top and bottom to eliminate black bars 480i 480p and SD 4 3 signals Eliminates top and bottom bars on anamorphic DVDs with a 2 35 1 aspect ratio 720p 1080i SD 16 9 and HD signals Eliminates bars added to squarish...

Page 25: ...ideo Signal Assign Name Computer Recommended 1080p 60 Hz 1920 X 1080 The image will fill the TV screen Other 60 Hz computer video signals compatible with the TV will display with black bars See Computer Display Formats on page 27 PC Any other 3D video source To see 3D video the signal must be 1080p 60 Hz Any other name Press 6 BACK to close the New Device Found screen Watching 3D Video Note 3D gla...

Page 26: ...es the video signal correctly Press 5 BACK to close the New Device Found screen 1 2 3 HDMI AVR AUDIO OUTPUT L R Pb Y VIDEO Pr Pb Pr INPUT 2 INPUT 1 DIGITAL AUDIO OUTPUT DVI PC AUDIO 480i 480p 720p 1080i L R L R INPUT AUDIO Y VIDEO 3D GLASSES EMITTER ANT IR NetCommand Output R 1 2 3 HDMI AUDIO R L Computer with HDMI audio and video output TV main panel An HDMI to HDMI connection carries all video a...

Page 27: ...e format aspect ratio best suited to the image See the chart on this page showing how different computer resolutions can be displayed on the TV Image Resolution Your Mitsubishi TV can display the resolu tions shown in the chart from standard VGA 640 x 480 through 1920 x 1080 signals at a refresh rate of 60 Hz In most cases the computer will select the best resolution match to display on the TV You...

Page 28: ...st Use these keys while playing a slide show or playlist or ENTER Replays the slide show or playlist Pauses a slide show or playlist Stops a slide show or playlist Displays the previous or next slide Plays the previous or next track GUIDE Rotates an image clockwise in 90 incre ments BACK Displays the USB Media Player menu MENU Displays the main menu and stops play Activity Displays the Activity me...

Page 29: ...an Transfer files to a different USB device Use your digital camera s composite video output See page 30 USB Media Setup Menu Use the USB Media Setup menu set up play of a slide show or playlist If JPEG image files and mp3 files are on the USB device choose Slideshow Music Slideshow Music only Slideshow Select either Auto or Manual advance for the slide show During manual operation press ENTER to ...

Page 30: ...signal type to 2 NTSC and put the camera into playback mode With the camera still turned on connect your digital 3 camera s composite video cable usually yellow to the TV s Y VIDEO jack To hear audio connect the camera s audio output cable to the AUDIO L jack Optional Audio Cable USB HDMI 4 INPUT 3 AUDIO L R Pb Y VIDEO Pr AUDIO L Y VIDEO Camera connection using a composite video cable When the 4 N...

Page 31: ... A V Device HDMI Cable 837 Series NetCommand IR Control Any Connection Type Set up NetCommand IR control of the device s keys as desired See IR Emitter Placement page 46 and Initial NetCommand Setup page 47 Any Connection Type TV A V Device Source device connected to an A V receiver connected to the TV CEC Enabled HDMI A V Receiver The TV s remote control may operate some functions of a connected ...

Page 32: ... and then select from one of these categories Adjust Customize picture and sound settings 33 Captions Turn closed captions on and off customize caption displays 37 Initial Perform basic TV setup Set language scan memorize channels and edit channel options set the TV clock set Lamp Energy set auto on TV Timer 38 Input Assign names to TV inputs enable HDMI Control assign activities to inputs 837 Ser...

Page 33: ...when there is no video signal from the current input Audio Screensaver On Off Select On to display a random pattern while playing an audio only input To use this feature the input must be either Named as an audio source e g CD or MP3 Player and selected under the Listen Music activity or Be the ANT input Film Mode 480i and 1080i signals only Auto Off In Auto the TV automatically detects and applie...

Page 34: ... ENTER to see the adjustment display Press 4 to change settings Use 5 to navigate to additional options and press to change settings Press 6 MENU to return to the Advanced Picture menu Press MENU to close the menu The Advanced Picture adjustments will be in effect for the current input To use the custom Picture Mode at a later time Press MENU and go to Adjust Picture Picture Mode and 737 and C9 Se...

Page 35: ...ure detail and clarity Color Temp High Gives white images a cool cast May provide the most realistic picture under bright lighting Adjusts the white balance Settings are stored indepen dently for each Picture Mode Low Gives white images a warm cast Natural Color Temp at the low setting displays video at approximately the 6500K industry standard for NTSC pictures Video Noise High Use High with poor...

Page 36: ...ect Listen To Applicable only to analog chan nels from the ANT input Stereo The TV plays stereo broadcasts in stereo and mono broadcasts in mono The word Stereo is displayed when you tune to a channel broadcasting in stereo Mono Reduces background noise Use when receiving a weak stereo audio signal All audio is played as mono with this setting SAP Second Audio Program Selects an additional monaura...

Page 37: ...Services Digital On if Mute Caption 1 Caption 6 Off On if Mute Displays digital closed caption signal Caption 1 when audio from the TV speakers is muted When watching TV press MUTE to turn closed captions on off Caption 1 Caption 6 Caption signals sent by the broad caster Analog On if Mute CC 1 CC 4 Text 1 Text 4 Off On if Mute Displays analog closed captions signal CC 1 when audio from the TV spe...

Page 38: ...d for accurate ChannelView updates Timer Timer On Off Select On to enable the Timer The Timer tells the TV to power on automatically at a time you set Use this menu to set a day time input and channel for the Timer If the TV is already on at the requested time the TV will automati cally change to the designated channel or input The TV clock must be set before you can use the Timer feature To remin...

Page 39: ...ber for the new digital channel See the website www antennaweb org for help Press 2 ACTIVITY and select the Ant input Use the number keys and 3 CANCEL key to enter the physical channel number followed by 1 and ENTER For example for physical channel 36 press 3 6 1 ENTER The TV will search for a digital channel on the channel 36 frequency When it finds the channel it will a Add the channel to memory...

Page 40: ...g an HDMI device When you disconnect an HDMI device the icon remains in the Activity menu until you remove it Select Delete in the Inputs Name menu to remove an unwanted icon for an HDMI input If the New Device Found screen does not display as expected when you connect an HDMI device see Reac tivating Auto Input Sensing for an HDMI Input page 11 HDMI Control and CEC Enabled Devices See Appendix C ...

Page 41: ...ssigned in the New Device Found menu or the Inputs Name menu The table below summarizes the device groupings that can appear in the Activity menu Key Activity assignments made automatically by the TV X Activity assignments you can make using the Inputs Activity menu Watch TV Watch Movie Play Game View Photos Listen Music Antenna AV Receiver Blu ray X X Cable Box Camcorder CD Audio DVD X DVD2 X DVR...

Page 42: ...k change to a different channel or device If a program is blocked you can still use the TV without entering a pass code Change to a channel airing an allowed program or change to another device Parental Menu The TV comes from the factory with the rating locks turned off and with pre set U S ratings TV PG and movie rating PG Turn on blocking for U S ratings to activate these rating restrictions Use...

Page 43: ...g the TV content categories listed below TV Y7 Youth 7 and older TV G General Audience For the entire family TV PG Parental Guidance Parental Guidance recommended may not be suitable for some children TV 14 Adolescent 14 and older Not recommended for children under 14 TV MA Mature Audience For adults only FV Fantasy Violence Applies to TV Y7 only TV Content Categories D Sexual Dialog Applies in di...

Page 44: ...rol panel Use this option if small children try to press TV buttons To release the Panel Lock from the TV s control panel press and hold the ACTIVITY button for ten seconds If the TV is powered off press POWER after the lock releases to make the TV power on To reactivate the lock return to this menu and change the setting to On Other Other Menu Options alternate rating system This TV can recognize...

Page 45: ...t Sensing or at any convenient time afterward Important Note on NetCommand Be sure to connect the IR emitter cable to the TV and properly place the emitters so that NetCommand can control your devices NetCommand operates by sending remote control signals from the TV to your other devices via the IR infrared emitters telling the devices to play record change inputs adjust volume change chan nels or...

Page 46: ...IR NetCommand Output R 1 2 3 HDMI IR NetCommand Output R IR NetCommand Output R TV Main Panel D I G I T A L S U R R O U N D S CH A V Receiver Other A V Device 1 3 2 2 3 Connecting IR NetCommand Output ront of a gle average ed device front shared two average zed devices or IR sensor In front of a single average sized device On top of a single tall device In front shared by two average sized devices...

Page 47: ... text stops flashing before the check mark appears repeat the previous step To remove the key from NetCommand control press the CANCEL key while the key name is highlighted Press the 6 keys on the TV s remote control to highlight other keys on the list Repeat steps 4 and 5 for each additional function you wish to control through NetCommand Note Device keys in the far right column will be asso ciat...

Page 48: ...ces Menu Displaying a Menu for the Current Device Learn the MENU key on the original remote in the Menu learning position Press MORE and then 1 to send the menu command to the current device Guide Displaying the On Screen Program Guide cable box or satellite receiver Learn the 1 Guide key on the original remote in the Guide learning position Learn the 2 PAGE UP and PAGE DOWN keys of the original r...

Page 49: ...rning position only if the original remote control has separate keys for Enter in menus and Enter for channel selection Press digit key s and then press ENTER NetCommand will send the Enter signal for channel selection Cancel CANCEL as the Cancel or Exit Function Learn the Cancel or Exit function in the NetCommand Cancel learning position Press 1 MENU or GUIDE to display the menu or guide Press 2 ...

Page 50: ...Lower Skip Backward Disc Page Up Page Up in Guides Page Dn Page Down in Guides Up Arrow up Down Arrow down Left Arrow left Right Arrow right Enter Enter or Select menus Cancel Cancel or erase menus Play Start playback Stop Stop playback Forward Fast Forward Rewind Rewind Fast Reverse Pause Pause playback Record Start Recording 1 2 3 4 5 6 7 8 9 0 Digits 1 2 3 4 5 6 7 8 9 0 Enter digits Use after e...

Page 51: ...te control operates the volume and mute functions Also when you switch to a device in the Activity menu the A V receiver automatically switches to the correct audio input for the device Several types of A V receiver control can be set up using the Inputs AVR menu Power and volume See the next page Audio switching For most equipment setups see Case 1 Automatic A V Receiver Switching to the TV Audio...

Page 52: ...me Open the 1 Inputs AVR screen in one of two ways If using the New Device Found screen for the A V receiver highlight NetCommand and press ENTER to open the AVR screen If performing NetCommand setup at any time after Auto Sensing Press MENU highlight Inputs and highlight AVR to open the AVR menu The first function highlighted in the 2 AVR screen is always Power Aim the TV s remote control at the ...

Page 53: ...e from TV only Send audio from the ANT input to the A V receiver from the TV s analog or digital audio output Use this setup to make the A V receiver switch to its designated TV audio input when viewing programming from the ANT input Setting Up A V Receiver Control continued Analog Stereo Audio Audio from sources with only analog stereo output such as a VCR can be sent either directly to the A V r...

Page 54: ...ceiver DVD audio input DVD Player with Digital Surround Sound video digital surround sound digital surround sound analog audio DVD Player with Digital Surround Sound Case 2 A V receiver audio from a device providing surround sound directly to the A V receiver In the 1 Inputs AVR menu press to highlight the name of the A V receiver input to control In this example it is the DVD input Press 2 ENTER ...

Page 55: ...l be lost In some cases audio from a device connected to the A V receiver may not be passed over the HDMI cable to the TV speakers In these cases you must use the A V receiver speakers to hear audio Multiple video inputs through a single HDMI cable You can connect multiple video devices to an A V receiver that has an HDMI output The optional audio connection allows you to hear through the A V rece...

Page 56: ... DVD INPUT key on the A V receiver s remote control When a check appears next to 9 DVD release the DVD INPUT key If the text stops flashing before the check mark appears repeat this step To erase the IR code just learned press CANCEL while the name is highlighted If there are no more devices to set up highlight 10 EXIT and press ENTER or continue to set up addi tional A V receiver audio video sour...

Page 57: ...57 Appendix A Programming the Remote Control 58 Appendix B Bypassing the Parental Lock 65 Appendix C HDMI Control of CEC Devices 67 Appendix D TV Care 70 Appendix E Troubleshooting 73 Appendices ...

Page 58: ...ord playback keys FAST Forward Pause Play Record Reverse Stop A V Receivers MUTE POWER SLEEP from MORE menu VOLUME 0 9 Number Buttons Direct Input Selection buttons numbers and LAST on some Mitsubishi models CD Players not all functions for all models SLEEP from MORE menu FAST Forward Pause Play Reverse Stop 0 9 Number Buttons DVD Players not all functions for all models CANCEL on some models CHAN...

Page 59: ...e Device Type Code CABLE SAT VCR DVD AUDIO IMPORTANT You may need to reprogram the remote control after changing the batteries Record the codes for each mode in the space provided to make this faster Code Verification To determine the code programmed for any mode Set the mode to the one you wish to verify 1 Press and hold 2 POWER on the remote control for several seconds until the mode indicator b...

Page 60: ...Players Acoustic Research 40420 Akai 40083 Burmester 40420 California Audio Labs 40029 DKK 40000 Fisher 40000 Garrard 40420 Hafler 40173 Harman Kardon 41202 40173 40100 40083 Inkel 40180 Integra 40101 JVC 41294 40072 Kenwood 40626 40190 40037 40029 40000 KLH 41711 41318 Koss 41317 LG 41208 Magnavox 40038 Marantz 40626 40435 40180 40038 40029 McIntosh 41703 MCS 40029 Memorex 40420 40000 MGA 40083 M...

Page 61: ...2 11414 11392 11377 11142 11109 10819 10749 10639 10566 10392 10247 10099 Dish Network System 11775 11505 11170 10775 Dishpro 11775 11505 10775 Echostar 11775 11505 11170 10775 Expressvu 11775 10775 Fortec Star 11821 Funai 11377 GE 10566 GOI 11775 10775 Hitachi 11250 10819 10749 Houston 10775 HTS 11775 10775 Hughes Network Systems 11749 11442 11142 10749 Humax 11790 11781 Innova 10099 JVC 11775 11...

Page 62: ...LXI 20067 20042 20037 20000 Magnasonic 20593 20278 20037 20000 Magnavox 21593 20618 20593 20563 20081 20048 20039 20037 20035 20000 Marantz 20081 20038 20035 Marta 20037 Matsui 20209 20037 Matsushita 20162 20081 20035 Media Center PC 21972 MEI 20035 Memorex 20479 20278 20209 20162 20048 20047 20046 20039 20037 20035 20000 Metz 20037 MGA 20060 20043 Microsoft 21972 Mind 21972 Minolta 20042 Mitsubis...

Page 63: ...hite Westinghouse 20479 20278 20209 20000 World 20479 20209 XR 1000 20035 20000 Yamaha 20038 Zenith 21139 20479 20278 20209 20039 20037 20033 20000 ZT Group 21972 DVD and Blu ray Players 3D LAB 30539 30503 Accurian 31416 30675 Acoustic Solutions 30730 Adcom 31094 Afreey 30698 Aiwa 30641 30533 Akai 31089 30770 30705 30695 Alba 30717 30672 Alco 30790 Allegro 30869 Amphion Media Works 30872 AMW 30872...

Page 64: ...03 30490 Philco 30675 Philips 32084 32056 31506 31354 31340 31267 31158 30675 30646 30539 30503 Phonotrend 30699 PianoDisc 31024 Pioneer 31571 31512 31460 30632 30631 30571 30525 30142 Polaroid 31086 31061 31020 Polk Audio 30539 Portland 30770 Presidian 31738 30675 Proceed 30672 Proscan 30522 Prosonic 30699 ProVision 30778 Qwestar 30651 Radionette 30741 RadioShack 30571 RCA 31769 30822 30790 30717...

Page 65: ...pen the Lock menu and make changes or press BACK to close the menu If any of the locks are turned on and you exit the menus when prompted for a new code the old code and all lock settings are retained If all locks are turned off and you exit the menus when prompted for a new code then the previous code is erased Lock Bypass Instructions Have Been Filed for Future Reference IMPORTANT Cut along the ...

Page 66: ...66 Appendices This page intentionally left blank ...

Page 67: ...tion Power on HDMI devices before connecting them to the TV Connect and set up HDMI devices one at a time Power on the device and allow it to complete the 1 power on sequence boot up Stop any playback Connect the device to one of the TV s HDMI inputs 2 When the TV detects the connection the 3 New Device Found screen will appear Note See If the New Device Found Screen Displays No HDMI Control Optio...

Page 68: ...New Device Found screen Optional Connect the TV s 8 DIGITAL AUDIO OUTPUT to an input on the A V receiver Use this additional connection if You want the ability to switch between the A V receiver speakers and the TV speakers You want to use the A V receiver to listen to devices connected to the TV only e g an antenna input or camcorder 837 Series 9 If desired perform NetCommand IR Learning to suppl...

Page 69: ...RE and then 1 MENU to display the menu The MORE Menu Press MORE on the TV s remote control to see a menu of additional supported functions for the current CEC enabled device To issue a command press the number key indicated in the menu MORE key Sample menu for a CEC enabled DVD player Resolving CEC Conflicts Because each manufacturer selects which CEC func tions to support some devices can conflic...

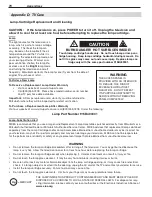
Page 70: ...because the lamp is very hot Allow the television to cool for at least one hour before replacing the lamp cartridge Do not remove the lamp cartridge except when replacing it Careless treatment can result in injury or fire Do not touch the lamp glass element It may be very hot and break causing injuries or burns Be sure not to insert any metal or flammable object into the lamp cartridge opening as ...

Page 71: ... YOUR HANDS THOROUGHLY AS THIS 4 LAMP CONTAINS MERCURY Disposal of the Old Lamp Cartridge Lamp under warranty All lamps replaced under war ranty must be returned to Mitsubishi Use the return shipping label provided and send to Mitsubishi Digital Electronics America 625 Braselton Parkway Suite 200 Braselton GA 30517 IMPORTANT Lamps found to be without defect will be returned and charged back to the...

Page 72: ...3 7278 General Cleaning Precautions DO NOT allow liquid to enter the TV through the ventilation slots or any crevice DO NOT use any strong or abrasive cleaners as these can scratch the surfaces DO NOT use any cleaners containing ammonia bleach alcohol benzene or thinners as these can dull the surfaces DO NOT spray liquids or cleaners directly on the TV s surfaces DO NOT scrub or rub the TV harshly...

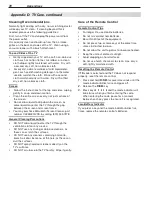
Page 73: ...ress 3 ENTER again to reset All Audio and Video settings for the individual input are reset except for the Listen To Language audio Balance Closed Caption and Advanced Picture settings TV Reset Comparison Guide You can resolve many common TV problems using the reset functions described in the following table See also the troubleshooting suggestions later in this appendix IMPORTANT Before you chang...

Page 74: ...emote control is misplaced Auto Input Sensing for HDMI If the New Device Found screen does not appear when you connect an HDMI device Disconnect the HDMI device 1 Delete the HDMI input in the 2 Inputs Name menu see page 40 Power on and connect the new 3 device The New Device Found screen will display System Reset If the TV does not turn on or off does not respond to the remote control or control p...

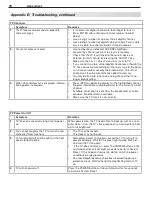
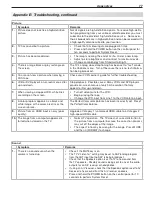
Page 75: ...device is turned on Begin play of the device 7 You have forgotten your Lock menu pass code See Bypassing the Parental Lock Appendix B 8 Rating restrictions are not working Open the Lock Parental Lock menu and Verify that the ratings locks are active Check the Lock Time Unlock Time to check if rating restric tions are disabled Rating restrictions apply only to content on the ANT input 9 On screen d...

Page 76: ...e TV takes several seconds to respond to channel changes It is normal for digital channels to take longer to tune in Press ENTER after entering a channel number to avoid delays Use a 4 digit number for an over the air digital channel Use a 6 digit number for digital cable channels if your cable service is able to recognize 6 digit channel numbers 2 You cannot access a channel Use number keys inste...

Page 77: ... half resolution that may appear to jitter up and down 7 When viewing a stopped VCR white lines are rolling on the screen Turn off video mute for the VCR Begin playing the tape Change the VCR input from Line 1 to the VCR antenna input 8 A color program appears as a black and white image or the colors are dim or the screen is black The PerfectColor color balance has been incorrectly set Reset the P...

Page 78: ... Disconnect headphones Connect the TV s AUDIO OUT to the A V receiver and select AV Receiver from the New Device Found screen NetCommand IR Control NetCommand equipped models only Symptom Remarks 1 Cannot see the menu from the A V Receiver A V Receiver Set Up for Audio Only Switching The A V Receiver is not connected to any video input of the TV To check the A V Receiver menu temporarily plug into...

Page 79: ...ver setup for a digital surround sound device 5 There is no sound or picture from the A V receiver for my DVD player or other device connected to the A V receiver the A V receiver should be sending video to the TV over an HDMI cable A V Receiver Set Up for Audio and Video Switching over HDMI The NetCommand A V receiver setup is not switching audio and video inputs properly because you did not lear...

Page 80: ...ERGY STAR and the ENERGY STAR mark are registered U S marks ENERGY STAR is a registered mark owned by the U S government HDMI the HDMI logo and High Definition Multimedia Interface are trademarks or registered trademarks of HDMI Licensing LLC Imaging Science Foundation Certified Calibration Controls The software in this TV is based in part on the work of the Independent JPEG Group copyright 1991 1...

Page 81: ...s This License Agreement grants you no rights to use such content except that you own the media on which the Software is recorded but MDEA and its licensors retain ownership of the Software itself All rights not expressly granted are reserved by MDEA 5 EXPORT RESTRICTIONS MDEA is licensing the Software for use within the United States You agree that you will not export or re export the Software Yo...

Page 82: ...dressed as you Activities other than copying distribution and modification are not covered by this License they are outside its scope The act of running the Program is not restricted and the output from the Program is covered only if its contents constitute a work based on the Program independent of having been made by running the Program Whether that is true depends on what the Program does 1 You...

Page 83: ...y way you could satisfy both it and this License would be to refrain entirely from distribution of the Program If any portion of this section is held invalid or unenforceable under any particular circumstance the balance of the section is intended to apply and the section as a whole is intended to apply in other circumstances It is not the purpose of this section to induce you to infringe any pate...

Page 84: ... Embedded Software is modified or changed in any manner except as specifically authorized by MDEA c Labor For thirty 30 days after the original purchase at retail we will repair or replace at our option the lenticu lar screen if it proves defective For certain items that are designed to be replaced by the consumer including but not limited to some Embedded Software the consumer is solely responsib...

Page 85: ...oduct that is covered under this limited warranty all costs expenses or any other damages arising from product installation or set ups any adjustments of user controls including contrast bright ness color tint fine tuning sharpness other adjustment necessary to prepare the unit for display or use connection with any external audio receiver antenna cable or satellite systems or service of products ...

Page 86: ...ayer and TV s Remote Control 59 Connecting 17 18 DVI Device Connecting 18 F Fan Noise 4 Film Mode 33 Filter Air on lamp cartridge 70 Font digital closed captions 37 FORMAT aspect ratio MORE menu 24 Freeze Picture PAUSE key 8 Front Panel Blue Glow Accent Lighting 33 Controls 9 G Game 3D Video 25 Game Picture Mode 35 HDMI Cables for Games 16 GUIDE Key ChannelView 22 HDMI Control 68 NetCommand Contro...

Page 87: ... 17 18 Scan memorize channels 39 ScreenSaver 33 SD Standard Definition Signal 24 Service and Support 72 Signal Definitions 24 Signal Strength Indicator 23 Sleep Timer 21 Sound Controlling A V Receiver Volume NetCommand 52 Audio Lock 60 Level Sound 36 Sound Mode audio effects 36 Speakers Option 36 Standard Definition Signal 24 Standard Lamp Mode 39 Stand Part Number 4 Status Display 23 Stereo Syste...

Page 88: ... 553 7278 SYSTEM RESET If the TV does not respond to the remote control control panel buttons or will not power on off press and hold the POWER button on the control panel for ten seconds The TV will turn off Power on the TV and the green LED will flash quickly for about one minute The changes you made most recently before using SYSTEM RESET may be lost V41_V41 _V41C_IB_e_20090616 2009 Mitsubishi ...

Reviews: