


16
OPERA
TION
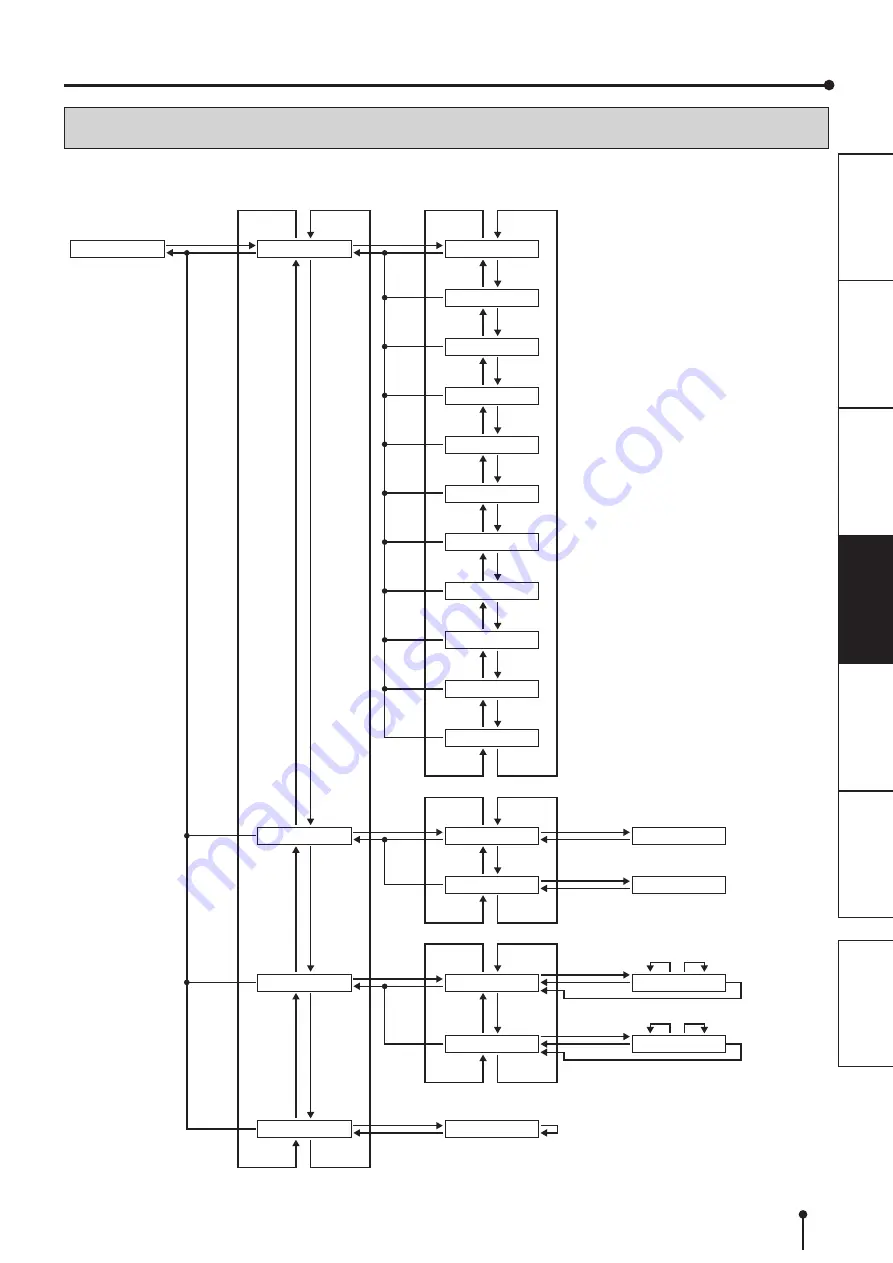
BUTTON OPERATION AND LCD INDICATION
Use the operator control panel buttons and LCD to review and change printer settings.
PRINTED: ******
PRINTER INFO>
READY[8x12]
PAPER LEFT: ***%
INK LEFT: ***%
MAIN FW: ******
FPGA: ******
TABLE: ******
SERIAL: ******
MODEL: ********
TPH MODEL: *****
TPH SN: ********
TPH RES: ****
10 LEVEL GRAY
CREATING
CREATING
TEST PRINTS>
WAIT TIME>
MAINTENANCE>
STATUS PRINT
WAIT TIME: ***
TIME OUT: ***
WAIT TIME: ***
TIME OUT: ***
CLEAR WASTE
ENTER
MENU
MENU
MENU
ENTER
ENTER
MENU
(Auto)
MENU
MENU
ENTER
MENU
ENTER
MENU
ENTER
ENTER
(Set value)
ENTER
(Set value)
ENTER
(Execute)
MENU
ENTER
MENU
MENU
MENU
MENU
MENU
MENU
MENU
MENU
MENU
MENU
MENU
-
+
-
-
-
+
-
+
-
+
-
+
-
+
-
+
-
+
-
+
-
+
-
+
-
+
MENU
MENU
MENU
-
+
-
+
+
-
+
-
+
(Change value)
-
+
(Change value)
(Print Test Pattern)
ENTER
(Auto)
(Print Test Pattern)
+
-
+
-
+
* Use the button shown in bold type.
USAGE


