


13
ARA
TION
Guide
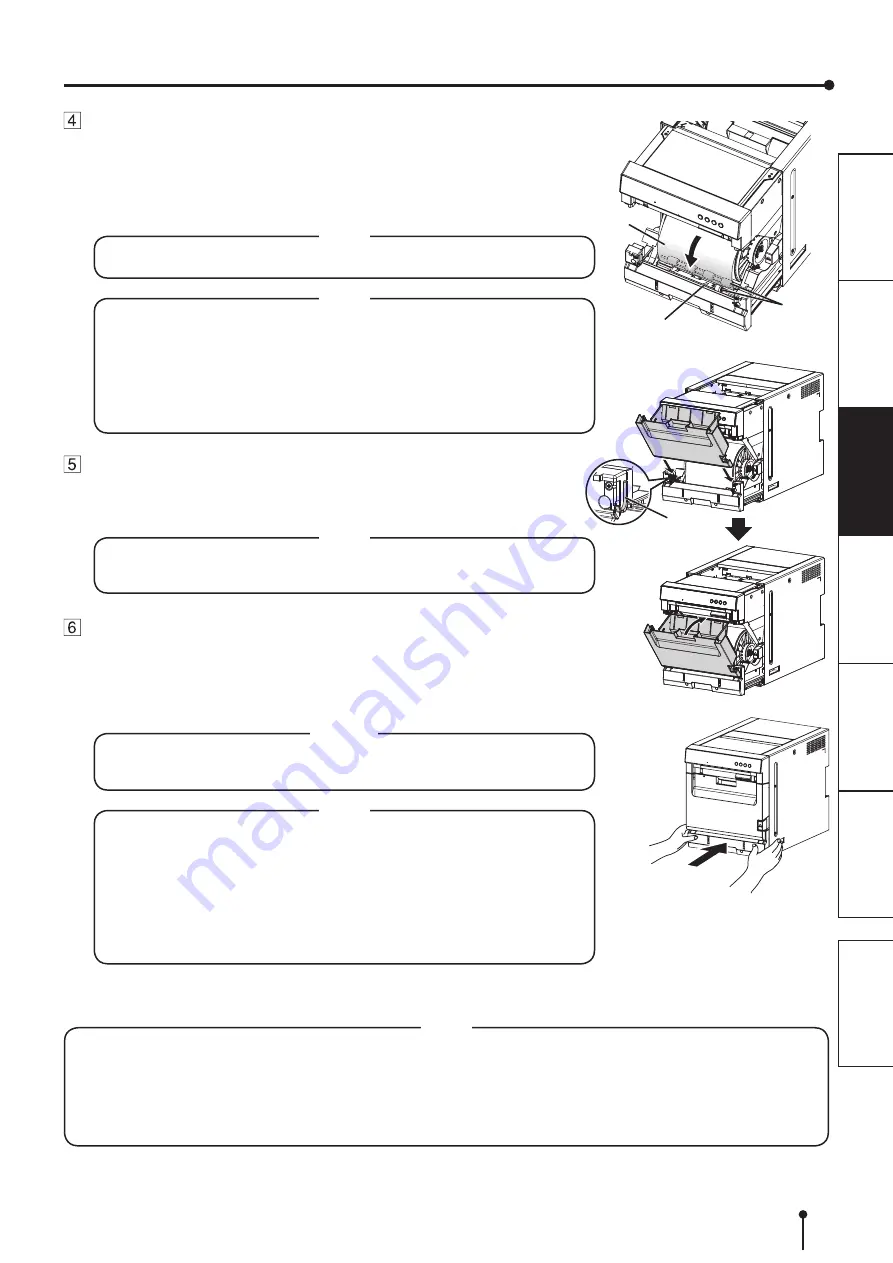
Remove the sticker and insert the print paper between the
rollers to feed it as shown in the figure. Insert the print paper
until the blue indicator at the front bottom of the slide door
illuminates.
Remove the sticker before inserting the print paper between the rollers. Make sure
to insert the paper straight.
• Keep the rollers clean. Dirt on the rollers may produce poor print quality.
NOTE
• When taking the print paper out, pull it up toward you by holding the
paper flanges.
• Make sure to turn on the power before replacing the print paper.
• Make sure to eliminate any slack from the print paper. If you carry out
the following steps without eliminating the slack, the print paper may be
damaged.
• Do not remove the barcode label.
NOTE
Mount the front cover bin.
Insert the projections at the bottom of both sides of the front cover bin along the
guides at the bottom of both sides of the slide door and then close the front cover
bin.
• Make sure that the front cover bin is mounted correctly. Incorrect
mounting may cause paper jam.
NOTE
Push the slide door to close.
Hold the handles in both sides and push the front of the printer with both hands to
close the slide door as shown in the figure.
When a new paper is loaded and the slide door is closed with the power turned on,
the paper will be automatically fed and cut. The printer ejects two pieces of paper
and displays “READY[8x12]” on the LCD.
• When closing the slide door, be careful not to get your hands caught
between the printer and the slide door. Otherwise, you may get injured.
CAUTION
• When closing the slide door, push it until a click is heard.
• If the ALARM indicator illuminates when the slide door is closed, the print
paper may have not been installed correctly. In this case, open the slide
door to make sure that the print paper has been installed correctly. Then
close the slide door again.
• The printer takes some time to finish initialization before starting the feed-
and-cut operation. This is not a malfunction. Wait for the printer to finish
initialization.
NOTE
Installation of the print paper and the ink ribbon is completed.
• Empty the front cover bin frequently to prevent jamming the strips at the print output slot. Whenever you replace the
paper, make sure to throw away the paper strips in the front cover bin.
• Whenever you replace the ink ribbon, clean the thermal head and the platen roller. For the cleaning procedures, see
• The LCD on the operator control panel may display “PAPER END” even when some print paper still remains. This is
not a malfunction.
NOTE
BEFORE OPERATION
Rollers
Blue indicator
paper


