Minuteman M220021H13 Operation & Service Manual Download Page 13

10

MAINTENANCE PROCEDURES

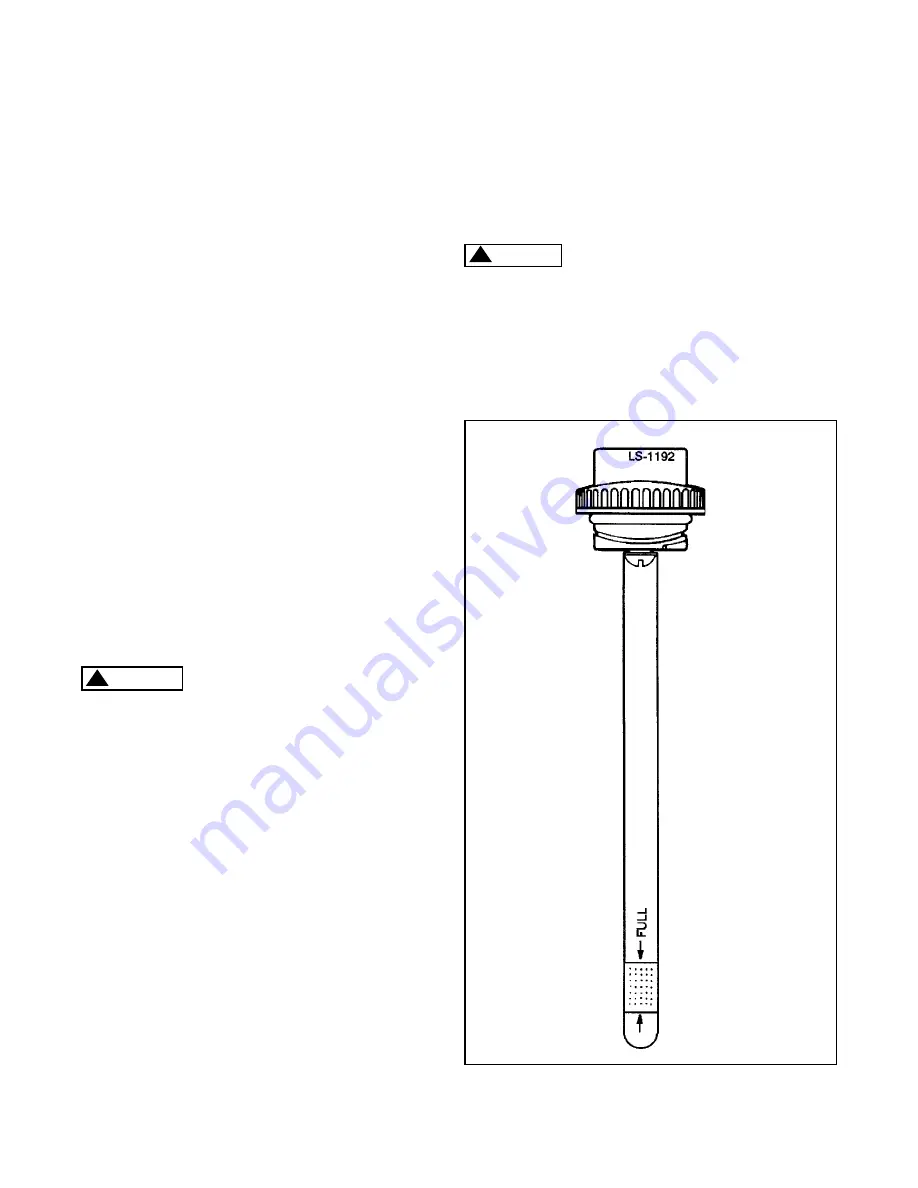
OIL FILL CAP AND DIPSTICK

NOTE: N.F.P.A. rule 58 8-1.4 states, “In the interest of
safety, each person engaged in installing, repairing,
filling, or otherwise servicing an LP-Gas engine fuel
system shall be properly trained in the necessary
procedures”.

3. Hose and Fuel Connections: Inspection: Check for gas

leaks by using a soapy water solution around all
connections with service valve turned on so the fuel
system is pressurized. Inspect all hoses for abrasions
and other signs of wear. Replace all damaged and worn
hoses. Fixing Leaking Joints: Uncouple bad joint, clean
joint and apply pipe sealing compound (use a Loctite
Pipe Sealant with Teflon or equivalent) to clean joint.
Re-couple  the joint, tighten plus 1/2 turn. Recheck for
leaks.

4. Carburetor Air Filter: 

NOTE: 

Failure to service and clean

carburetor air cleaner may produce excessive carbon
monoxide emissions.

Remove cover from the air cleaner.

Remove foam pre-cleaner and use the same
procedure for cleaning the foam pre-cleaner.

Rinse in mild detergent and squeeze out excess
water, do not wring out.

Clean filter seal, making sure no dust  is allowed
in the carburetor inlet.

Inspect paper element. Replace if dirty, bent or
damaged.

Install  the clean paper element, pre-cleaner, and
attached air cleaner cover.

OIL CHANGE

 Hot crankcase oil can cause burns if it

contacts the skin. Wear protective clothing and keep
fingers and hands clear when draining oil.

Used oil is harmful to the environment. Pour used oil into a
sealed container and deliver it  to the nearest recycling
center or automotive service station.

CHANGING THE OIL

1. Run engine for 5 minutes to warm oil, then stop engine

by closing the service valve on the tank. Turn the key
to the off position.

2. Locate the oil drain  located the right side of the engine

at its base. Remove the cap on the oil drain tube by
turning counter clockwise with a wrench.

3. Allow oil to drain completely into the receptacle.
4. Replace the cap by turning clockwise.
5. Remove oil fill cap. Always refer to the Engine Manual

for recommended oil and amount.

6. Check oil level with dip stick in oil fill cap. Add additional

oil if necessary. 

NOTE: TO CHECK OIL ON THE

BRIGGS & STRATTON MODELS, SCREW THE CAP
IN AND OUT AGAIN. ALWAYS MAKE SURE THE
MACHINE IS SITTING LEVEL WHEN CHECKING OIL.

7. Replace fill cap. Hand tighten only.


CAUTION

!

If the oil level is low, add API Class SG or SH oil (also SG/
CD, SG/CE, SH/CD or SH/CE) having an SAE viscosity
grade appropriate for the expected temperatures, as
indicated by Table 1.

DO NOT FILL TO A LEVEL ABOVE THE FULL MARK ON
THE DIPSTICK. Drain the excess oil if too much has been
added.

Too much oil can cause high oil

consumption, high operating temperatures and oil
foaming. Too little oil can cause severe engine damage.
Keep the oil level between the Full and Add marks on
the dipstick.

Reinstall the dipstick and cap after checking or adding oil,
turning it clockwise until it is secure.

    WARNING

!

Summary of Contents for M220021H13

Page 1: ...Mirage Propane Burnisher OPERATION SERVICE PARTS CARE Model M220021H13...

Page 2: ......

Page 3: ...npacking Instructions User Tips 2 4 General Warning Information 5 6 Engine Set Up 7 Operation 8 10 General Maintenance Information 11 12 Trouble Shooting 13 18 Engine Specifications 19 Warranty Inform...

Page 4: ...y instructions for venting overfilled tanks in safety section in this manual Never leave machine unattended with engine running Never change or alter fuel system unless authorized by Minuteman Interna...

Page 5: ...practice that can result in severe personal injury or death Thissymbolreferstoahazardorunsafe practice that can result in personal injury or product or property damage Fuels electrical equipment batt...

Page 6: ...eed above maximum ratings Explosive Fuel LPG is extremely flammable and is heavier than air and tends to settle in low areas where a spark or flame could ignite the gas Do not start or operate this en...

Page 7: ...case cylinder head exhaust system and other components can get extremely hot from operation To prevent severe burns do not touch these areas while the engine is running or immediately after it is turn...

Page 8: ...and oil foaming Do not overfill the crankcase WARNING CAUTION PRE START CHECKS Inspect the engine visually Check for loose or missing parts and any damage that may have occurred in shipment Starting t...

Page 9: ...trap fuel in the lines which can cause a backfire and cause damage to the engine NOTE In case of emergency always turn ignition key off NOTE Machines without clutch the pad starts to rotate immediate...

Page 10: ...below freezing Make sure the engine oil viscosity is appropriate for the ambient temperatures and change the oil if necessary See Table 1 If the temperature drops before you have the chance to change...

Page 11: ...lly and audibly check exhaust system for leaks 2 Perform more often when running under severe operating conditions 3 Required for initial break in only 4 Required for initial 100 hours 200 hour interv...

Page 12: ...n cause overheating and engine damage Keep the cooling fins and air inlet screen clean MAINTENANCE PROCEDURES 4 Check the engine oil level The equipment must be parked on a level surface and the engin...

Page 13: ...tive clothing and keep fingers and hands clear when draining oil Used oil is harmful to the environment Pour used oil into a sealed container and deliver it to the nearest recycling center or automoti...

Page 14: ...tions 3 The engine cranks but fails a Check the fuel tank or LPG container and fill as necessary to start b Check and if necessary reconnect the fuel line to the vapor withdrawal fitting on the LPG co...

Page 15: ...for servicing and instruction SMELL OF BURNED RUBBER CAUSE Belt out of adjustment SOLUTION Refer to Maintenance Procedures EXCESS VIBRATION CAUSE Engine overload loose bolts on engine or deck of unit...

Page 16: ...13 ENGINE 13HP HONDA...

Page 17: ...30 1 Hose Barb 30 450076 2 Crimp Clamp 31 220269 1 Fuel Hose 3 8 ID x 30 32 220192 1 Tank Frame Weldment 33 220070 1 1 High Pressure Hose 34 220065 1 45 Male Elbow 1 4 x 3 8 35 62 252 A 1 Connector Fe...

Page 18: ...15 ENGINE 13HP HONDA...

Page 19: ...20 77 81 A 1 Spacer 21 220041 1 Belt Idler w Bushing 22 364 816 1 Nut Nyloc 1 2 13 23 220010 1 Belt Tensioner Assy 24 220097 1 V Belt BX44T M220021K17 K17C 25 220019 6 Gimbal Spacer Disc 26 760401 1...

Page 20: ...17 WIRING DIAGRAM 13HP HONDA...

Page 21: ...n Very little vacuum is needed to start this vacuum diaphragm travel 0 2 Mercury to start and 0 5 Mercury for full travel The instant engine stops rotating loss of vacuum in section D releases diaphra...

Page 22: ...chaser that each new engine will be free from manufacturing defects in materials or workmanship under normal use during a period of two 2 years from the date of delivery provided it is operated and ma...

Page 23: ...t exact original equipment replacement All warranteed items become the sole property of Minuteman International Inc or its original manufacturer whichever the case may be Minuteman International Inc d...

Reviews: