background image

4

How Would You Like Your Copy?

4-8

Rev. /

Using Auto Paper Mode

Automatically copy a variety of original sizes onto a suitable paper size.
The copy paper is automatically selected according to the size of the
original being used and the Zoom Ratio selected for use.

1

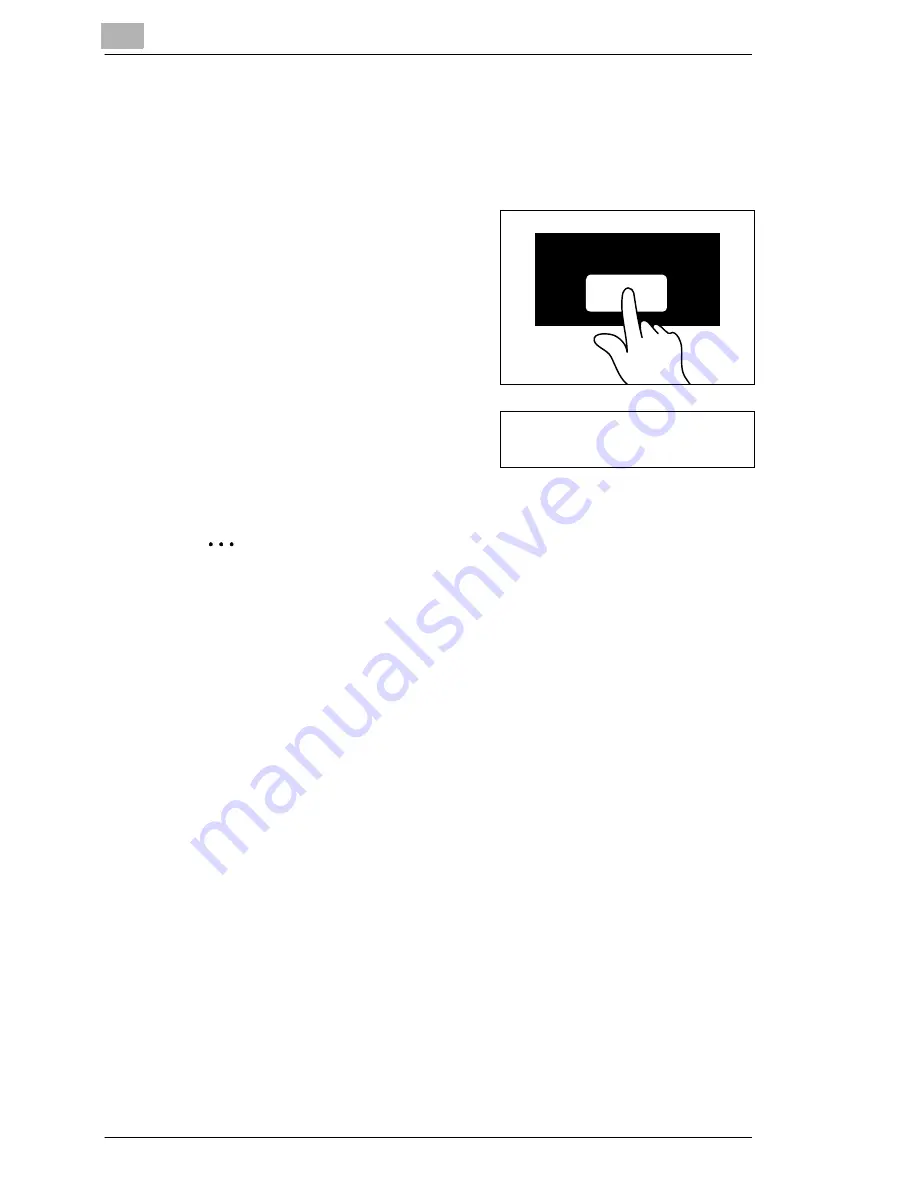
Press the [AUTO PAPER/
AUTO SIZE] key on the Control
Panel.

The Display will change.

2

Make sure that

AUTO

is indicated in

the Display for Paper Drawer.

“Auto Paper Mode“ is now enabled.

.

Wrinkled and curled . . .

Wrinkled and curled originals are not always identified correctly in this
mode. In that case, select a suitable paper size manually,
see page 4-9.

Auto Paper/Auto Size

Ready to copy.

A

× 1.000

AUTO

1

Summary of Contents for Di181

Page 1: ...aper Feed Cabinet Option 2 4 2 2 The Safe Use of Your Copier 2 5 Laser Safety 2 7 Internal Laser Radiation 2 7 Safety Label 2 8 2 3 Transporting the Copier 2 9 2 4 Setting Up the Copier 2 9 Environmental Requirements 2 9 Installation Site 2 9 Space Requirements for the Copier 2 10 Storing Supplies 2 10 2 5 Power Requirements 2 11 Voltage and Frequency Tolerances 2 11 2 6 Turning the Copier ON OFF ...

Page 2: ...50 sheets 3 11 2nd Drawer 250 sheets 3 13 3rd 4th Drawer 500 sheets each 3 14 Large Paper Drawer 2500 sheets 3 15 3 10 Using the Multi Bypass Tray 3 17 3 11 Replacing the Toner Bottle 3 19 3 12 Activating Toner Replenisher Mode 3 21 3 13 Activating the Drum Dehumidifier 3 21 3 14 Checking the Meter Count 3 22 4 How Would You Like Your Copy 4 1 Basic Functions 4 1 Toggling Auto Exposure Mode 4 1 Ma...

Page 3: ...5 5 16 Default Auto Exposure Level 5 5 17 Default Manual Exposure Level 5 5 20 Auto Panel Reset ON OFF 5 6 21 Energy Saver Mode ON 5 6 23 Auto Reset for Key Counter 5 6 28 Sleep Mode Timing 5 7 30 Language 5 7 40 Zoom from Memory Input Mode 5 8 51 to 54 Special Paper Mode 5 8 6 Troubleshooting 6 1 If You Are Not Satisfied with Your Copy 6 1 6 2 If a Message Appears on the Display Panel 6 4 6 3 If ...

Page 4: ... 6 23 7 Appendix 7 1 Care of the Unit 7 1 Cleaning Device Components 7 1 Document Transport Belt 7 1 Cleaning the Corona Units 7 2 7 2 Copier Specifications 7 3 Digital Copying Machine Di181 7 3 Automatic Document Feeder AF 5 7 4 Paper Feed Cabinet PF 207 7 5 Paper Feed Cabinet PF 114 7 5 7 3 Paper Size Tables 7 6 Metric 7 6 Inch Areas 7 6 7 4 Zoom Ratio Tables 7 7 Metric 7 7 Inch Areas 7 8 7 5 CE...

Page 5: ...eshooting Please read this manual carefully before using your copier and keep it handy at all times Store the manual in the holder on the rear side of the copier For further information and assistance in the event of difficulties please contact l your Minolta Technical Representative l the Minolta Hotline and l our Web site http www minolta com Please keep the serial number located on the copier s...

Page 6: ... to 60 Copiers with a high copying speed automatically switch to 2 sided copying mode This reduces the costs for copy media and the volume of paper consumed Did you know that manufacturing a sheet of paper requires 10 times as much energy as making a copy The conservation of paper thus also has a direct global effect on the conservation of energy This copier complies with the Energy Star energy ef...

Page 7: ...e copier on and off 3 Initial Steps This chapter provides you with the knowledge needed for using your photocopier such as Loading originals Step by step instructions on copying your documents Stopping the copy cycle Resetting the copier to its Initial Settings Canceling the copy cycle Filling the paper drawers Changing toner cartridges 4 How Would You Like Your Copy This chapter explains the effe...

Page 8: ...ing from incorrect operation Ü The arrow marks the precautionary measure required to avoid the danger START The button on the control panel labelled Start ERROR Message on the display panel with the text ERROR Ü Individual action to be performed no further steps 1 Step 1 of a sequence of actions 2 Step 2 of a sequence of actions etc This is additional assistance Ü The action described here is sure...

Page 9: ...below Original and Copy The original is the document to be duplicated during the copy cycle Feeding Direction The feeding direction is the paper s path through the copier The feeding direction is symbolized by the arrows in the following illustration Original document to be copied Copy duplicate of the original document Copy cycle enlargement reduction sorting stapling punching ...

Page 10: ...side A and the second to the length side B Lengthwise and Crosswise If side A of the paper format is shorter than side B this is referred to as lengthwise If side A of the paper format is longer than side B this is referred to as crosswise 21 x 29 7 cm Width of the paper side A Length of the paper side B Lengthwise Crosswise 21 x 29 7 cm 29 7 x 21 cm ...

Page 11: ... 1st Drawer Holds up to 250 sheets of paper in a variety of sizes 5 2nd Drawer Holds up to 250 sheets of paper 6 Control Panel Provides the keys and displays used for operating the copier 7 Original Cover Holds the original in place on the Original Glass 8 Power Switch Turns the copier ON and OFF 9 Multi Bypass Tray Holds up to 50 sheets including thick paper OHP films and other special paper type...

Page 12: ...s lever to open the upper half of the Copier Cabinet 2 Toner Bottle Holder Swing this holder open to replace the Toner Bottle 3 Original Pad Holds the original in place on the Original Glass 4 Original Glass Place the original on the Original Glass with the side to be copied face down 5 Corona Cleaning Unit top bottom Pull the Corona Cleaning Unit out by the levers to clean the corona wires 6 Heat...

Page 13: ...Exit Tray Receives originals ejected from the Document Feeder 2 Document Feed Tray Extender Pull out this extender when copying large size originals 3 Document Feed Tray Place the originals on the Document Feed Tray with the side to be copied face up 4 Document Guide Plate Slide the Document Guide Plate to match the size of the original 5 Document Feed Unit Door Open this cover to clear a paper mi...

Page 14: ... Paper Feed Cabinet PF 114 With a large capacity drawer to hold up to 2 500 sheets of 80 g m2 1 2 3 4 PF 207 PF 114 Item Name Description 1 3rd Drawer Holds up to 500 sheets of paper 2 4th Drawer Holds up to 500 sheets of paper 3 Paper Descent Key for the large capacity drawer Press this to open the Paper Drawer 4 3rd Drawer large capacity drawer Holds up to 2 500 sheets of paper ...

Page 15: ...es or other small pieces of metal into the openings of the copier This could result in a fire or cause an electrical shock In the event that metal objects are accidentally introduced into the copier switch the copier off immediately unplug the power cord from the power outlet and contact your Technical Representative Ü Do not place coffee cups bottles or other containers with liquids on the copier...

Page 16: ...ult in a fire or the malfunction of the affected equipment Ü Ensure that the power supply has the correct voltage for the copier Incorrect voltage could result in a fire or cause an electrical shock Ü Never connect the copier to a multiple socket extension cord This could result in a fire or cause an electrical shock Ü Switch the copier off immediately unplug the power cable and contact your Techn...

Page 17: ...t This means that the unit does not generate any hazardous laser radiation Internal Laser Radiation Mean radiant power 15 6 µW at the laser aperture of the print head unit Wavelength 770 795 nm This machine operates using a Class IIIb laser diode that emits an invisible laser beam The Laser Diode and Scanning Polygon Mirror are incorporated in the print head unit The print head unit is NOT A FIELD...

Page 18: ...uctions provided in this Operator s Manual This is a semiconductor laser printer The maximum radiation capacity of the laser diode is 5 mW The wavelength is 770 795 nm Safety Label The safety label is located at the position marked above The Manufacturer s Name Plate is also located at this position Make note of the model name and serial number that are specified on the type label in the table bel...

Page 19: ...on of 10 C 18 F per hour l Humidity of 15 to 85 maximum fluctuation of 20 per hour Installation Site The installation site must meet the following requirements l An area which is dry and free of dust l A level surface free of undue vibrations l Provision for good ventilation l A location away from curtains or other easily inflammable materials The unit must be protected from the following influenc...

Page 20: ...are stored l In their sealed original packaging l Protected from direct sunlight and heat sources l In a cool dry dust free location l Out of the reach of children CAUTION Toner can be hazardous to your health Toner is harmful if swallowed Ü If you get any toner on your hands immediately wash them thoroughly with soap and cold water 1230 1190 890 650 240 300 1155 450 705 1390 1038 913 Scale mm Fro...

Page 21: ... Power Switch to the ON position After a few seconds The START key lights up orange After about 30 seconds The START key lights up green Initial Mode l Number of copies 1 l Zoom Ratio 1 000 l Paper Auto Paper Mode l Exposure Auto Exposure Mode l Copy mode From 1 sided original to 1 sided copy l Finishing Non Sort Sort with Auto Document Feeder The initial mode can be modified under User s Choice s...

Page 22: ...urning the Copier OFF Ü Press the Power Switch to the OFF position Help conserve energy The Sleep Disabled Mode function switches the copier off after a specified idle period This helps conserve energy For more information see page 5 7 ON OFF ...

Page 23: ...erate a one sided copy of two originals reduced to fit onto one sheet of paper 4 F2 Mixed Original Detection Key Press this key to switch Mixed Original Detection on and off 5 F3 Margin Key Press this key to add a margin to the copies 6 F4 Frame Erase Key Press this key to erase anything that might appear around the frame of a document 7 F5 Non Sort Key Press this key to select between the Sort an...

Page 24: ... various values 3 Energy Saver Key Press this key to manually trigger Energy Saver Mode 4 Clear Key Press this key to reset the number of copies to 1 and reset any values that have been entered using the keypad 5 Reset Key Press this key to set the copier back to initial mode 6 Stop Key Press this key to stop a copy cycle 7 Start Key Press this key to start a copy cycle 8 Auto Paper Auto Size Key ...

Page 25: ...Item Name Description 1 Add Paper Indicator Indicates that a drawer is empty a drawer is open or a door on the copier is open 2 Add Toner Indicator Indicates that the Toner Bottle has to be changed 3 Call Tech Rep Misfeed Indicator Indicates that a malfunction in the copier or a paper misfeed has occurred 4 Display Panel Shows specified settings and text messages see figure below A Auto P Photo Fu...

Page 26: ...Copier The copier may only be used for the tasks described in this manual Any other applications are considered inappropriate Certain types of documents may not be copied for further use or with the intent to pass copies of such documents off as the original These include l Money l Stamps canceled or uncanceled l Personal identification cards l Vehicle registration documents l Copyrighted material...

Page 27: ...uence when selecting the modes You can then be certain that you have not forgotten anything 1 Placing the Original m Load the originals face up in the Automatic Document Feeder or m Lift the Original Cover and place the original face down on the Original Glass 2 If desired change any of the basic settings m Paper m Zoom m Exposure Paper Zoom 0 5 2 0 Lighter Darker Auto Photo A ...

Page 28: ...3 Initial Steps 3 2 Rev 3 If desired select an auxiliary mode m 2in1 m Margin m Frame Erase 4 If required select a finishing mode m Non Sort m Sort F1 2in1 F3 Margin F4 Frame Erase F5 Non Sort ...

Page 29: ...umber of copies Did you enter an incorrect number Ü Press the C key and enter the correct number 6 Start the copy cycle by pressing START Do you want to cancel the copy cycle Ü Press the STOP key 6 5 4 3 2 1 9 8 7 C 0 ABC DEF JKL GHI MNO TUV PQRS WXYZ 1134P342DA ...

Page 30: ...le of less than 15 2 Place the original face down on the Original Glass 3 Align the rear left corner of the Original with the marker on the Original Width Scale Press the rear edge of the original against the Original Positioning Plate Is the original transparent Ü Place a sheet of white paper of the same size on top of the Original 4 Close the Original Cover For transparent originals only Origina...

Page 31: ...iginal against the Original Positioning Plate 4 Close the Original Cover Is the book too thick to close the Original Cover Ü Leave the Original Cover open Ü To avoid being dazzled by the extremely bright light do not look at the Original Glass during the copy cycle CAUTION Improper operation can damage the Original Glass Books weighing more than 3 kg or pressing the book firmly can damage the Orig...

Page 32: ...lexing Document Feeder Unsuitable originals include Carbon paper paraffin paper and other very thin originals Thick paper Originals larger than A3 or smaller than A5L OHP transparencies translucent paper Folded stapled or curled originals Punched or clipped originals Carbon backed originals Ü Place originals that are not suitable for the Duplexing Document Feeder onto the Original Glass manually s...

Page 33: ...e Document Guide Plate to suit the size of the originals Are you copying large originals Ü Flip up the Document Feed Tray Extender Is the Document Feeder feeding the originals incorrectly Ü Ensure that the Document Guide Plate is correctly adjusted and positioned flush with the paper Which originals can be used with the feeder Single sheets of smooth standard paper Not stapled or punched A3L B4L A...

Page 34: ...en the Document Feed Tray and slide the Document Guide Plate to the size of the original 2 Wait until the START key turns green 3 Insert the original face down into the Multi Bypass Tray The original is automatically taken in and the copy cycle is started 4 When the START key turns green again you can insert the next original Which originals can be used with the feeder Which functions are not avai...

Page 35: ...he Control Panel of the copier The copy cycle stops The number of copies shown on the display is set to 1 The other settings remain unchanged 3 6 Resetting the Copier to Initial Mode Reset the copier to its initial mode to start a new copy cycle A Zoom value or copy mode that has been saved manually will not change Ü Press the RESET key located on the Control Panel of the copier The copier setting...

Page 36: ...PUT key to save the settings The settings are stored Storing settings again will overwrite these values The settings of only one copy job can be stored If you store the settings of another copy job the previously stored values will be overwritten 3 8 Calling up the Copy Job Program Use this feature to call up the stored settings of a copy job Ü Press the JOB RECALL key The stored settings are disp...

Page 37: ...gnment 1 Slide out the Drawer and press down on the Paper Lifting Plate 2 Slide out the Edge Guides 3 Load the new paper so that its front side faces down Make sure that the paper stack rests under the two catches of the Drawer 4 Ensure that the maximum paper filling height is not exceeded see mark on inside of the Paper Drawer ...

Page 38: ... the paper 6 Close the Paper Drawer Inches or metric In the back left corner of the Drawer there is a Marketing Area Switch for specifying the measurement system that applies to the paper size being used Set the Marketing Area Switch to the corresponding measurement system ...

Page 39: ...echnical after sales service 1 Slide out the Drawer and press down on the Paper Lifting Plate 2 Load the new paper so that its front side faces down Make sure that the paper stack rests under the two catches of the Drawer 3 Ensure that the maximum paper filling height is not exceeded see mark on inside of the Paper Drawer 4 Close the Paper Drawer ...

Page 40: ...ese Paper Drawers are fixed and can be altered only by our technical after sales service 1 Pull the Paper Drawer out 2 Load the new paper so that its front side faces down 3 Ensure that the maximum paper filling height is not exceeded see mark on inside of the Paper Drawer 4 Close the Paper Drawer ...

Page 41: ...t although the Large Paper Drawer is currently selected for use it has run out of paper 1 Press the Paper Descent Key on the Paper Drawer The Paper Drawer is lowered automatically 2 Slide out the Paper Drawer 3 Insert the paper into the right half of the Paper Drawer Press the leading edge of the paper stack against the side of the Drawer 4 Ensure that the maximum paper filling height is not excee...

Page 42: ...3 Initial Steps 3 16 Rev 6 Ensure that the maximum paper filling height is not exceeded see mark on inside of the Paper Drawer 7 Close the Paper Drawer The Drawer is raised automatically ...

Page 43: ...per onto the Tray and insert it until it stops The side to be printed must be face up m Up to 50 sheets of plain paper m Up to 20 sheets of other types of paper m Up to 5 OHP transparency sheets 4 Ensure that the maximum paper filling height is not exceeded see the Max Level Indicator on the Multi Bypass Tray Which originals can be used with the feeder Which functions are not available Types of Pa...

Page 44: ...red number of copies Did you enter an incorrect number Ü Press the C key and enter the correct number 7 Start the copy cycle by pressing START Do you want to cancel the copy cycle Ü Press the STOP key Change the Multi Bypass Tray position for OHP transparencies When making multiple copies onto OHP transparencies set the Multi Bypass Tray into the upper position Ready to copy A 1 000 5 MULTI 1 6 5 ...

Page 45: ... them thoroughly with soap and cold water Use only the Toner Bottles and toner specified for this copier The copying quality may otherwise be impaired 1 Open the Front Door of the copier 2 Swing out the holder together with the empty Toner Bottle and remove the Toner Bottle 3 Tap the new Toner Bottle against a hard surface to loosen any caked toner deposits 4 Shake the new Toner Bottle ...

Page 46: ...re facing you insert the Bottle into the Holder 7 Align the mark on the Bottle with the mark on the Toner Bottle Holder and swing the holder all the way into the machine 8 Close the Front Door Copies still too light If your copies are still too light after changing the Toner Bottle activate Toner Replenisher For more information see page 3 21 Arrow Marks ...

Page 47: ...s about 90 seconds Do not turn off the copier or open the Front Door during this process The mode deactivates automatically 3 13 Activating the Drum Dehumidifier Periods of high humidity or sudden rapid changes in humidity can cause condensation to form on the surface of the PC Drum This results in unsharp copies with missing text In such a case manually activate the Drum Dehumidify function to en...

Page 48: ...ng Copy Track functions will be displayed l Total Count Shows the number of all copies generated since the machine was installed l Size Count Shows the number of copies made on the copy paper of a preset size The size will be set by your Technical Representative Return to the standard display To return to the standard display mode press the METER COUNT key again TOTAL COUNT SIZE COUNT 500 12345 ...

Page 49: ...riginal 1 Press the A key on the Control Panel 2 Make sure that A is shown in the Display for Exposure Auto Exposure Mode is now enabled Is A not shown on the Display Use the A key to toggle between Auto Exposure Manual Exposure and Photo Mode Ü Press the A key until A is indicated in the Display Are your copies still too dark overall The default density for the Auto Exposure mode can be adjusted ...

Page 50: ...s You can select between five exposure levels Ü To make the image darker press the key on the Control Panel or To make the image lighter press the key on the Control Panel Turn Auto Exposure Mode back on To turn the Auto Exposure function back on press the A key until A is indicated in the Display for Exposure Lighter Darker Auto Photo A ...

Page 51: ...at P is shown in the Display for Exposure Photo Mode is now enabled Is P not shown on the Display Use the A key to toggle between Auto Exposure Manual Exposure and Photo Mode Ü Press the A key until P is indicated in the Display Making photo images lighter darker manually If you are copying using Photo Mode you can make the exposure lighter or darker manually see page 4 2 A Lighter Darker Auto Pho...

Page 52: ...ss the AUTO PAPER AUTO SIZE key on the Control Panel The Display will change 2 Make sure that AUTO is indicated in the Display for Zoom Auto Size Mode is now enabled 3 Press the PAPER key on the Control Panel until the Paper Drawer containing the paper for your copies is indicated in the Display 4 Make sure that the correct Paper Drawer is shown in the Display Auto Paper Auto Size Ready to copy A ...

Page 53: ... that you use often in the User s Choice Settings You can then call up the stored Zoom Ratio under Zoom Memory Ü For more information see page 5 8 2 Make sure that the correct Zoom Ratio is shown in the Display Resetting the Zoom Ratio To rest the Zoom Ratio and make copies that are the same size as your originals press the FULL SIZE key on the Control Panel Zoom 0 5 2 0 B4 A4 0 816 A3 A4 B4 B5 0 ...

Page 54: ...the Display Can a frequently used Zoom Ratio be saved You can store a Zoom Ratio that you use often in the User s Choice Settings You can then call up the stored Zoom Ratio under Zoom Memory Ü When storing a Zoom Ratio refer to page 5 8 2 Make sure that the correct message is shown in the Display Zoom 0 5 2 0 B4 A4 0 816 A3 A4 B4 B5 0 707 0 500 2 000 Zoom Memory B4 A3 B5 A4 1 154 A4 A3 B5 B4 1 414...

Page 55: ... number Ü Press the C key and enter the correct number 4 Make sure that the correct Zoom Ratio is shown in the Display 5 Press the key on the Keypad to confirm your input The Display returns to its default mode 6 5 4 3 2 1 9 8 7 C 0 ABC DEF JKL GHI MNO TUV PQRS WXYZ 10 KEY INPUT THEN ZOOM 0 5 2 0 1 500 1 ...

Page 56: ...nd the Zoom Ratio selected for use 1 Press the AUTO PAPER AUTO SIZE key on the Control Panel The Display will change 2 Make sure that AUTO is indicated in the Display for Paper Drawer Auto Paper Mode is now enabled Wrinkled and curled Wrinkled and curled originals are not always identified correctly in this mode In that case select a suitable paper size manually see page 4 9 Auto Paper Auto Size R...

Page 57: ...es 1 Press the PAPER key on the Control Panel until the desired Paper Drawer is displayed The Display will change 2 Make sure that the correct Drawer is shown in the Display for the Paper Drawer 9 8 1 2 3 4 6 7 5 Multi Bypass Tray MULTI 1st Drawer 2nd Drawer 3rd Drawer Option 4th Drawer Option Paper Ready to copy A 0 500 3 A4 1 ...

Page 58: ... originals to a 1 sided copy 2in1 Producing 1in1 Copies This option gives you 1 sided copies from 1 sided originals This option is the default setting Ü To produce a 1in1 copy press the START key Switching on Mixed Original Detection Mode If your machine is equipped with an Automatic Document Feeder you can enable the Mixed Original Detection mode This automatically ensures that your originals are...

Page 59: ...Automatic Document Feeder is present This option automatically reduces the size of two 1 sided originals to fit on one 1 sided copy 1 Count the originals 2 Place the originals in the Document Feeder 3 Press the F1 2IN1 key on the Control Panel The Display will change Horizontally Vertically F1 2in1 ...

Page 60: ... the C key and enter the correct number 6 Make sure that the correct setting is shown in the Display 7 Press the key on the Keypad to confirm your input The Display returns to its default mode 8 Start the copy cycle Odd number of originals If you are copying an odd number of originals using the 2in1 function the last page will always be blank 10 KEY INPUT THEN 0 EVEN 1 ODD 6 5 4 3 2 1 9 8 7 C 0 AB...

Page 61: ...iginal sizes onto a suitable paper size The copy paper is automatically selected according to the size of the original being used 1 Place the originals in the Document Feeder as shown 2 Touch the F2 MIXED ORIG DET key The Mixed Original Detection Mode is now enabled 3 Make sure that the correct setting is shown in the Display F2 Mixed Orig Det 10 KEY INPUT THEN MARGIN 5 20 5 ...

Page 62: ...ur Copy 4 14 Rev Do you need to process a variety of original sizes User s Choice allows you to default to Mixed Original Detection The MIXED ORIG DET key then serves to disable the function For more information see page 5 3 ...

Page 63: ...ou can select a Margin width from 5 to 20 mm 1 Insert the originals 2 Press the F3 MARGIN key on the Control Panel The Display will change 3 Make sure that the correct message is shown in the Display Margin on Left Edge Margin on Left Edge F3 Margin 10 KEY INPUT THEN MARGIN 5 20 10 ...

Page 64: ... the correct setting is shown in the Display 6 Press the key on the Keypad to confirm your input The Display returns to its default mode 7 Start the copy cycle Do not enter a Margin that is too wide Selecting a Margin that is too wide can cause part of the image near the edges to be lost on the copy 6 5 4 3 2 1 9 8 7 C 0 ABC DEF JKL GHI MNO TUV PQRS WXYZ 10 KEY INPUT THEN MARGIN 5 20 5 ...

Page 65: ...ge 3 Make sure that the correct message is shown in the Display 4 Use the Keypad to set the desired Margin width Did you enter an incorrect number Ü Press the C key and enter the correct number 5 Make sure that the correct setting is shown in the Display F4 Frame Erase 10 KEY INPUT THEN ERASE WIDTH 5 20 5 6 5 4 3 2 1 9 8 7 C 0 ABC DEF JKL GHI MNO TUV PQRS WXYZ 10 KEY INPUT THEN ERASE WIDTH 5 20 5 ...

Page 66: ... to confirm your input The Display returns to its default mode 7 Start the copy cycle Keep the Zoom Ratio in mind The area to be erased by the Frame Erase function will be adjusted if a size reduction or enlargement is applied simultaneously 20 mm 20 mm 10 mm 10 mm 0 500 ...

Page 67: ... SORT key to switch between Sort Mode and Non Sort Mode 1 Insert the originals 2 Press the F5 NON SORT key on the Control Panel The Display will change 3 Make sure that 5 is indicated in the Display in front of the Zoom Ratio Sort Mode is now enabled 4 Start the copy cycle 3 2 1 2 2 2 3 3 3 1 1 1 3 2 1 3 2 1 3 2 1 3 2 1 Sort Non Sort F5 Non Sort Ready to copy A 5 1 000 AUTO 1 ...

Page 68: ...be changed in the User s Choice Settings see page 5 6 Energy Saver Mode Approximately 15 minutes after the last copy cycle has completed or the last user input has been entered Energy Saver Mode is enabled automatically You can also trigger this function manually by pressing the ENERGY SAVER key on the Control Panel The default setting for the Energy Saver Mode can be changed in the User s Choice ...

Page 69: ...hat the correct message is shown in the Display 3 Use the Keypad to assign a number to the desired User s Choice Settings e g 10 Priority Paper see page 5 4 Did you enter an incorrect number Ü Press the C key and enter the correct number 4 Press the START key The Display will change 5 Make sure that the correct message is shown in the Display USER S CHOICE SELECT 10 KEY INPUT 6 5 4 3 2 1 9 8 7 C 0...

Page 70: ...you enter an incorrect number Ü Press the C key and enter the correct number 7 Make sure that the correct message is shown in the Display 8 Press the START key to save your changes 9 To return to the Standard Display Mode press the RESET key or Repeat steps 2 to 8 to configure further User s Choice Settings 6 5 4 3 2 1 9 8 7 C 0 ABC DEF JKL GHI MNO TUV PQRS WXYZ PAPER PRIORITY 10 KEY INPUT 6 ...

Page 71: ... 21 Energy Saver Mode ON 4 Lightweight Originals 23 Auto Reset for Key Counter 7 Sleep Disabled Mode OFF 28 Sleep Mode Timing 10 Priority Paper Size Source 30 Language 12 AP AS Manual Priority 40 Zoom from Memory Input Mode 14 Default Exposure Mode 51 Special Paper Mode 1st Drawer 16 Default Auto Exposure Level 52 Special Paper Mode 2nd Drawer 17 Default Manual Exposure Level 53 Special Paper Mode...

Page 72: ...ority Use this to specify which copying mode should be enabled when the machine is turned on or the RESET key is pressed Setting Description Initial Setting 0 Sleep Disabled Mode OFF OFF 1 Sleep Disabled Mode OFF ON Setting Description Initial Setting Setting Description Initial Setting 0 A3 L 13 8 1 2 11 L 1 B4 L 14 5 1 2 8 1 2 L 2 A4 L 15 8 1 2 11 C 3 B5 L 20 1st Drawer 4 A5 L 21 2nd Drawer 5 FL...

Page 73: ...et the optimal Exposure Level for Auto Exposure Mode 17 Default Manual Exposure Level Use this to specify which Exposure Level should be enabled when Manual Exposure Mode is enabled Setting Description Initial Setting 0 Auto Exposure 1 Manual Exposure Setting Description Initial Setting 0 Low 1 Normal 2 High Setting Description Initial Setting 0 Level 1 1 Level 2 2 Level 3 3 Level 4 4 Level 5 Ligh...

Page 74: ...o Energy Saver Mode The Initial Setting is 15 minutes 23 Auto Reset for Key Counter Use this to set whether the machine should be returned to the initial mode when the Key Counter is pulled out Setting Description Initial Setting 0 Auto Panel Reset OFF 1 Enabled 30 seconds 2 Enabled 1 minute Setting Description Initial Setting 1 Enabled 1 minute 2 Enabled 2 minutes 3 Enabled 3 minutes 239 Enabled ...

Page 75: ... 1 in the 7 Sleep Disabled Mode OFF and then select 0 in the Sleep Mode Timing 30 Language Use this to change the language of the messages in the Message Display Setting Description Initial Setting 0 Disabled 1 Enabled 1 minute 2 Enabled 2 minutes 3 Enabled 3 minutes 239 Enabled 239 minutes 240 Enabled 240 minutes Setting Description Initial Setting 0 English 1 French 2 Spanish 3 German 4 Italian ...

Page 76: ...pecial Paper Mode If the copier is equipped with a printer or fax unit the Paper Drawers can be assigned the Special Paper attribute 51 1st Drawer 52 2nd Drawer 53 3rd Drawer only if present 54 4th Drawer only if present Setting Description Initial Setting 0 500 0 500 0 999 0 999 1 000 1 000 1 001 1 001 2 000 2 000 Setting Description Initial Setting 0 No Special Paper Setting 1 Special Paper Sett...

Page 77: ... Enable the Toner Replenisher Function see page 3 21 The Toner Bottle has just been replaced The Add Toner Indicator is lit up on the Control Panel Replace the toner bottle see page 3 19 The paper is damp Replace the paper The image is too dark The exposure level for the Auto Exposure Mode is set on a dark value Change the exposure level under User s Choice see page 5 5 Manually set the exposure t...

Page 78: ...of the copy is dirty The Original Cover or Document Transport Belt is dirty Clean the Original Cover or Document Transport Belt see page 7 1 Original is not placed in the correct position Place the original on the Original Glass correctly see page 3 4 The paper size is larger than the original Select the same copy paper size as the original Use the Auto Size Mode to set the size of the original to...

Page 79: ...he Original Glass correctly see page 3 4 Place the original in the Document Feeder correctly see page 3 6 The original is not suitable for the Document Feeder Place the original on the Original Glass see page 3 4 The copy has lines The Corona Units are dirty Clean the Corona Units see page 7 2 Symptom Possible cause Action ...

Page 80: ...eft on the Original Glass Either remove the original from the Original Glass or from the Automatic Single Feed Tray Select Paper Size The Paper Size can not be determined by the Auto Paper Mode Open the Original Cover at least 15 and close it again Select Zoom Ratio The Paper Size can not be determined by the Auto Size Mode Open the Original Cover at least 15 and close it again Not exact paper The...

Page 81: ...o manageable sections Insert the Plug in Counter The Key Counter is not plugged in Plug in the Key Counter Set SADF Again You placed an original into the Automatic Document Feed Tray before the prior copy cycle was finished Place the original into the Automatic Document Feed Tray again Message on Display Panel Cause Action ...

Page 82: ...y key to cancel the Energy Saver Mode The copier is turned OFF Turn ON the Power Switch The copy cycle does not start when the START key is pressed The copier was just turned ON Wait about 60 seconds The copier is warming up The copier has developed a malfunction Please read the message on the Display Panel The copier is not activated when the Power Switch is turned ON The power cord is unplugged ...

Page 83: ...s will become lighter and lighter l The copy cycle will be canceled as soon as the Toner has run out completely Ü Replace the toner bottle see page 3 19 Lighter Darker 9 8 1 2 3 4 6 7 A Auto P Photo Function No 5 Full Size Auto Paper Auto Size B4 A4 A4 A3 B4 0 816 0 707 0 707 B5 A4 A3 B4 B5 B4 1 414 1 414 1 154 A3 B5 1 154 A4 Add Toner Indicator lights up Ready to copy A 1 000 2 A4 1 ...

Page 84: ...Paper Drawer is empty l The current copy process is interrupted l The Add Paper Indicator on the Control Panel lights up l The Load paper message is displayed Ü Load new paper see page 3 11 Lighter Darker 9 8 1 2 3 4 6 7 A Auto P Photo Function No 5 Full Size Auto Paper Auto Size B4 A4 A4 A3 B4 0 816 0 707 0 707 B5 A4 A3 B4 B5 B4 1 414 1 414 1 154 A3 B5 1 154 A4 Add Paper Indicator lights up Messa...

Page 85: ...l Panel lights up l The Cover open message is displayed Ü Close the open door Lighter Darker 9 8 1 2 3 4 6 7 A Auto P Photo Function No 5 Full Size Auto Paper Auto Size B4 A4 A4 A3 B4 0 816 0 707 0 707 B5 A4 A3 B4 B5 B4 1 414 1 414 1 154 A3 B5 1 154 A4 Add Paper Indicator lights up Message displayed if a door is open Cover open No 6 Location of open door ...

Page 86: ...6 Troubleshooting 6 10 Rev Message Display Check location Cover open No 8 Cover open No 9 Cover open No 6 Cover open No 7 ...

Page 87: ...he current copy process is interrupted l The Call Tech Rep Misfeed Indicator on the Control Panel lights up l The Display Panel indicates where the paper misfeed has occurred Ü Clear the paper misfeed see page 6 14 Lighter Darker 9 8 1 2 3 4 6 7 A Auto P Photo Function No 5 Full Size Auto Paper Auto Size B4 A4 A4 A3 B4 0 816 0 707 0 707 B5 A4 A3 B4 B5 B4 1 414 1 414 1 154 A3 B5 1 154 A4 Paper JAM ...

Page 88: ... see Copier Fusing Unit Copier Paper Take Up Section Multi Bypass Tray page 6 14 page 6 16 page 6 18 2 Way Paper Feed Cabinet Large Paper Drawer page 6 19 page 6 20 Automatic Document Feeder page 6 21 Paper JAM No 6 Paper JAM No 8 Paper JAM No 7 Paper JAM No 9 ...

Page 89: ...Tech Rep Misfeed Indicator light up again A malfunction has occurred Ü Write down the malfunction code Ü Turn off the copier and unplug the power cord Ü Call your Technical Representative and inform him or her of the malfunction code Lighter Darker 9 8 1 2 3 4 6 7 A Auto P Photo Function No 5 Full Size Auto Paper Auto Size B4 A4 A4 A3 B4 0 816 0 707 0 707 B5 A4 A3 B4 B5 B4 1 414 1 414 1 154 A3 B5 ...

Page 90: ...only Ü Do not touch the areas designated with this symbol DANGER Danger of electrical shock inside the copier The inside of the copier contains high voltage components Ü Do not touch the areas designated with this symbol 1 Open the Front Door Turn the Lock Release Lever counterclockwise and tilt the top half of the copier upwards until the Stopper M2 locks 2 Tilt the Fusing Unit away and pull the ...

Page 91: ...Troubleshooting 6 Rev 6 15 3 Pull out the sheet of paper from the Transport Section 4 Release the Stopper M2 Lower the top half of the copier and close the Front Door ...

Page 92: ...se and tilt the top half of the copier upwards until the Stopper M2 locks 2 Open the Right Door and pull out the sheet of paper from the Multi Bypass Tray 3 Pull out the sheet of paper from the Transport Section Close the Right Door 4 Release the Stopper M2 Lower the top half of the copier and close the Front Door ...

Page 93: ...Troubleshooting 6 Rev 6 17 5 Remove the current Paper Drawer and take out the paper 6 Push the Paper Lifting Plate down 7 Fan the paper thoroughly and reload it 8 Close the Paper Drawer ...

Page 94: ...i Bypass Tray 2 Open the Front Door Turn the Lock Release Lever counterclockwise and tilt the top half of the copier upwards until the Stopper M2 locks 3 Pull out the sheet of paper from the Transport Section 4 Release the Stopper M2 Lower the top half of the copier and close the Front Door ...

Page 95: ...9 2 Way Paper Feed Cabinet 1 Open the Lower Right Door and pull out the sheet of paper 2 Close the door 3 Remove the current Paper Drawer and take out the paper 4 Fan the paper thoroughly and reload it 5 Close the Paper Drawer ...

Page 96: ...pacity Cabinet 1 Open the Lower Right Door and pull out the sheet of paper 2 Close the door 3 Press the Paper Descent Key for the Paper Drawer 4 Pull the Paper Drawer out 5 Fan the paper thoroughly and reload it 6 Close the Paper Drawer ...

Page 97: ...Remove the original stack from the Document Feed Tray 2 Open the Document Feed Unit Door F1 and pull out the original 3 Remove the original from the Document Exit Unit 4 Lift the Document Feeder and remove the original 5 Close the Document Feed Unit Door F1 ...

Page 98: ...der 7 Take the amount of originals out of the Document Exit Unit as is indicated in the Display Place these under the stack of originals so that they can be copied again Example as illustrated on the right Return two originals 8 Return the Original Set to the Document Feed Tray Re insert 2 Org s A 1 000 2 A4 1 ...

Page 99: ...appear Function B function set last Auto Paper Manual Paper Sel Auto Size Zoom 1in1 2 in1 Mixed Orig Det Non Sort Sort Margin Edge Frame Erase Job Recall Multi Bypass Tray SADF Function A function set first Auto Paper Mode O O O O O O O O O O Manual Paper Sel O O O O O O O O O O Auto Size Mode O O O O O O O O O Zoom O O O O O O O O O O O 1in1 O O O O O O O O O O O O 2in1 O O O O O O O Mixed Orig D...

Page 100: ...6 Troubleshooting 6 24 Rev ...

Page 101: ...nel l Original Glass l Inside of Front Door CAUTION Improper cleaning can damage the copier Ü Wipe the surface of the Control Panel clean using a soft dry cloth only Document Transport Belt 1 Wipe the surface of the Document Transport Belt clean with a soft cloth dampened with mild home detergent 2 Pull the Document Transport Belt carefully to the left to clean the covered areas of the Belt Repeat...

Page 102: ...te cleaning process two or three times to ensure that the Corona Wires are thoroughly clean 1 Carefully pull the upper Corona Unit Cleaner out as far as it will go 2 Push the Corona Unit Cleaner back fully 3 Repeat steps 1 and 2 with the lower Corona Unit Cleaner ...

Page 103: ...t Drawer A3L B4L A4L A4C B5L B5C A5L FoolscapL 203 330 mm 216 330 mm 210 330 mm 11 17 L Legal L 8 1 2 14 LetterL 5 1 2 8 1 2 L 2nd Drawer A3L B4L A4L A4C A5L FoolscapL 254 203 mm C 203 330 mm L 210 280 mm L 216 297 mm L 297 216 mm C 216 320 mm L 220 280 mm L 297 430 mm L 210 330 mm L Multi Bypass Tray Crosswise 100 mm to 297 mm Lengthwise 140 mm to 432 mm Paper Feeding System 1st Paper Drawer 250 ...

Page 104: ...Depth 705 mm Height 530 mm Weight 69 0 kg Specifications Specifications Document Feeder Default Mode 1 sided originals Multi Bypass Tray Mixed Original Detection Mode 1 sided originals in various sizes Original Paper Types Sheet originals Original Weights 1 sided originals 2in1 50 g m2 to 110 g m2 Mixed Original Detection Mode 60 g m2 to 90 g m2 Multi Bypass Tray 35 g m2 to 160 g m2 Lightweight or...

Page 105: ...r Total Drawer Capacity 1 000 sheets 2 500 sheets Power Consumption DC 24V supplied from copier Dimensions Width 610 mm Depth 610 mm Height 389 mm Weight 32 7 kg Specifications Paper Types Plain paper recycled paper 60 g m to 90 g m Paper Size 3rd Paper Drawer A4C Capacity Automatic feeding from Drawer Total Drawer Capacity 2 500 sheets 80 g m Power Consumption DC 24V supplied from copier Dimensio...

Page 106: ... Size Inch Size mm Ledger 11 x 17 279 x 432 mm 11 x 14 11 x 14 279 x 356 mm Computer 10 1 8 x 14 257 x 356 mm 10 x 14 10 x 14 254 x 356 mm 9 1 4 x 14 9 1 4 x 14 236 x 356 mm Legal 8 1 2 x 14 216 x 356 mm Foolscap Government Legal 8 1 2 x 13 246 x 330 mm Foolscap 8 x 13 203 x 330 mm Foolscap 8 2 3 x 13 220 x 330 mm Foolscap Folio 8 1 4 x 13 210 x 330 mm 8 1 4 x 11 3 4 8 1 4 x 11 3 4 210 x 301 mm Le...

Page 107: ...7 B4 x 0 866 B5 x 0 707 B5 x 0 610 B6 x 0 500 A4 A5 x 0 707 A3 x 1 145 A6 x 0 500 B5 A5 x 0 816 B5 x 0 866 A6 x 0 577 B6 x 1 224 B6 x 0 707 A3 x 1 414 A3 x 1 640 B4 x 1 224 A4 x 1 154 A5 A6 x 0 707 B4 x 1 414 B6 x 0 866 B6 A6 x 0 816 A4 x 1 414 A4 x 1 640 A3 x 2 000 A5 x 1 154 B4 x 1 733 B4 x 2 000 B5 x 1 224 B5 x 1 414 A6 A4 x 2 000 A5 x 1 414 B5 x 1 733 B6 x 1 224 ...

Page 108: ... Letter x 0 647 11 x 17 x 1 076 Invoice x 0 500 Letter Invoice x 0 647 11 x 15 11 x 14 x 0 933 11 x 17 x 1 294 Legal x 0 772 11 x 14 x 1 272 Foolscap x 0 722 Invoice 11 x 17 x 2 000 Letter x 0 733 11 x 14 x 1 647 Invoice x 0 500 Legal x 1 545 11 x 14 Legal x 0 772 Foolscap x 1 529 Foolscap x 0 772 Letter x 1 294 Letter x 0 772 Invoice x 0 500 Legal Legal x 0 928 Foolscap x 0 785 Letter x 0 607 Inv...

Page 109: ...ing and measurement techniques Section 2 Electrostatic discharge immunity test EN 61000 4 3 1996 Electromagnetic compatibility EMC Part 4 Testing and measurement techniques Section 3 Radiated radio frequency electromagnetic field immunity test EN61000 4 4 1995 Electromagnetic compatibility EMC Part 4 Testing and measurement techniques Section 4 Electrical fast transient burst immunity test EN61000...

Page 110: ... Safety First year of labeling according to EC Directive 73 23 EEC and 93 68 EEC 99 on EMC This product was designed for operation in a typical office environment EC Directives Safety 72 23 EEC and 93 68 EEC EMC 89 336 EEC and 93 68 EEC ...

Page 111: ...eed 6 21 Auxiliary Functions 4 10 B Basic Functions 4 1 Basic Settings 5 1 C Calling up Copy Job Program 3 10 Call Tech Rep Misfeed Indicator 6 11 Care of the Unit 7 1 Checking the Meter Count 3 22 Cleaning Corona Units 7 2 Device Components 7 1 Document Transport Belt 7 1 Cleaning Device Components 7 1 Cleaning the Corona Units 7 2 Cleaning the Document Transport Belt 7 1 Clearing a Paper Misfeed...

Page 112: ... Display 2 15 Display Panel Messages 6 4 Drawer Switching Automatic 4 20 E Energy Saver Mode 4 20 5 6 Enlarging Reducing 4 5 4 6 Environmental Requirements for the Copier 2 9 Erasing frames 4 17 Exposure Automatic 4 1 Manual 4 2 Photos 4 3 F F1 2in1 4 10 F2 Mixed Original Detection Mode 4 13 F3 Margin 4 15 F4 Frame Erase 4 17 F5 Non Sort 4 19 Frequency tolerances 2 11 Functions Combining 6 23 Fusi...

Page 113: ...On the Multi Bypass Tray 3 8 On the Original Glass 3 4 Paper originals 3 4 Transparent originals 3 4 M Manual Exposure Mode 4 2 Manual Paper Select Mode 4 9 Messages Display Panel 6 4 Misfeed Clearing Procedure Automatic Document Feeder 6 21 Copier Fusing Unit 6 14 Large Capacity Cabinet 6 20 Multi Bypass Section 6 18 Paper Feed Cabinet 6 19 Paper Take Up Section 6 16 Mixed Original Detection 4 13...

Page 114: ...Paper Misfeed 6 19 Paper Feeding Direction 1 5 Paper Select Mode Automatic 4 8 Manual 4 9 Paper Size Tables 7 6 Paper Take Up Section Paper Misfeed 6 16 Photo Exposure 4 3 Power Requirements 2 11 Priority Paper Size Source 5 3 5 4 R Refilling the paper drawers 3 11 1st Drawer 3 11 2nd Drawer 3 13 3rd 4th Drawer 3 14 Large Paper Drawer 3 15 Replacing the Toner Bottle 3 19 Reset modes 3 9 Reset the ...

Page 115: ...ts for the Copier 2 10 Special Paper Mode 5 8 Specifications 7 3 Standard Zoom Ratios 4 5 Starting copy cycle 3 9 Stopping copy cycle 3 9 Storing Supplies 2 10 Storing Copy Job Program 3 10 System Overview 2 1 T Toggling Auto Exposure Mode 4 1 Total Count 3 22 Transporting the Copier 2 9 Troubleshooting 6 1 Turning the Copier ON OFF 2 11 U Using Auto Paper Mode 4 8 Using Auto Size Mode 4 4 Using t...

Page 116: ...7 Appendix 7 16 Rev Z Zoom from Memory Input Mode 5 8 Zoom Ratio Tables 7 7 Zoom Ratios standard 4 5 Zooming 4 6 ...

Reviews: