Click on the file name to highlight it. Click the
OK button to select the settings to apply to the
image displayed in the exposure-control tab.
Confirm the autoexposure settings in the prefer-
ence window (p. 44). Click the apply button to view
the results.
To delete a setting file, open the load window and
click on the file name to highlight it. Use the key-
board delete key to erase the file.
Loading exposure settings
Saving exposure settings
Click the apply-all button to use the exposure-control
settings for all the images in the film holder. If autoex-
posure is used, the exposure setting for the displayed
image is fixed and applied to the other images in the
holder.
Adjust the sliders or enter values between ±2 in
0.1 increments in the text boxes. Press the
apply button to view the effect on the preview
image. Repeat until the desired result is
achieved. To cancel all settings, click the reset
button and press the apply button to initialize the
preview image.
When using autoexposure, adjustments are
made in reference to the exposure determined
by the AE system. To calibrate the scanner in
reference to a standard exposure, turn the auto-
exposure functions off in the preference window (p. 44); set exposure control for
negatives to manual or uncheck the auto-exposure for slides check box. This is rec-
ommended when making settings for specific films.
47
D
IMAGE SCAN DUAL III UTILITY
-
ADVANCED SCANNING
46
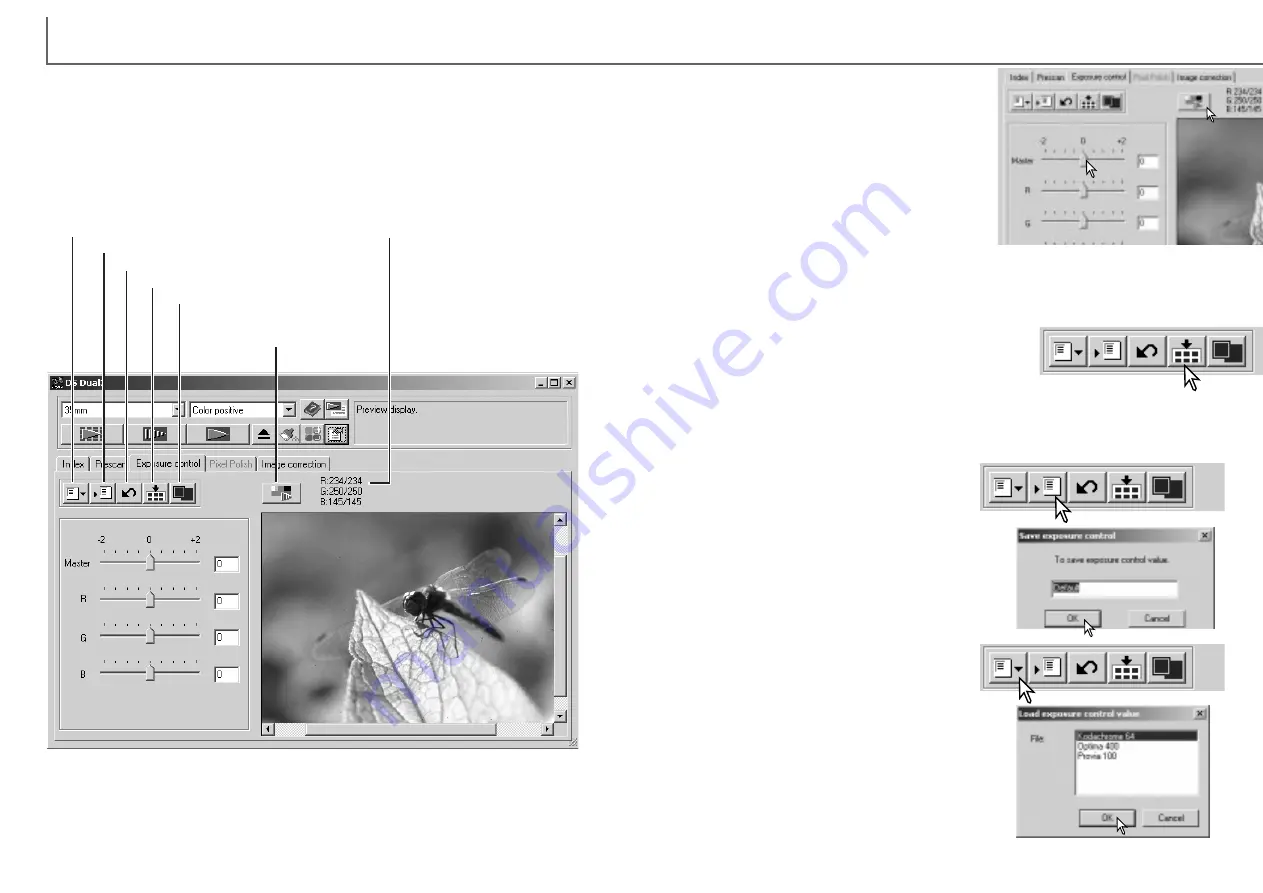
Exposure-control tab
Save setting button
Load setting button
Reset button
Apply button
Apply-all button
Fit-to-window button (p. 35)
If any changes are made to exposure, the exposure control tab will be highlighted in
red (Windows), or an asterisk will be displayed on the tab (Macintosh).
The master slider and text box control the overall exposure. The R, G, and B sliders
and text boxes are used to compensate for any color shift.
The exposure control is not an image-processing tool. No gamma or contrast
changes can be made. The exposure-control tab allows the scanner’s exposure sys-
tem to be customized to specific films, lighting, or a personal exposure index based
on the film, processing, lens, and shutter combination. This can also be used to
compensate for badly exposed film.
Simply click the exposure-control tab to display the selected image. If a prescan has
not been made, the scanner will make one automatically.
RGB display
To cancel changes to exposure once the apply-all function has been used, click the
reset button, then the apply-all button.
Click the save setting button to open the save
window.
Enter the name for the setting file. Click the
OK button.
Click the load setting button to open the load
window.
The RGB display will show
the color values for any point
in the image; simply place
the mouse pointer in the
image area to see the val-
ues of that point.
Summary of Contents for AF-2840
Page 1: ...INSTRUCTION MANUAL E...


