background image

–  Do not expose the dash camera to dusty, dirty or sandy conditions, if these 

gets into the camera or on the lens it can damage the components.

–  Do not expose the dash camera to high temperatures. 

The normal operating temperature of the dash camera is 0 C to 40 C (32F to 
104F

High temperatures can shorten the life span of electronic device, and 
extremely high temperature will shorten the battery and/or degrade the 
plastic components. Note extreme temperatures can be achieved in parked 
cars in direct sunlight.
Expose the dash camera to strong sunlight when using Motion Detection 
mode may cause the dash camera to malfunction or become damaged as 
the temperature can be too high in your car in summer.

–  Do not expose the dash camera to a cold environment. 

Extremely low temperatures can also damage the electronic components; if 
there is water moisture in cold environment, freezing water can cause 
damage, as can thawing. 

–  Do not try to dismantle or open the casing. Doing so may result in electrical 

shock and will most likely result in damaging the dash camera.

–  Do not mistreat the dash camera, dropping, sudden impact, and vibration 

can cause damage.

–  Do not clean the dash camera with chemicals, cleaning solution or a high 

concentration detergent. Only a slightly damp cloth should be used.

Please download the latest firmware from:
        www.mini0806.com
to upgrade the camera for improved stability and extra functions.

Extract the FIRMWARE.BIN file to the root folder of your microSD card; insert 
the card into your mini0806 camera and power on. The camera will auto 
examine the FIRMWARE.BIN file and popup a confirmation dialogue, press the 
UP or DOWN button to choose YES and press OK to upgrade.
The camera will shut down automatically after upgrading is completed. 
Enjoy.

PRECAUTIONS

UPGRADING

Summary of Contents for X44

Page 1: ...carefully before using This manual should be kept for future reference WARNING The dash camera should be set up before driving Concentration should always be maintained on the task of driving let the...

Page 2: ......

Page 3: ...so damage the electronic components if there is water moisture in cold environment freezing water can cause damage as can thawing Do not try to dismantle or open the casing Doing so may result in elec...

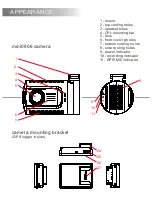
Page 4: ...mera mounting bracket GPS logger inside 27 1 mount 2 top cooling holes 3 speaker holes 4 CPL mounting bar 5 lens 6 front cooling holes 7 bottom cooling holes 8 side cooling holes 9 power indicator 10...

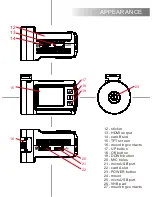
Page 5: ...icker 13 HDMI output 14 card B slot 15 TFT screen 16 mounting contacts 17 UP button 18 OK button 19 DOWN button 20 MIC holes 21 microUSB port 22 card A slot 23 POWER button 24 mount 25 microUSB port 2...

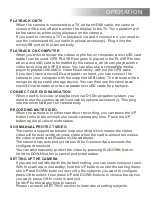
Page 6: ...D card in the card slot the camera will auto start recording if the power is on RECORDING A VIDEO When the camera is standby press the OK button to start video recording When the camera is recording p...

Page 7: ...camera which can playback the video recording with GPS traces You can also use a compatible media player to playback the MOV video les directly without the GPS trace If you don t have a microSD card...

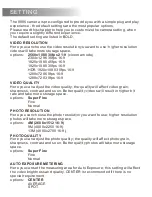
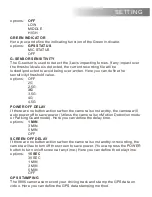
Page 8: ...ou can adjust the video quality the quality will affect video grain sharpness contrast and so on Better quality videos will result in higher bit rate and take more storage space options Super Fine Fin...

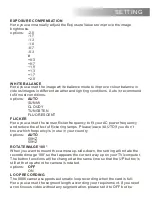
Page 9: ...ATION Here you can manually adjust the Exposure Values to improve the image brightness options 2 0 1 7 1 3 1 0 0 7 0 3 0 0 3 0 7 1 0 1 3 1 7 2 0 ROTATE IMAGE 180 When you want to mount the camera up s...

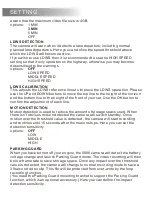
Page 10: ...DLE SPEED HIGH SPEED LDWS CALIBRATION This adjusts the LDWS reference lines to improve the LDWS operation Please use the UP and DOWN buttons to move the top line to the height of the horizon and the b...

Page 11: ...re no button actions when the camera is on standby or recording the camera will auto turn off the screen to save power You can press the POWER button to turn on off screen at any time Here you can de...

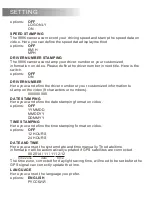
Page 12: ...m date and time manually The date time information will be automatically updated if GPS satellites are connected 00 2014 11 11 12 12 time zone date time The time zone corrected for daylight saving tim...

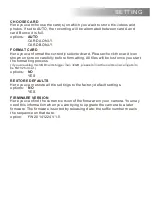
Page 13: ...ently selected card Please check the card icon shown on screen carefully before formatting All les will be lost once you start the formatting process If you are using microSD cards bigger than 32GB pl...

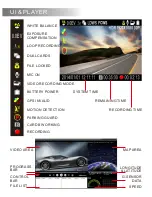
Page 14: ...UAL CARDS FILE LOCKED MIC ON VIDEO RECORDING MODE BATTERY POWER GPS INVALID MOTION DETECTION PARKING GUARD CARD B WORKING RECORDING SYSTEM TIME REMAINING TIME RECORDING TIME VIDEO AREA PROGRASS BAR CO...

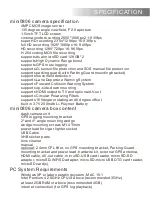
Page 15: ...rding 2304 1296px 16 9 30fps full HD recording 1920 1080px 16 9 45fps HD recording 1280 720px 16 9 60fps H 264 coding MOV le recording supports dual microSD card 128GB 2 supports High Dynamic Range bo...

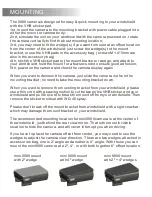
Page 16: ...ing bracket no need to take the mounting bracket down When you want to remove the mounting bracket from your windshield please use a thin cord with a sawing motion to cut between the VHB sticker and y...

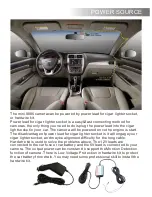
Page 17: ...disadvantage of power lead for cigar lighter socket is it will engage your cigar lighter socket and maybe alignment dif culty for the long cable Hardwire kit is used to solve the problems above The 1...

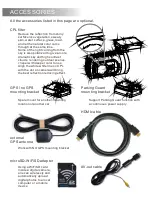
Page 18: ...d to give a more dramatic sky and high contrast clouds rendering outdoor scenes crisper with deeper color tones Align the white white line on CPL with the dot on camera will bring the best reflection...

Page 19: ...o the wrong setting of Flicker Please adjust it depending the local power supply frequency reset the Flicker 50 Hz 60 Hz Camera doesn t auto start recording when the car engine is started Please make...

Page 20: ...MORE THAN A DASH CAMERA www mini0806 com...

Reviews: