Getting Started
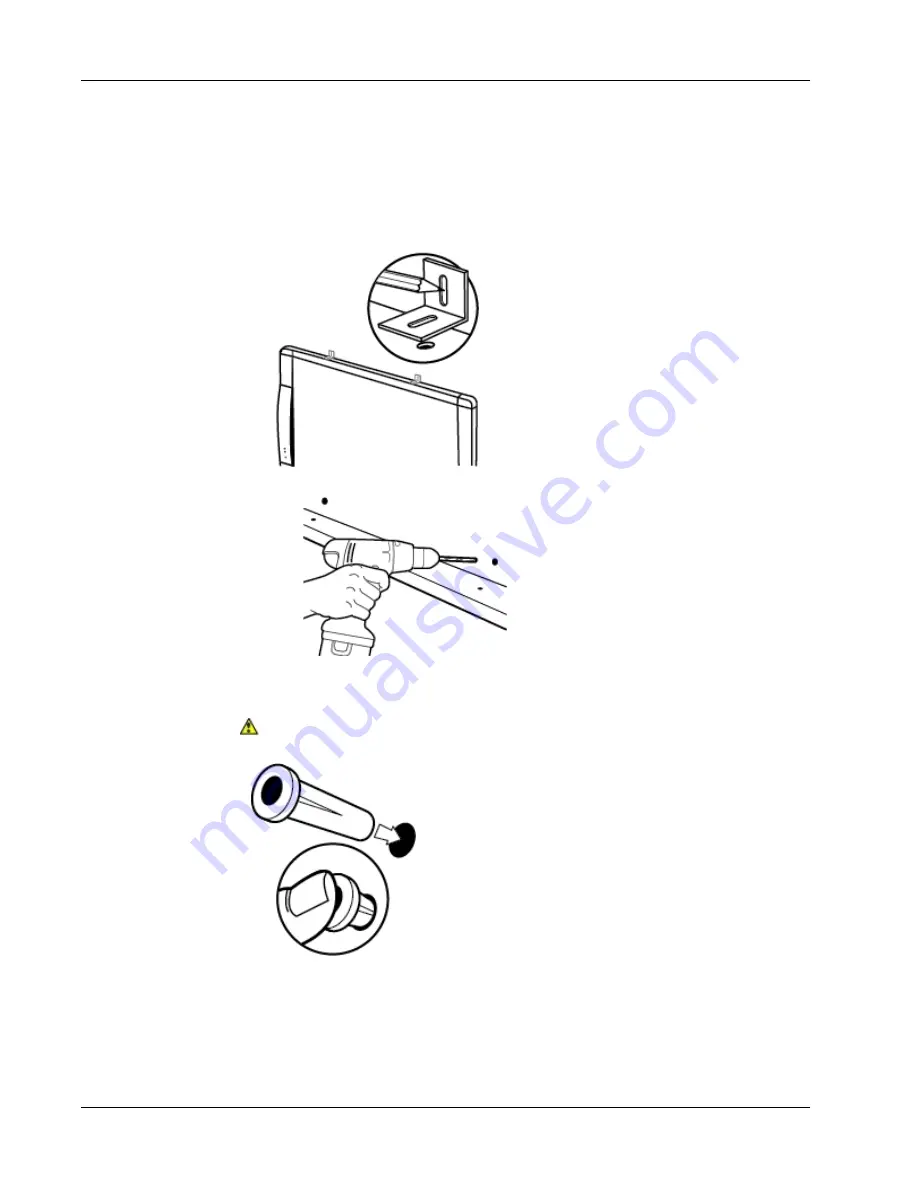
15. Locate the two holes on the top of the MimioBoard and do the following for each of
the two holes:
a. Align the slot in the L-bracket with the hole on the top of the MimioBoard.
b. Make a mark on the wall in the center of the slot in the L-bracket that is touching
the wall.
16. Remove the L-brackets and drill a hole at each mark using a ¼ in (6.35 mm) drill bit.
17. Insert a drywall anchor into each of the two holes so that each anchor is flush with the
surface of the wall.
The included anchors are for use with drywall only. For concrete walls, use concrete
anchors (not included).
10
Summary of Contents for MimioBoard ME-77
Page 1: ...MimioBoard ME 77 ME 87 User Guide mimio com ...
Page 4: ...iv This page intentionally left blank for double sided printing ...
Page 6: ...MimioBoard If you are missing any of the items above contact Customer Support 2 ...
Page 20: ...16 This page intentionally left blank for double sided printing ...
Page 28: ...24 This page intentionally left blank for double sided printing ...


