26
HD96-24-CC-TP
Quick Start Guide
27
Chapter 6 Surface Controls
The HD96-24 has full multi-touch screen control. This gives the user some of the
feeling of working with analogue consoles again whilst at the same time
incorporating modern ways of interacting with everyday products like
smartphones and tablets. One of the advantages digital consoles have over
analogue ones is that their channel count is not limited by the control surface
hardware. However, this means that only a certain number of channels can be
shown on the control surface at any time, while the others are available at the
touch of the screen (GUI) or assignable shortcuts area.
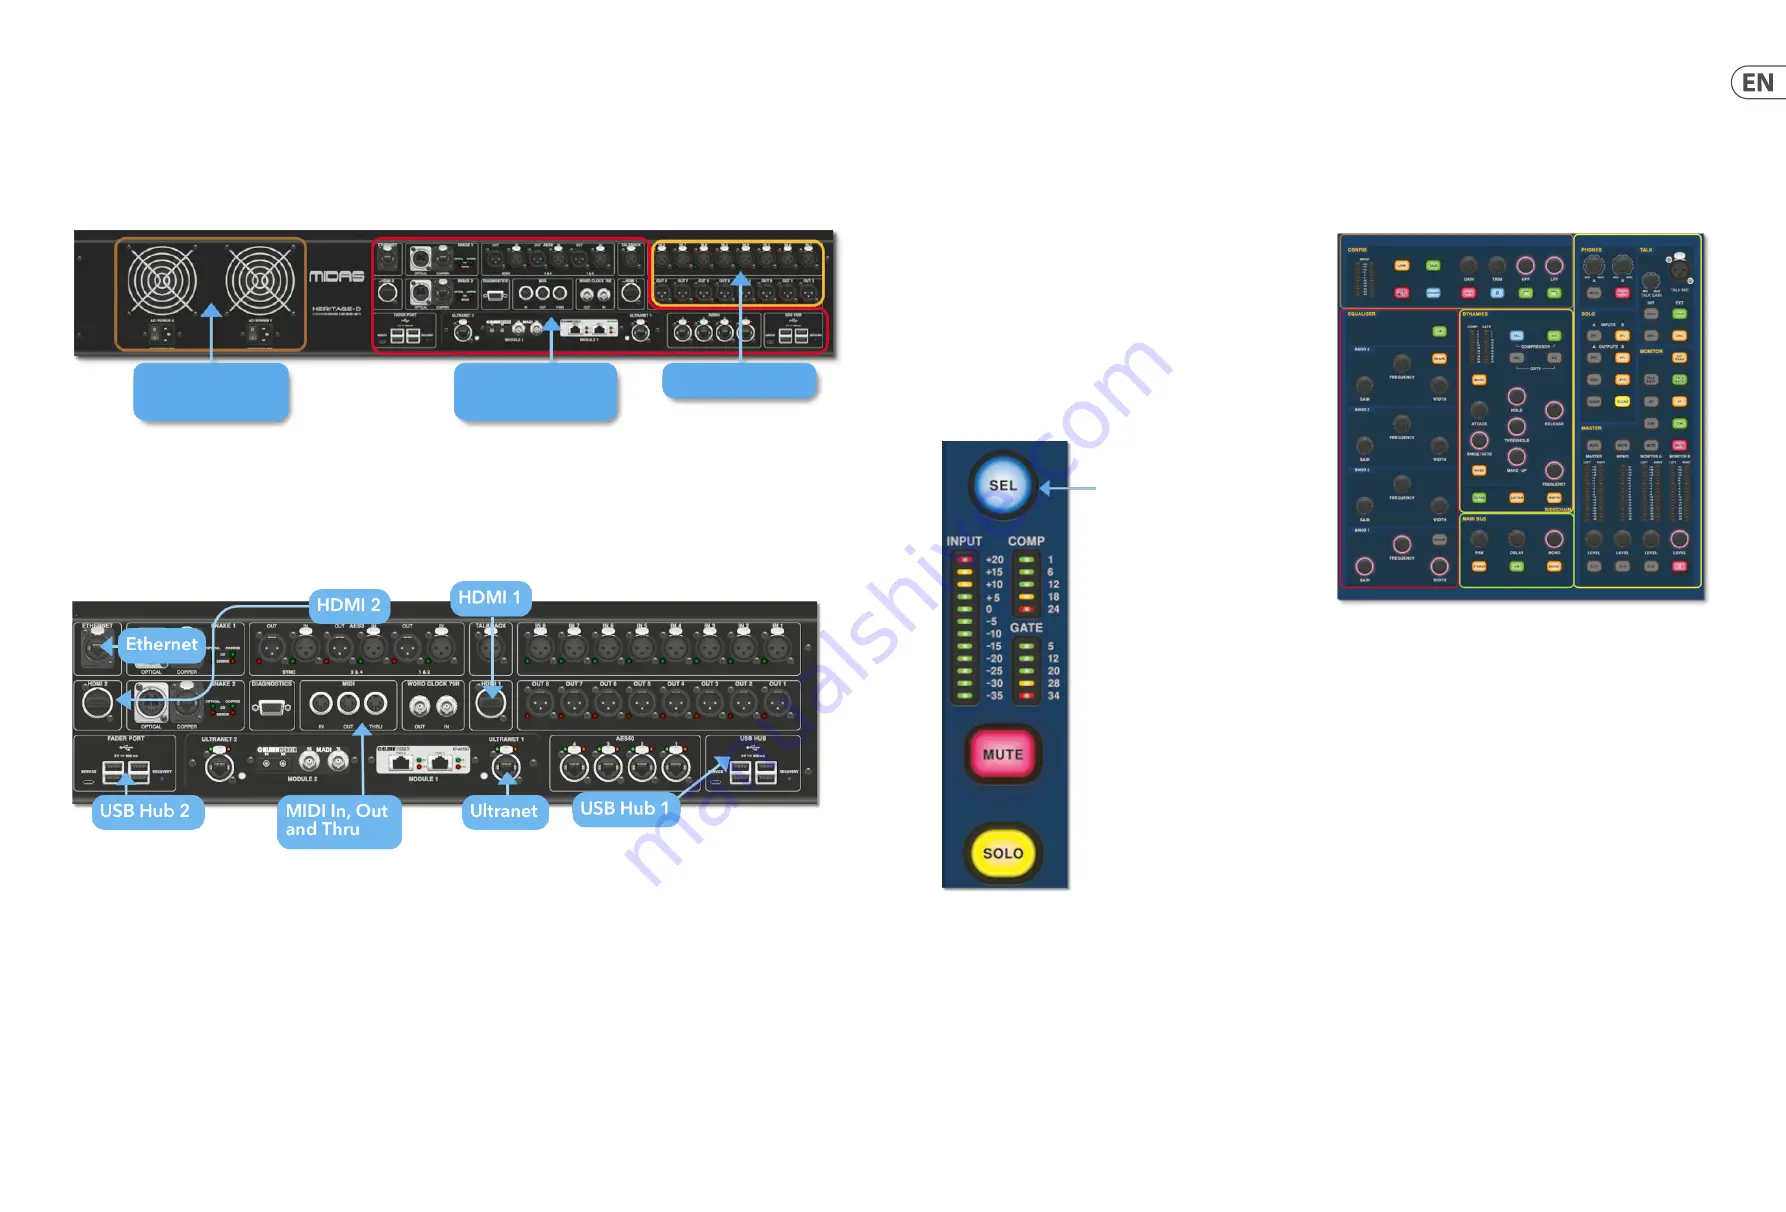
Pressing the SEL (select) button on any input or output will bring the chosen
channel to the surface controls (also to the touch screen widgets). From here
adjustments to many common parameters can be changed such as Gain, EQ,
Dynamics or Pan position. This way of working has a familiar feel that you will
understand and be comfortable to use. Mute will turn the channel off and solo
will send the audio of the selected path to either the A or B solo bus depending on
path settings.
Navigating via the surface detail area
The surface is laid out with a familiar analogue feel for easy operation. Everyday
functions are available for hands on operation. All functions are mirrored in the
GUI with parameter values highlighted on touch. This allows you to make changes
quickly to the selected channel or path.
HD96-24 Basic Operation
Setting up the ID of the unit(s)
After connecting up your system, you may need to set up the ID of the unit(s) in the rack, such as the DL231 I/O or DL15x I/O, as each unit within the same family of units
must have its own unique ID number.
Please refer to the DL series or HD manuals for full details on changing unit ID’s.
A connector panel on the rear of the control surface has two main sections. On the left are two mains power inlet and ventilation assemblies, with 2 x AC power switches
below. The right-section contains connections for the Snake/Multicore, Ethernet control, eight analogue audio inputs and outputs, three AES3 inputs and outputs,
diagnostics, word clock, Twin HDMI™ external monitor outputs, Midi, Talkback (line level input), two expansion card slots and USB Hub.
External interfaces and peripheral devices
Various devices can be used with the HD96-24 such an external USB keyboard.
MIDI
Standard 5-pin connectors are housed in the rear panel for use as MIDI IN, OUT and THRU ports. These are also fitted on some I/O units (DL231, DL251 for example)
and, therefore, are available at both the FOH and the stage locations.
USB
2 x 4way USB 3.0 hubs are provided on the rear of the HD96-24. In addition, a USB port can be found to the right of GUI screen for convenient file transfer.
The Fader Port USB outputs are only for use with future fader bank expansions.
External monitor
The HD96-24 has 2 HDMI™ connections on the rear panel to connect extra displays (1920 x 1080p 59.94Hz/60Hz 16:9 &
720 x 480p 59.94Hz/60Hz 16:9 supported).
Ethernet port
The Ethernet port on the rear of the surface is for connecting the HD96-24 to a network or external wireless router.
Ultranet
2 x Ports for connecting Ultranet enabled devices.
Mains power
and ventilation
Audio, control
and networking
Fixed local I/O
Summary of Contents for HD96-24-CC-TP
Page 17: ...32 HD96 24 CC TP Quick Start Guide 33 HD96 24 Dimensions 1028 352 352 719...
Page 28: ...54 HD96 24 CC TP Quick Start Guide 55 Dimensiones del HD96 24 1028 352 352 719...
Page 39: ...76 HD96 24 CC TP Quick Start Guide 77 Dimensions du HD96 24 1028 352 352 719...
Page 50: ...98 HD96 24 CC TP Quick Start Guide 99 HD96 24 Abmessungen 1028 352 352 719...
Page 61: ...120 HD96 24 CC TP Quick Start Guide 121 Dimens es HD96 24 1028 352 352 719...
Page 72: ...142 HD96 24 CC TP Quick Start Guide 143 Dimensioni HD96 24 1028 352 352 719...
Page 83: ...164 HD96 24 CC TP Quick Start Guide 165 HD96 24 Afmetingen 1028 352 352 719...
Page 94: ...186 HD96 24 CC TP Quick Start Guide 187 HD96 24 M tt 1028 352 352 719...
Page 109: ......


