


88
8.4.3 TCP/IP
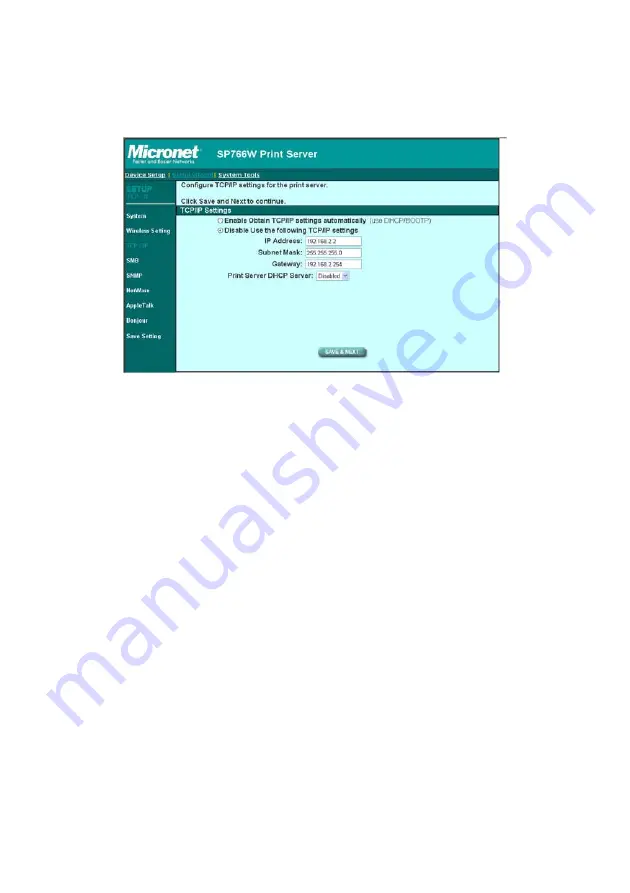
You can configure the print server to automatically get IP from DHCP
server or manually specify static IP. The print server also has a built-in
DHCP server. You can enable this DHCP server and let it manages IP for
you.
If you need the print server to automatically get an IP from DHCP server,
select “
Enable Obtain TCP/IP Settings Automatically (Use DHCP/
BOOTP)
”. You also can select “
Disable Use the following TCP/IP
Settings
” to manually assign “
IP Address
”, “
Subnet Mask
” and
“
Gateway
” for the print server.
You can enable/disable or set auto for the print server’s DHCP server.
The DHCP server is disabled by default. If the DHCP Server is enabled or
set Auto, you have to assign a range of IP addresses here. Fill in the
“
Start IP
”, “
Range
”, “
DNS
”, “
Subnet Mask
” and “
Gateway
”, and the print
server will assign a unique IP for each client. Note that when “
Auto
” is
selected, the DHCP Server of the print server will be enabled only when
there is no other DHCP Server within the network.
Summary of Contents for SP766W
Page 16: ...8 NetWare Network see below...
Page 120: ...112 7 Choose to set the print whether as a default printer or not Click Next...
Page 128: ...120 3 In the Local Area Connection Properties select Advanced option menu and click Settings...
Page 129: ...121 4 The Windows Firewall screen will be popped up select Exceptions option menu...
Page 130: ...122 5 Enable UPnP Framework from the Programs and Services list and click OK...
Page 132: ...124 3 Select Advanced tab and click Settings...
Page 133: ...125 4 Select Exceptions tab and click Add Program...
Page 134: ...126 5 Click Browse to add a new program...
Page 136: ...128 7 A new program Network Ports Quick Setup is displayed in the list click OK...


