19
©2022 Micro-Air Corp
March 21, 2022, revision 1.0
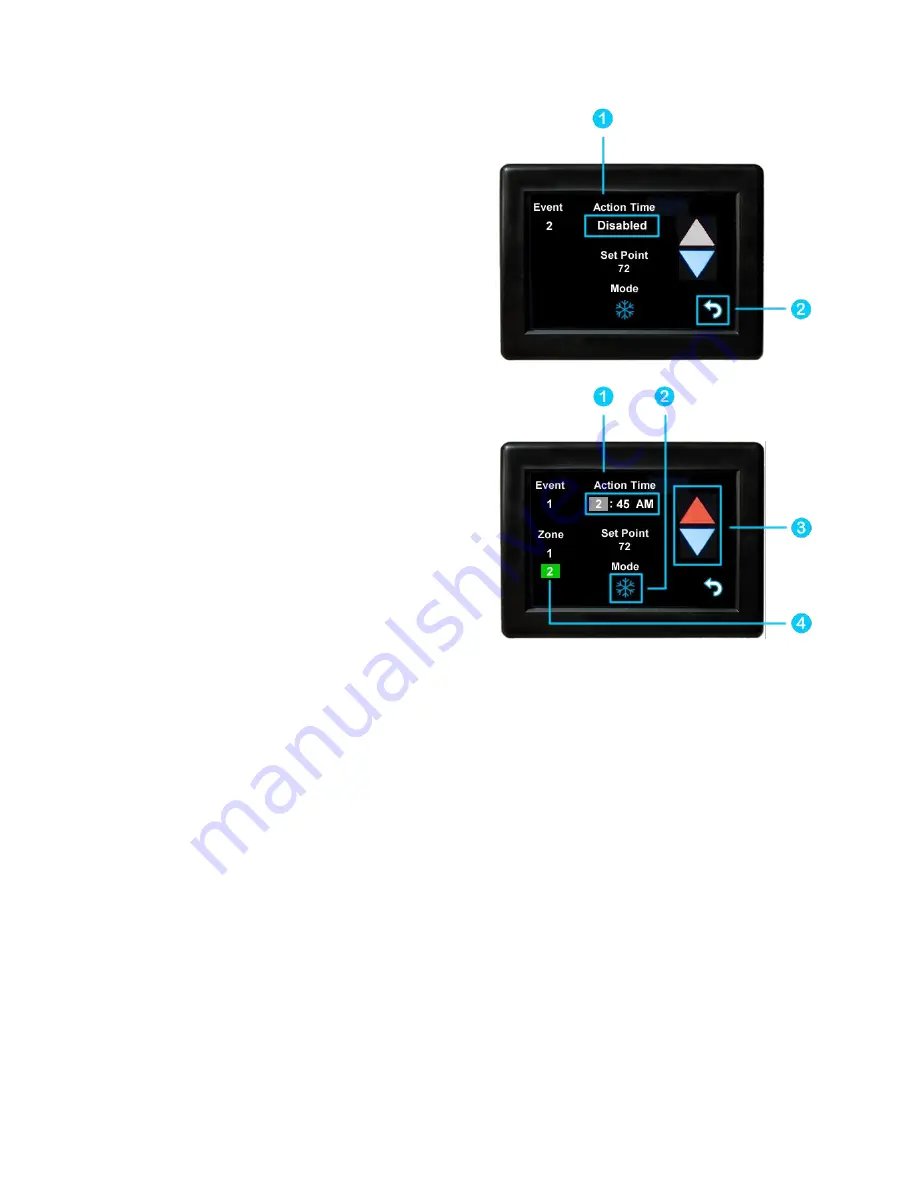
shows the edit screen when an event
is tapped as shown in
on the main
schedule screen. The event on the main screen and
action time in the edit screen will show disabled until a
time is set. Press “Disabled”
(1) at the top of the screen
to show a gray box around the disabled selection. Use
the up and down arrows to make a change. The up and
down arrows change to full color once a selection is
made. Use the back arrow (2) to save any changes and
leave the screen.
shows the schedule edit screen once a valid time
is set for the event.
1.
Set the event time by selecting hours, minutes or
AM/PM.
2.
Set the desired mode by tapping the mode
button.
3.
Tap the hours, minutes, AM/PM or the set point
to select an editable parameter, then use the red
and blue arrow buttons to make a change.
4.
Tap the zone number enable/disable the zone
you want this event to affect. A green box will
draw around zones the event is enabled for. EasyTouch RV models that are not zone controls will
not have this feature and will always be enabled when a valid Action Time (1) is used.
Create and Enable a Schedule
•
Tap the edit schedule button as described in the
section in
settings, to enter the main schedule screen, shown by
•
Ensure that a valid
is shown. Tap the day you want to set up a schedule for, then
the event you want to edit, all shown by
. Tapping the event will take you to the edit
•
Tap the Action Time, Setpoint and Mode to make edits to what you want your event to do. Tap
the zone you want this event to occur in if shown.
•
Tap the back button and repeat for any other events and any other days.
•
Tap the back button once again to return to the settings screen and this will save your schedule.
Activate the schedule by pressing the schedule button with the “Enabled/Disabled” subtext as
section in settings. When enabled, it will be
noted on the
Figure 4 - Schedule Edit Screen (Disabled Event)
Figure 5 - Schedule Edit Screen (Enabled Event)


