7 SG9H 70 en
7
3
MOUNTING
3.1
General
If the SwitchGuard is supplied with valve and actuator, the
tubes are mounted and the SwitchGuard adjusted in
accordance with the customer’s specifications.
The controller is equipped for connection according to VDI/
VDE 3845.
Shaft coupling alternatives for the controller for Metso
actuators are shown in Fig. 4.
For mounting parts for Metso actuators, see 10.3 - 10.5.
3.2
Mounting on Metso actuators with
VDI/VDE mounting face
See figure in Section 10.3.
Mount the H-shaped coupling (47) to the shaft.
Apply the thread-locking compound to the screw
(48) and tighten firmly.
Remove all protective plastic plugs from the pneu-
matic connections (3 pcs.).
BJ and other single acting actuators:
mount a metal
plug (53) with sealant to the C1 connection.
Set the direction arrow of the actuator in the direc-
tion of the valve closure member and attach the ear
(2) to the indicator cover in the position shown in
Section 10.3. Secure the screw of the ear using e.g.
Loctite and tighten firmly.
Attach the bracket (1) to the SwitchGuard.
Attach the bracket (1) to the actuator. The shaft cou-
pling of the SwitchGuard must fit into the ear (2) so that
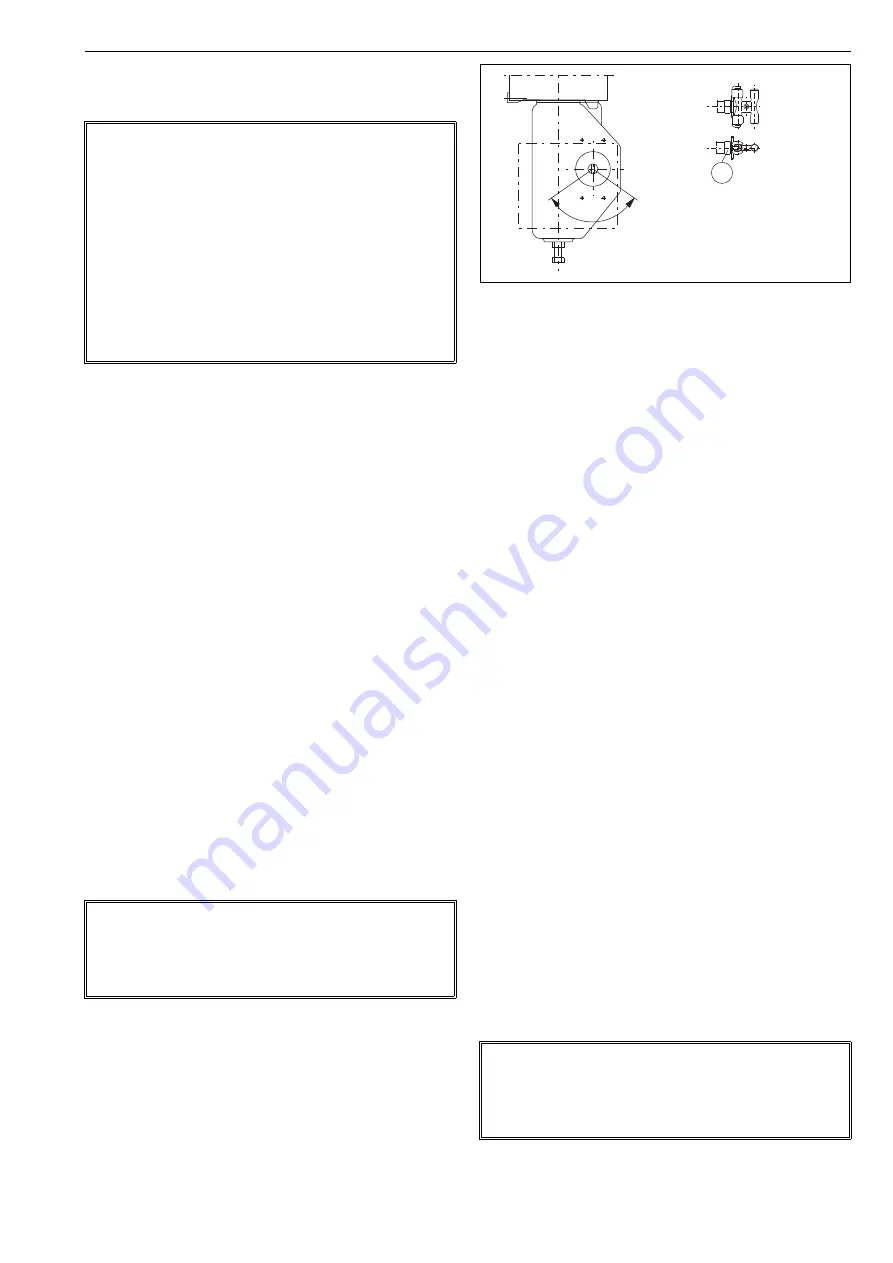
the pointer is located in the position shown in Fig. 3.
3.3
Mounting on linear actuator with
IEC 60534 mounting face
See figure in Section 10.5
Attach the feedback arm with spacer to the controller
shaft. Note the position of the pointer on the shaft as
in 10.5. Apply thread locking compound to the
screws and tighten firmly. Attach the spring to the
feedback arm as shown in Section 10.5.
Mount the controller mounting bracket loosely to
the yoke of the actuator.
Remove all plastic plugs from all actuator connections
(3 pcs.).
Mount the controller loosely to the mounting
bracket guiding the pin on the actuator stem to the
slot of the feedback arm.
Align the bracket and the controller with the actuator
stem and adjust their position so that the feedback arm
is approximately at a 90° angle to the actuator stem (in
the mid-stroke position).
Tighten the controller mounting bracket screws.
Adjust the distance of the controller to the pin on the
actuator stem so that the pin stays in the lever slot at
full stroke. Ensure also that the maximum angle of the
lever does not exceed 45° in either direction. Maxi-
mum allowed travel of the lever is shown in Section
10.5. Best control performance is achieved when the
feedback lever utilises the maximum allowed angle
(±45° from horizontal position). The whole range
should be at least 45°.
Make sure that the controller is in right angle and
tighten all the mounting bolts.
Ensure that the controller complies with previous steps.
Check that the actuator pin does not touch the controller
case throughout the entire stroke of the actuator. If the actu-
ator pin is too long it may be cut to size.
Apply grease (Molykote or equivalent) to the contact
surfaces of the actuator pin and the feedback arm to
reduce wear.
NOTE:
The enclosure of SwitchGuard on/off valve controller
meets the IP66 protection class according to EN 60529 in
any position when the cable entry is plugged according to
IP66. However, it is not allowed to mount the valve con-
troller in position where cable entry is pointing upwards.
Based on good mounting practice, the recommended
mounting position is electrical connections placed down-
wards. This recommendation is shown in our mounting
position coding for control valves. If these requirements
are not fulfilled, and the cable gland is leaking and the
leakage is damaging valve controller or other electrical
instrumentation, our warranty is not valid.
NOTE:
Special care must be taken that the shaft position has
been set according to marking in SG9000H housing and
the pointer in the shaft. Also make sure that the positioner
fail action parameter (PFA) is set correctly (Section 4.4.3).
Fig. 3
Mounting on Metso actuator with VDI/VDE
mounting face
NOTE:
Special care must be taken that the shaft position has
been set according to marking in SG9000H housing and
the pointer in the shaft. Also make sure that the positioner
fail action parameter (PFA) is set correctly (Section 4.4.3).
C2
S
C1
The pointer on the coupling must
stay in this sector
11


