


and
SQA-V
Service Manual Dec_2019
23
If the orientation of flat data cable is correct
but the problem persists – replace it (Item
P/N: KHD-908-000858)
If replacement of flat data cable does not
solve the issue - Replace short flat data
cable connecting the LCD screen to the
Backlight PCB. (Item P/N: V-H-01411-00)
4.
If replacement of the short flat data cable does
not solve the problem - Replace backlight PCB
(Item P/N: V-B-01410-00)
5.
If replacement of the backlight PCB does not
solve the problem - replace the processor on the
main board (see Appendix section for
instructions).
6.
If replacement of the processor has been already
done but the problem persists – replace the
Operation monitor (Item P/N: V-MA-00615-00)
following instructions from paragraph #11 (How
to replace Operation monitor) above
7.
If the problem persists with the new screen –
perform an MBOB replacement OR send the SQA
back to the manufacturer (MES) for a repair
RMA.
SECTION 3:
Replacing the
SQA-V
processor
Instructions for RE-SEATING or REPLACING the SQA-V PROCESSOR
Applies to all SQA-V system versions
Stage 1:
Re-seating the processor
to the correct position
1.
Turn off the SQA-V and
disconnect the power supply
cable
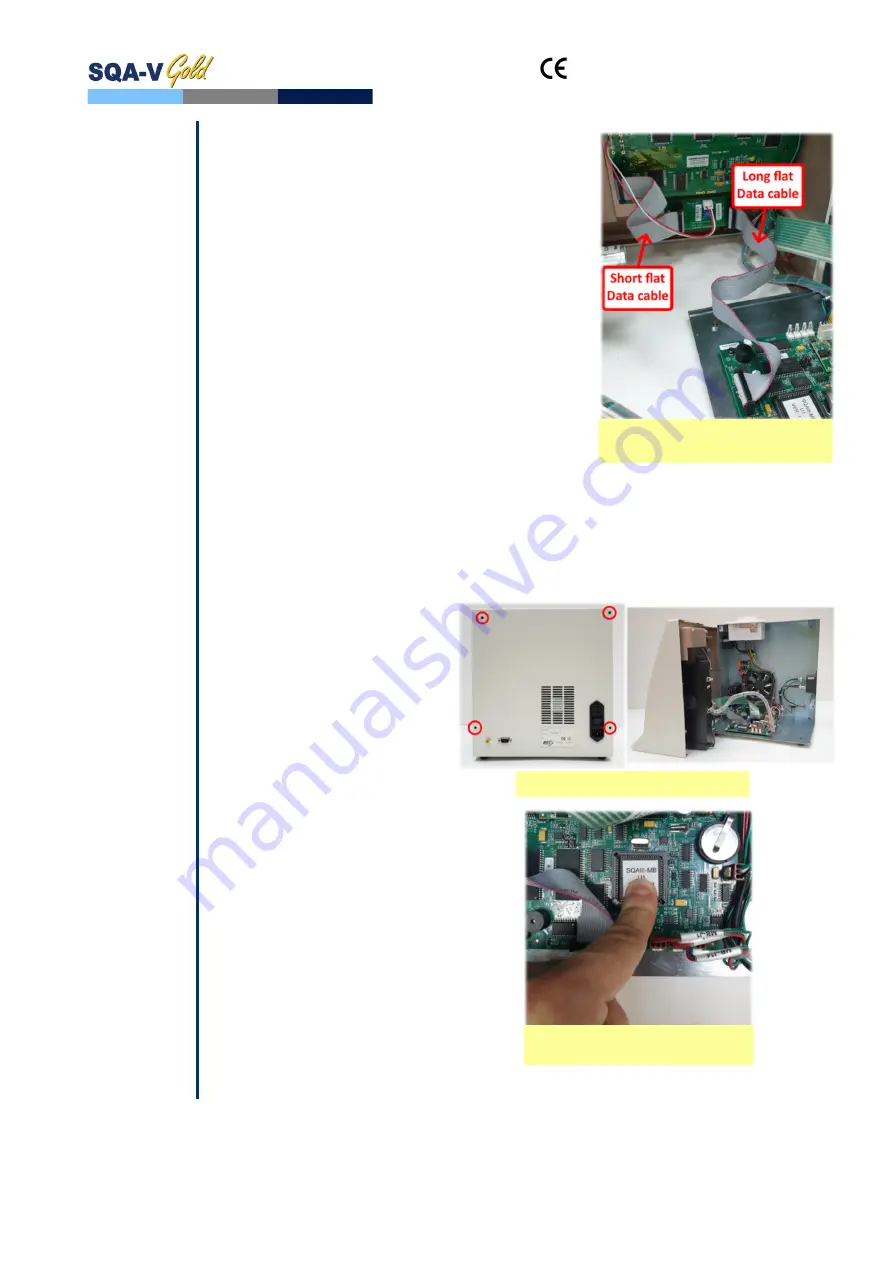
2.
Loose the 4 screws on the rear
panel using a Philips
screwdriver #2 and open the
SQA-V
3.
Slightly press the center of the
processor with an index finger
to re-seat it into the correct
position
4.
Close the SQA-V and tighten all
screws of the rear panel
5.
Connect the power cable of the
SQA-V
6.
Turn the SQA-V on and run the
SELF-TEST
7.
If the SQA-V passes, the repair
process is complete
8.
If the SQA-V does not turn-on
or fails the self- test, go to
Stage 2
Connection of flat data cables
inside the device
Open the SQA-V
Slightly press the center of
the processor


