Please retain product label and instructions for future reference
P 7
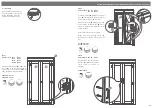
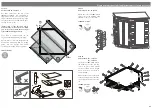
Step 15
Parts needed - No. 26 QTY 1
Attach the two turn buttons
(No. 26)
to the top and bottom of the second-
ary door using 1x16mm screw per
turn button.
* These turn buttons help to keep
your doors straight during high and
low levels of moisture content in the
air.
2x16mm Screws
16mm
screw
Pre drill
hole
Sec
ondar
y D
oor
Lock
ing D
oor
26
13
12
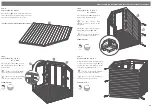
Step 16
Parts needed - No. 12 QTY 1
No. 13 QTY 1
Secure the front
(No. 13)
and
rear
(No. 12)
roof framing to
the underside of the roof, fixing
in place using 6x40mm screws
6x40mm Screws
40mm
screw
Pre drill
hole
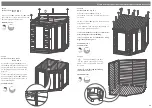
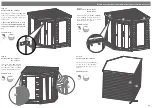
Step 17
Parts needed - No. 18 QTY 2
No. 20 QTY 1
Attach the rain guards
(No. 18 & 20)
to the building, fixing in place above
each window and the door using
3x60mm screws per guard.
9x60mm Screws
60mm
screw
Pre drill
hole
20
18
18
18
Step 18
Parts needed - No. 19 QTY 1
Fix the rear cover trims
(No. 19)
to the back of the building,
aligning with the edge of the
panel.
6x40mm Screws
40mm
screw
Pre drill
hole
19
19


