background image

27

Introduction

Audio

Telephone

Navigation

Index

System settings

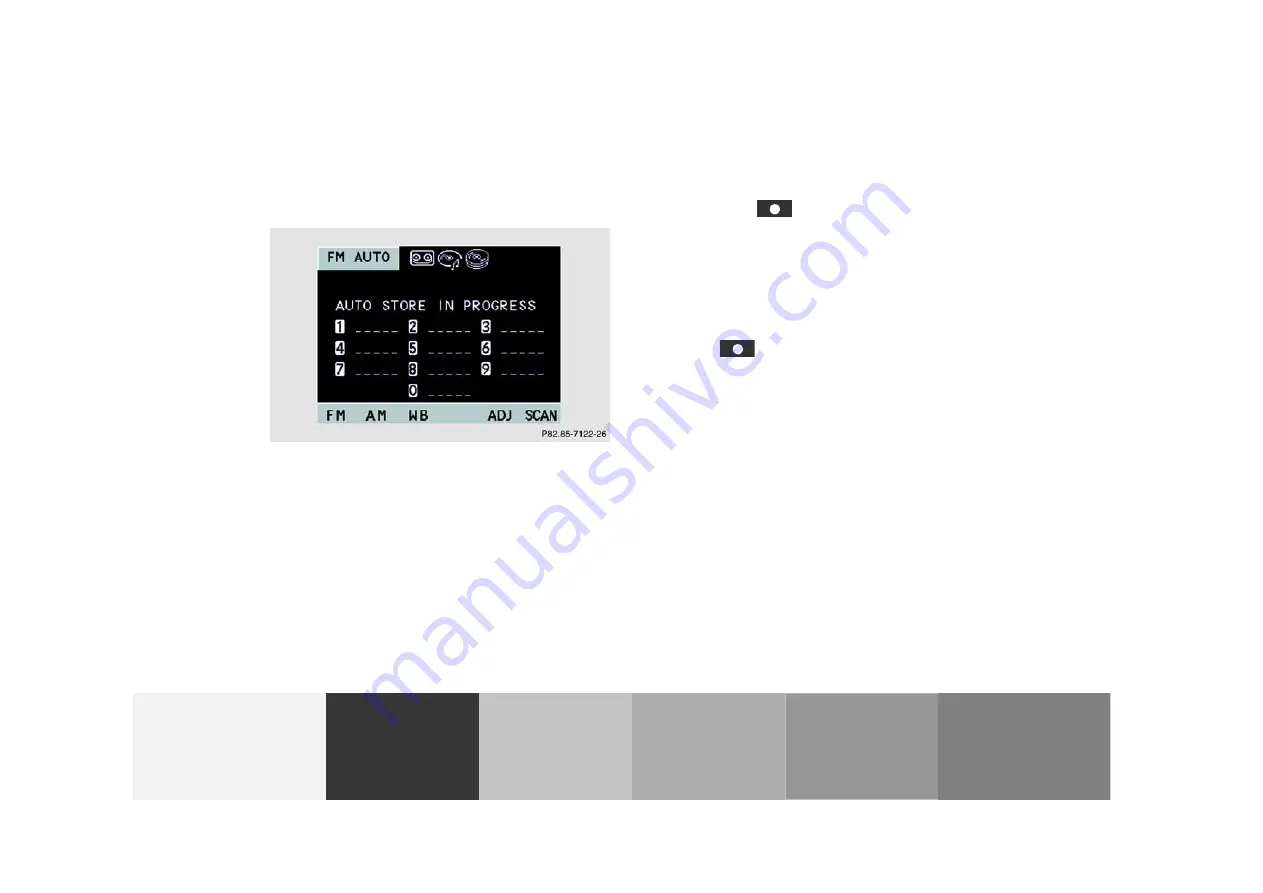
Saving stations automatically (Auto store)

Select a band. You can select AM or FM.

The saving of stations in the auto store function does 
not affect the saved station in the preset menu.

Press the softkey 

 “AUTO” for longer then 2 sec-

onds. While the stations are being saved “AUTO STORE 
IN PROGRESS” will appear in the display. All stations 
stored in auto store preset will be deleted and the 10 
strongest stations will be searched and stored. The sta-
tion frequencies available will appear in the memory 
list.

To view the saved stations select AM or FM and press 
the softkey 

 “AUTO.”

Note:

The standard FM/AM presets are not affected by the 
auto store preset. This is a second possibility for storing 
a station range you are currently receiving.

P82.85-7122-26

Radio operation

Summary of Contents for MY02

Page 1: ...Modular Control System Operator s Manual P ...

Page 2: ...l may not be reasonably relied upon in making any claims with respect to the actual performance of the product If your MCS operating unit is equipped with functions which are not described in this operating manual or if you have any questions please contact any Mercedes Benz Center for further information We recommend that you keep the operating instructions in your vehicle so that you always have...

Page 3: ...Control System as given in the data and illustrations of this Operator s Manual Reprinting translation and copying even of excerpts is not permitted without our prior authorization in writing Title illustration no P82 85 7147 00 Press time 06 12 01 MBUSA TI Printed in U S A ...

Page 4: ...555 Order No DaimlerChrysler 6515 6636 13 Parts No 163 584 42 83 Edition A 2002 ...

Page 5: ...ters Introduction An overview of the operating and display elements as well as explanation of the basic functions Audio Information on the radio tape single CD player and CD changer equipment Telephone Explanation of the telephone functions Navigation How to enter your destination selecting your route route guidance how to use the route memory and selecting a detour System settings Here you will f...

Page 6: ...id distractions which could lead to an accident system settings should be entered with the vehicle at standstill and the system should be operated by the driver only when traffic conditions permit Bear in mind that at a speed of just 30 m p h approximately 50 km h your car is covering a distance of 50 feet approximately 14 m every sec ond G Warning Any alterations made to electronic components and...

Page 7: ...ther band 28 Operating and display elements Tape deck 30 Inserting or ejecting a tape 31 Menu overview Tape deck 32 Switching tape operation on and off 33 Changing sides 34 Fast forward rewinding 35 Music search 36 Scanning 37 Skip blanks 38 Dolby B noise reduction 39 Pause 40 Operating and display elements Single CD player optional and CD changer optional 41 General information on CD playback 42 ...

Page 8: ... use the navigation system 82 Operating and display elements Navigation 85 Menu overview Navigation 86 Switching navigation operation on and off 88 Inserting or ejecting a navigation CD 89 Entering destination address 90 Saving the current vehicle position 109 Address Book 110 Today s Plan 115 Recent Route editing 120 The principle of route guidance 122 Route guidance 124 Mute voice instructions 1...

Page 9: ...ing the off route recalculation mode 146 Selecting the language 147 Viewing GPS Information 149 Viewing Software Information 150 Settings Operating and display elements System settings 152 Adjust sound settings 153 Switching between the light mode and the dark mode 155 Adjusting the brightness in the dark mode 155 Adjusting the brightness for navigation systems 156 Setting the display dimming char...

Page 10: ...panel 1 a rotary push button 2 a number keypad with the zoom keys 3 a joystick 4 a softkey panel 5 and a color display screen 6 as the displaying element All of the functions are displayed on the screen This includes menus lists maps symbols and information windows The joystick is used to select and confirm the menu fields You will find information on the operating and display elements pertaining ...

Page 11: ...o return the control panel to its closed position Key This key enables you to alter an incorrect input Number keypad Use the keys to to enter telephone numbers and transmission frequencies they can also be used to select radio stations CD tracks and CD s Key and These keys change the map scale in the navigation mode Key This key brings up the navigation menu Key During the navigation operation thi...

Page 12: ...ay Select the desired menu field by positioning the cursor on it 2 Push the joystick to or to start rewind or search functions in the radio tape or CD mode 3 Press the joystick to confirm your selection The selected function will activate or a submenu may appear or a selection will be confirmed Softkeys With the softkeys the submenus and functions which appear above the softkeys on the display can...

Page 13: ...oaming R highlighted Roaming on non home type system 6 Signal meter for telephone 7 Displays system settings and functions 8 Menu field for the softkey functions The information status line 1 indicates the active sys tem e g FM for radio The current system settings and functions displayed appear in the middle of the screen 7 The menu field for the softkey functions 8 appears at the bottom of the s...

Page 14: ... lock to position 0 or removed The MCS can also be switched on if the electronic key is not inserted in the steering lock but it will switch itself off automatically after one hour MCS switches on the system which was last active and displays the corresponding menu Press the button marked for the component you would like to switch on e g the Switch off Press the rotary push button 1 The MCS operat...

Page 15: ... functions Telephone function The selected volume level applies only to the telephone function Navigation function Raising the volume difference turn the rotary push button 1 to the right clockwise Lowering the volume difference turn the rotary push button 1 to the left counterclockwise During a navigation announcement you can select the volume difference between the volume of the audio source and...

Page 16: ...he light will be shut off When the display has cooled down the light will be automatically switched on Anti theft system If the power supply to the MCS has been interrupted PLEASE ENTER SECURITY CODE will appear on the display when it is next switched on The MCS will only work after the five digit code has been entered using the number keypad P82 85 7114 26 P82 85 7117 26 Introductions ...

Page 17: ...If a wrong number is entered you have to enter the complete numerical code again If an incorrect numerical code has been entered and confirmed PLEASE ENTER SECURITY CODE will reappear on the display The correct code must be entered once again If an incorrect code is entered three times WAIT will appear on the display and the MCS will be locked out for about 10 minutes If after 10 min utes an incor...

Page 18: ... and off 33 Changing sides 34 Fast forward rewinding 35 Music search 36 Scanning 37 Skip blanks 38 Dolby B noise reduction 39 Pause 40 Operating and display elements Single CD player optional and CD changer optional 41 General information on CD playback 42 Inserting or ejecting a CD Single CD player 42 Loading CDs in the CD changer 43 Menu overview Single CD player optional and CD changer optional...

Page 19: ...ut page 20 Selecting a station page 23 5 Push joystick to Automatic seek tuning page 21 Push joystick to Automatic seek tuning page 21 Push joystick to Manual tuning page 20 Push joystick to Manual tuning page 20 6 Softkeys for LIST Preset menu page 23 25 AM FM Changing radio band page 19 WB Weather band page 28 AUTO Automatically station saving page 27 ADJ Sound adjustment page 153 SCAN Scan func...

Page 20: ...16 Introduction Audio Telephone Navigation Index System settings Menu overview Radio P82 85 7157 29 Radio operation ...

Page 21: ...y 4 Scan function scanning radio stations page 22 5 Main sound settings menu Adjust sound settings page 153 6 Auto store menu save and select stations automati cally page 27 7 Weather band page 28 8 Current weather band 9 Main AM radio menu page 19 10 Current band FM and memory preset selected are displayed 11 Preset menu save and select stations page 25 Radio operation ...

Page 22: ...ress The radio will switch on The station last tuned will begin to play On FM and AM the frequency will appear in the display Note The telephone and navigation functions can be used while the radio is on Switching off the radio Switch to the tape single CD or CD changer mode or switch off the MCS P82 85 7118 26 Radio operation ...

Page 23: ...select the WB band The station last tuned into will begin to play The fre quency will appear in the display Selecting a station FM or AM mode Different functions are available for selecting a station Manual tuning page 20 Station selection via direct frequency entry page 20 Automatic seek tuning page 21 Automatic station scan page 22 Station selection via number keypad presets page 23 Station sele...

Page 24: ...ed Push joystick to The frequency displayed will descend in increments of 200 kHz FM or 10 kHz AM The descending of the frequency starts slowly and then increases in speed Station select via direct frequency entry It is possible to set a station by entering the station fre quency directly via the number keypad Press the key bottom left on the keypad An input line will appear in the main radio menu...

Page 25: ...is completed within 4 seconds the station heard last will resume play Enter the desired frequency Frequency ranges FM 87 9 107 9 MHz AM 530 710 kHz If you enter a frequency that is outside the allowable input range it will not be accepted Automatic seek tuning Push joystick to The next receivable station up the frequency range will be tuned in and begin to play The station frequency will appear on...

Page 26: ...an be received activate another radio function e g the tune function see page 20 to stop the seek function Automatic station scan Press softkey SCAN The activated scan func tion is shown by a negative SCAN on the display The receivable stations on the same band FM AM will be played one after the other for 8 seconds P82 85 71220 26 Radio operation ...

Page 27: ...et number in the main radio menu or in the preset menu LIST To view the preset menu select AM or FM and press the softkey LIST 1 Frequency of the station you are listening to pres ently 2 Preset position of the station you are listening to presently To exit the preset menu press the softkey FM P82 85 7118 26 P82 85 7121 26 Radio operation ...

Page 28: ... only be accessed while in the cor responding band The memory preset number will appear in the status line Saving stations pages 25 and 27 Station selection in the auto store preset menu To view the preset menu select AM or FM and press the softkey AUTO 1 Frequency of the station you are listening to pres ently 2 Preset position of the station you are listening to presently 3 Memory preset availab...

Page 29: ...n the status line Saving stations pages 25 and 27 Memory functions FM or AM mode The following functions are available Saving stations manually page 25 Saving stations automatically page 27 Note There are 10 presets for the FM waveband and 10 pre sets for the AM waveband Saving stations manually FM AM Select a band You can select either AM or FM You can save a station in the main radio menu or in ...

Page 30: ... The memory preset selected will appear in the status line Note An existing entry is overwritten in the memory list when a new input is given The standard FM AM presets are not affected by the automatic preset This is a second possibility for storing a station range you are currently receiving Preset menu 1 Frequency of the station you are listening to pres ently 2 Preset position of the station y...

Page 31: ...tions are being saved AUTO STORE IN PROGRESS will appear in the display All stations stored in auto store preset will be deleted and the 10 strongest stations will be searched and stored The sta tion frequencies available will appear in the memory list To view the saved stations select AM or FM and press the softkey AUTO Note The standard FM AM presets are not affected by the auto store preset Thi...

Page 32: ... the station you are listening to pres ently 2 Preset position of the station you are listening to presently 3 Memory preset available Weather band Press softkey WB WB is displayed in the upper left corner The channel last tuned to will appear on the display P8285 7123 26 P82 85 7124 26 Radio operation ...

Page 33: ...els will be played one after the other for 8 seconds Press one of the number keys between and such as briefly the selected channel will tuned in If a weather station cannot be received on this channel an automatic search of all 7 channels will take place As soon as a weather station is received the search run stops and the channel appears in the display Three cycles through the 7 channels will be ...

Page 34: ... with the but ton page 31 4 Raising or lowering the volume page 11 5 Push joystick to Music search forward page 36 Push joystick to Music search reverse page 36 Push joystick to The tape will wind fast for ward page 35 Push joystick to The tape will rewind page 35 6 Softkeys for PAUSE Pause function page 38 SIDE Changing sides page 34 Dolby B function page 39 SKIP Skip blanks page 38 ADJ Sound adj...

Page 35: ...a cas sette symbol on the display if a cassette is inserted Ejecting Press to lower the front of the control panel Press to eject the cassette Press to raise the front of the control panel If the display is in the down position for more than 20 seconds 2 successive beeps will be heard This will con tinue at 5 second intervals until the front of the control panel is returned to its normal position ...

Page 36: ...32 Introduction Audio Telephone Navigation Index System settings Menu overview Tape deck P82 85 7158 29 Tape operation ...

Page 37: ... 4 Skipping blank section page 38 5 Noise reduction Dolby B page 39 6 Changing sides page 34 7 Pause function page 40 Switching tape operation on and off Tape operation begins automatically by inserting a cassette page 31 if you press the button when a tape is already inserted in the cassette slot The cassette side facing upward is defined as SIDE 1 P82 85 7125 26 Tape operation ...

Page 38: ...splay the tape mode will stop and the headunit will switch to the radio mode The telephone and navigation functions can be used while a tape is playing Switch off tape playback Eject the tape switch to the radio single CD or CD changer mode or switch off the MCS Changing sides Press the softkey SIDE The flip side of the tape will now begin to play The side will also change automatically when the e...

Page 39: ...ar on the screen Push joystick to The tape will rewind REWIND will appear on the screen To stop the function Push the joystick in any direction Note When the end beginning of the tape is reached the winding stops and the playback begins The tape switches automatically to the other side at the end of a fast forward operation P82 85 7127 26 Tape operation ...

Page 40: ...reen Push joystick to The tape will wind to the beginning of the current track or to the previous track MUSIC SEARCH REVERSE will appear on the screen To stop the function Push the joystick in any direction Note The music search function will not work properly unless there is enough blank tape approx 2 seconds separat ing the individual tracks P82 85 7128 26 Tape operation ...

Page 41: ...blank tape approx 2 seconds separat ing the individual tracks To start the function Press the softkey SCAN The activated scan function is shown by a highlighted SCAN on the display and SCANNING will appear on the screen To stop the function Press the softkey SCAN or the joystick in any direction Note At the end of the tape the tape will automatically switch to the other side and scan will stop P82...

Page 42: ...e This function will continue after the tape has reached the end and switch to the opposite side To start the function Press the softkey SKIP The activated skip blanks function is shown by a highlighted SKIP on the display If the tape deck activates fast forward SKIPPING BLANK SECTION will appear on the display To stop the function Press the highlighted softkey SKIP P82 85 7130 26 Tape operation ...

Page 43: ...eduction system is manufactured under licence by Dolby Laboratories Licensing Corpora tion The word Dolby and the double D symbol are trademarks of Dolby Laboratories Licensing Corpora tion To start the function Press the softkey The activated Dolby B function is shown by a highlighted on the display To stop the function Press the highlighted softkey P82 85 7131 26 Tape operation ...

Page 44: ...n Index System settings Pause Press the softkey II The tape will stop playing and PAUSE will appear on the display The tape will also stop if you send or receive a phone call To cancel PAUSE Press the softkey PLAY P85 25 7132 26 Tape operation ...

Page 45: ...ising or lowering the volume page 11 5 Selecting a CD MCS with CD changer page 53 Selecting a track page 54 6 Push joystick to Track select the next track starts page 54 Push joystick to Track select the previous track starts page 54 Push joystick to Music seek forward page 55 Push joystick to Music seek reverse page 55 7 Softkeys for II Pause function page 58 RDM Random play function page 57 RPT ...

Page 46: ...D player or the CD changer and should not be used G Warning The single CD player and CD changer are Class 1 laser products There is a danger of invisible laser radiation if the cover is opened or damaged Do not remove the cover The single CD player and the CD changer do not contain any parts which can be serviced by the user For safety reasons have any service work which may be necessary per forme...

Page 47: ... In the radio and tape mode there will be an audio CD symbol on the display if an audio CD is inserted Ejecting Press to lower the front of the control panel Press to eject the CD Press to raise the front of the control panel If the display is in the down position for more than 20 seconds 2 successive beeps will be heard This will con tinue at 5 second intervals until the display is returned to it...

Page 48: ...d the trim panel on the right side of the cargo area It can accommodate up to 6 CDs Open the sliding door by pushing in the direction of the arrow indicated in the picture Push the door completely open G Warning A lowered control panel can easily be damaged so as soon as the CD is ejected close the control panel Do not place anything on the lowered control panel P82 85 6536 26 CD operation ...

Page 49: ... slide upwards Note The magazine can be ejected even if the MCS is switched off However the eject button will not function if the battery is not connected or drained Pull the disk tray forward until it stops Note Do not attempt to remove the tray from the magazine P82 85 2087 26 P82 85 2088 26 CD operation ...

Page 50: ...on Audio Telephone Navigation Index System settings Place the CD in the tray The CD should be inserted with the label side up Push the CD tray into the magazine completely P82 85 2890 26 P82 85 2891 26 CD operation ...

Page 51: ...for the click Close the sliding door 3 Note Make sure that the tip of the arrow 1 on the side of the magazine is pointing in the direction of the arrow 2 Do not force the magazine into the changer If the maga zine does not enter smoothly please check for proper orientation of the magazine P82 85 2892 26 M e rs e d e s B e n z CD operation ...

Page 52: ...48 Introduction Audio Telephone Navigation Index System settings Menu overview Single CD player optional and CD changer optional P82 85 7159 29 CD operation ...

Page 53: ... 57 6 Main sound settings menu Adjust sound settings page 153 7 Pause function page 58 8 Select time display page 59 CD changer 9 Main CD menu for CD changer 10 Icon for connected and loaded CD changer 11 Number of selected CD 12 Scan function scanning tracks page 56 13 Repeat function page 56 14 Random play page 57 15 Main sound settings menu Adjust sound settings page 153 16 Select time display ...

Page 54: ...ever navigation is only possible while a navigation CD is inserted in the single CD player MCS with single CD player CD operation begins automatically by inserting a CD page 42 The playback starts at Track 1 Press when a CD is already inserted in the CD slot The playback starts at Track 1 Switch off CD playback Eject the CD switch to the radio or tape mode or switch off the MCS P82 85 7148 26 CD o...

Page 55: ... MCS will start the last CD mode which was activated To start the other CD mode press again Single CD player operation begins automatically by inserting a CD page 42 The playing starts at Track 1 Press when a CD is already inserted in the CD slot page 42 The playing starts at Track 1 Switch off CD playback Eject the CD switch to the radio tape or CD changer mode or switch off the MCS CD changer op...

Page 56: ...ERTED a navigation CD is inserted in the CD slot replace the CD and press CD again CD changer mode MAG EMPTY there are no CDs in the inserted magazine CD changer mode NO MAGAZINE there is no magazine in the CD changer CD changer mode CHANGER ERROR have the MCS and the CD changer checked by an authorized Mercedes Benz Center Note In the CD radio and tape modes there will be symbols on the display f...

Page 57: ... appear for 4 seconds on the display The selected CD will be highlighted If the selected magazine slot is empty the message NO CD and the number of the selected slot will appear on the screen Then the next CD inserted will be selected The playback will begin with track 1 of the selected CD Note After the last track of the current CD has been played the next CD inserted in the magazine is selected ...

Page 58: ...sh joystick to Play back the previous track If more than 10 seconds of playing time have elapsed the current track is started over Push the joystick as often as necessary to select the desired track Selecting a track with the number keypad Press and enter the number of the track you wish to select e g and Track 2 is played P82 85 7148 26 P82 85 7151 26 CD operation ...

Page 59: ... will switch off and the screen will return to the previous display If you enter a track number which is higher than the last track on the disk INVALID TRACK will appear on the display The current track will keep playing without interruption Music seek Push joystick to The CD will seek forward as long as you push the joy stick Push joystick to The CD will seek backward as long as you push the joy ...

Page 60: ... Press the softkey SCAN The activated scan function is shown by a highlighted SCAN on the dis play To stop the function Press the highlighted softkey SCAN or the joy stick in any direction CD track repeat Select the repeat function to repeat the current track The repeat function will continue until you switch the function off P82 85 7133 26 P82 85 7134 26 CD operation ...

Page 61: ...function Press the highlighted softkey RPT Note You can not activate the repeat function and the random function at the same time You can only select one func tion at a time Play CD tracks in random order Select the random function to play back the tracks on the CD currently selected in random order To select the next track in the random list push the joy stick to or P82 85 7135 26 CD operation ...

Page 62: ...the function Press the highlighted softkey RDM Note You can not activate the repeat function and the random function at the same time You can only select one func tion at a time Pause Press the softkey II The CD will stop playing On the display PAUSE will appear The CD will also stop playing if you send or receive a phone call To cancel PAUSE Press the softkey PLAY P82 85 7136 26 CD operation ...

Page 63: ...The CD main menu displays the current track and the elapsed time By pressing the softkey TIME the total numbers of tracks and the total playing time will be displayed This display disappears after 4 seconds automatically or by pressing the softkey TIME again P82 85 7137 26 CD operation ...

Page 64: ...lay elements telephone 63 Menu overview Telephone 64 Switching telephone on and off 66 Incoming calls 68 Outgoing calls 70 Dialing a telephone number 70 Dialing a number from the phone book 72 Redial 74 Speed dialing 75 Quick dialing 76 Emergency call 76 Requesting and displaying Info Services 79 Contents Telephone ...

Page 65: ...k again on its own If you have locked the phone you must enter the unlock code to be able to use all of the telephone functions If you do not enter the unlock code you can only use the emergency number programmed into memory location 1 default is 9 1 1 To enter the unlock code see page 66 1 Observe all legal requirements G Warning Never operate radio transmitters equipped with a built in or attach...

Page 66: ...o appears if the network is no longer receivable because of weak receiving condi tions The message NO SERVICE is displayed if you try to make a call The message TELEPHONE NOT ATTACHED is dis played Please attach the telephone The message PHONE IS OFF is displayed Please switch on the telephone In the following situations it is only possible to access the emergency number programmed into memory loc...

Page 67: ... the phone book with a maximum of 2 digits page 75 Quick dialing Activates the first ten numbers stored with one digit page 76 Enter the emergency call page 76 5 Push joystick to Scroll list down page 72 Push joystick to Scroll list up page 72 Push joystick to Select name or number page 72 Push joystick to Select name or number page 72 6 Softkeys for SVC Info service page 79 NUM Phone book with nu...

Page 68: ...64 Introduction Audio Telephone Navigation Index System settings Menu overview Telephone P82 85 7152 29 Telephone ...

Page 69: ...k code menu page 66 2 Main telephone menu 3 S Signal page 67 R Roaming page 67 R highlighted Roaming on non home type system 4 Reception indicator page 69 5 Incoming call page 68 6 Alphanumeric phone book page 70 7 Numeric phone book page 72 8 Info Service page 79 Telephone ...

Page 70: ...ode Use the number keys to enter the unlock code Asterisks will appear in place of the digits in the input line If the input code is correct and the phone is registered in a network the phone is ready for use Switching off the telephone system The telephone will change to sleep mode if you switch to an audio mode navigation mode or switch off the MCS system P82 85 7139 26 Telephone ...

Page 71: ...ch to it from another system i e radio The emergency number programmed in memory loca tion 1 can be used even if the unlock code has not been entered NO SERVICE this message will appear in case the phone is not registered in a network or the network is no longer receivable because of bad receiving condi tions In this case the emergency call number cannot be used If the telephone is ready for opera...

Page 72: ...esponding name will appear in the display if it has been entered witht hte number in the phone book When the call is answered the call time will appear in the display Accepting a call Press the current audio source is automatically muted Refusing a call Press the main telephone display disappears and the previous source is restored Ending a call Press the main telephone display disappears and the ...

Page 73: ... cradle will switch hands free operation off 1 Observe all legal requirements P82 85 5066 26 G Warning Please be sure to pay attention to the traffic situa tion at all times Use the mobile cellular telephone1 only when the traffic situation allows Some jurisdictions prohibit the driver from using a cellular telephone while driving a vehicle Whether or not prohibited by law for safety reasons the d...

Page 74: ...e 76 Pre programmed emergency call page 76 Dialing a telephone number Press The main telephone menu will appear Any activated audio source will automatically be muted Enter the telephone number with the number keys To correct the last digit press If the number is correct press The dialing will begin If the number is stored in the memory with a name then the name will appear on the display To stop ...

Page 75: ...e will appear on the display Ending a call Press Subsequent dialing During the call you can press the number keys and to transmit other dialing tones to the party you are talking to The numbers dialed will appear in the menu for 10 sec onds after the last key is pressed subsequent dialing display P82 85 7141 26 Telephone ...

Page 76: ...MPTY will appear on the display Note You can only save numbers and names in the telephone book via the cellular telephone see telephone Opera tor s Manual Dialing a number from the alphanumeric scrolling mode When the main telephone menu is on display press the softkey NAME You also can enter the desired memory location number with the number keys e g You can enter up to 2 digits To correct the la...

Page 77: ...ftkey NUM Begin dialing If you have found the right name press When the call is initiated the call time will appear in the display End the call Press Dialing a number from the numeric scrolling mode When the main telephone menu is on display press the softkey NUM You also can enter the desired memory location number with the number keys e g You can enter up to 2 digits To correct the last digit pr...

Page 78: ...tick to the left or the right you can jump to the next or previous page of the list You also can jump to the alphanumeric scroll menu by pressing the softkey NAME Begin dialing If you have found the right number press When the call is initiated the call time will appear in the dis play End the call Press Redial You can redial the last 10 numbers which have been dialed P82 85 7146 26 Telephone ...

Page 79: ...o numbers stored LAST NUMBERS MEM ORY EMPTY will appear on the screen Begin dialing If you have found the right number press When the call is initiated the call time will appear in the dis play End the call Press Speed dialing When the main telephone menu is displayed enter the memory location desired with the number keys You can enter up to 2 digits To correct the last digit press Press The phone...

Page 80: ...all Press Emergency call Important If you press and press the number stored in memory location 1 default is 9 1 1 will be dialed Pressing and holding for more than 2 seconds will also initiate the call The 9 1 1 emergency call system is a public service Using it without due cause is a criminal offence The emergency call will be placed as long as the corre sponding mobile communications network is ...

Page 81: ...r avail ability Telephone is ready for operation When the main telephone menu or a memory menu is displayed on the screen enter the emergency number by pressing 1 for longer than 2 seconds quick dialing G Caution It will not be possible to connect the emergency call if the cellular system is busy The message SYSTEM BUSY will be displayed P82 85 7140 26 Telephone ...

Page 82: ...longer than 2 seconds the number which is stored will appear in the display End the call Press Note To use this function you must ensure that the number stored in memory location 1 is the number to be dialed in case of emergency This function can also be used if the telephone is locked Telephone ...

Page 83: ...pdate If there is no information stored NO INFORMATION STORED IN MEMORY PLEASE UPDATE appears on the screen If there is no information stored or you want to update the information press the softkey UPDT In the following situations it is not possible to update and the following messages appear DATA CONNECTION CANNOT BE ESTABLISHED request has failed because Response Center cannot be accessed TELE A...

Page 84: ...ftkeys and or with the joy stick you can flip to the next or previous page To exit the Info Service mode press the softkey EXIT you will return to the main telephone menu P82 85 7154 26 G Warning In order to avoid distraction which could lead to an accident information should only be read with the vehicle at stillstand and the system should be oper ated by the driver only when traffic condition pe...

Page 85: ...oute guidance 122 Route guidance 124 Mute voice instructions 127 Altering the map scale 128 Break off route guidance 128 Changing the route calculation mode during guidance 129 Viewing the Maneuver List during guidance 130 Road obstructed 131 Detour function 134 Setting voice prompt type frequency 135 Setting type of guidance display 137 Setting map screen orientation 140 Setting points of interes...

Page 86: ...buttons while the vehicle is in motion let voice notifications guide you Stop at a safe location before using buttons or correcting screen Drive carefully and always obey traffic laws and road signs even if they contradict system instructions For your safety you should only enter destinations when the vehicle is stationary When the vehicle is in motion a passenger should enter the destina tion G W...

Page 87: ...ed trip may deviate from the available traffic pattern because the data informa tion stored on the CD represents the local conditions at the time of the recording The current vehicle position cannot be displayed exactly in every case Satellite reception conditions road condi tions the conditions of the vehicle etc could cause deviations from the actual situation If the vehicle has been transported...

Page 88: ...r Changing tires After changing the tires it may take some time for MCS to adjust to the new measurement of the tires In these cases it is often sufficient to move the vehicle a few yards to receive a complete route recommendation Travelling abroad If you intend to travel through different regions or abroad you will need the respective CD Contact your authorized Mercedes Benz Center to purchase a ...

Page 89: ...the volume difference between an audio source and navigation voice during an announcement page 11 6 Input address number 7 Push joystick Moving cursor Press Confirm selection 8 Activates the navigation menu 9 Repeats current last voice instruction 10 Softkeys for DETR Detour page 134 STOP Cancels the current destination page 128 LIST Lists the maneuver page 130 MUTE Mutes the voice instructions pa...

Page 90: ...86 Introduction Audio Telephone Navigation Index System settings Menu overview Navigation XXX Navigation ...

Page 91: ...eturn to the main navigation menu 11 Route menu 12 Avoid Road page 131 13 Change Method page 129 14 Cancel Current Destination 15 Maneuver screen 16 Destination menu 17 Find destination by address page 90 18 Find destination by intersection page 96 19 Find destination by Point of interest page 100 20 Find destination by Map Cursor page 105 21 Find destination by Recent route page 102 22 Find desti...

Page 92: ...vigation CD has been inserted in the CD slot After the navigation system is booted the disclaimer screen appears If you accept the statements press Note The radio tape CD changer or telephone function can be used while the navigation system is running To switch off navigation operation Switch to the radio tape or CD changer mode and the navigation system will continue to run in the back ground If ...

Page 93: ...vigation CD is inserted Ejecting Press to lower the front of the control panel Press to eject the inserted CD Press to raise the front of the control panel If the display is in the down position for more than 20 seconds 2 successive beeps will be heard This will continue at 5 second intervals until the display is returned to its normal position Press the key to return the control panel to its clos...

Page 94: ...section page 96 a point of interest page 100 a recent address page 102 the personal address book page 103 selecting directly from the map page 105 Today s plan page 115 Searching for a destination by address Press Select Dest with the joystick and press The Destination menu appears Select Address with the joystick and press P82 85 5098 26 Destination input ...

Page 95: ...tion Index System settings Select City Name or Street Name with the joystick and press Note If the city name is known start your search using the city name This will save time versus starting a search using the street name Destination input ...

Page 96: ...aracter will appear in the text window 2 and all cities starting with this character will appear in the city name list 3 To enter more characters repeat this step All unneces sary characters are shaded out To correct the last character select Delete 4 with the joystick and press Select the desired city name from the city name list with the joystick and press If the street name was not entered befo...

Page 97: ...indow 6 and all streets starting with this character will appear in the street name list 7 To enter more characters repeat this step All unneces sary characters are shaded out To correct the last character select Delete 8 with the joystick and press Select the desired street name from the street name list with the joystick and press The address number menu will appear P82 85 5025 26 Destination in...

Page 98: ...d through the number key pad Note All unnecessary characters are shaded out Use N E W or S only if the address number contains such a character The MCS will automatically differentiate north east west and south street names To correct the last character select Delete 11 with the joystick and press When the address number has been displayed select Done with the joystick and press If the city name w...

Page 99: ...pear Select OK to Proceed with the joystick and press the MCS will begin calculating the route Select Save in Address Book with the joystick and press the address will be stored in the Address Book page 110 Select Add to Today s Plan with the joystick and press the entry will be added to Today s Plan page 115 P86 0081 B13 2 fbg Destination input ...

Page 100: ...ith the joystick and press The Destination menu appears Select Intersection with the joystick and press Select City Name or the Street Name and press Note If the city name is known start your search using the city name This will save time versus starting a search using the street name P82 85 5100 26 P82 85 5019 26 Destination input ...

Page 101: ...l appear in the text window 2 and all cities starting with this character will appear in the city name list 3 To enter additional characters repeat this step All unnecessary characters are shaded out To correct the last character select Delete 4 with the joystick and press Select the desired city name from the city name list with the joystick and press If the street name was not entered before the...

Page 102: ...will appear in the street name list 7 To enter additional characters repeat this step All unnecessary characters are shaded out To correct the last character select Delete 8 with the joystick and press Select the desired street name with the joystick from the street name list and press If the city was entered before the cross street display will appear If the city name was not entered before the c...

Page 103: ...ed out To correct the last character select Delete 12 with the joystick and press Select the desired street name from the street name list with the joystick and press If the complete address has been entered the Confirm Destination menu will appear Select OK to Proceed with the joystick and press the MCS will begin calculating the route Select Save in Address Book with the joystick and press the a...

Page 104: ... for a destination by Point of Interest and Place Name Press Select Dest with the joystick and press The Destination menu appears Select Point of Interest with the joystick and press Select Place Name with the joystick and press P82 85 5101 26 P82 85 5070 26 Destination input ...

Page 105: ...last character select Delete 4 with the joystick and press Select the desired Place Name with the joystick from the Place Name list and press Note Duplicate place names are listed in order of proximity nearest place first The Confirm Destination menu will appear Select OK to Proceed with the joystick and press the MCS will begin calculating the route Select Save in Address Book with the joystick a...

Page 106: ... most recent route calculations you can recall that destination Press Select Dest with the joystick and press The destination menu appears Select Recent Route with the joystick and press A list of up to the 20 most recent destinations is dis played Select the desired destination with the joystick and press P82 85 5102 26 P82 85 5022 26 Destination input ...

Page 107: ... stored in the Address Book page 110 Select Add to Today s Plan with the joystick and press the entry will be added to Today s Plan page 115 Searching for a destination in the Address Book If a location has already been placed into the address book you can recall this location for use as a destina tion Press Select Dest with the joystick and press The destination menu appears Select Address Book w...

Page 108: ...ct the desired destination with the joystick and press The Confirm Destination menu will appear Select OK to Proceed with the joystick and press the MCS will begin calculating the route Select Add to Today s Plan with the joystick and press the entry will be added to Today s Plan page 115 P82 85 5104 26 P82 85 5027 26 Destination input ...

Page 109: ...e joystick and press The destination menu appears Select Map Cursor with the joystick and press The Place Cursor menu appears Select Directly on Map or Within a City with the joystick and press If you selected Directly on Map the menu Select an Area will appear If you selected Within a City the menu Select a City Name will first appear See page 92 on how to enter a city name P82 85 5114 26 P82 85 ...

Page 110: ...lect the destination To return to the previous screen press The Select a Destination menu appears with a detail map 0 5 miles square of the select destination Select Directly on Map with the joystick and press For a detailed view press Move the map cursor to the desired location with the joystick and press The closest street segment to the selected destination will be highlighted If this street se...

Page 111: ... will be stored in the Address Book page 110 Select Add to Today s Plan with the joystick and press the entry will be added to Today s Plan page 115 Searching for a street segment directly from the Map Display A destination can be found directly in map mode by pointing to the location of the destination on the map It operates even while in guidance mode Refer to Starting Map page 85 Starting guida...

Page 112: ...tion You do not need to know the street name Once you have selected the correct position press A new destination point appears along with a call out indicating the street and city name Next a warning appears asking if you would like to change your destination Press if you want to change your destination Press if you do not want to change the destination P82 85 5035 26 P82 85 5034 26 Destination in...

Page 113: ...ct Add to Today s Plan with the joystick and press the entry will be added to Today s Plan page 115 Saving the current vehicle position Press Select Option with the joystick and press The Option Select menu appears Select Save Current Position with the joystick and press The location will be saved in the Recent Route list The Select Address menu will appear with the saved entry Press one more time...

Page 114: ... addresses in the Address book The addresses will be stored in alphabetical order Saving a destination in the Address Book Whenever a destination is selected and entered the sys tem allows you to save the address Select Save in Address Book with the joystick and press P82 85 5099 26 Destination input ...

Page 115: ...To enter additional characters repeat this step To correct the last character select Delete 3 with the joystick and press Note If a Point of Interest is selected the Point of Interest name will automatically appear in the Input Name dis play Select Delete with the joystick to completely erase and replace the name When the new name is spelled out completely select Save with the joystick and press I...

Page 116: ... Confirm Destination menu appears Select OK to Proceed with the joystick and press if you wish to proceed to this destination Address Book editing Press Select Option with the joystick and press The Option Select menu appears Select Edit Address Book with the joystick and press P82 85 5027 26 P82 85 5036 26 Destination input ...

Page 117: ...s The Confirm Address menu appears After selection press Change Name Phone Number The name and the phone number can be changed Delete from Address Book The selected address will be deleted Don t Delete The selected address will not be deleted or changed You will return to the Option menu P82 85 5038 26 P82 85 5039 26 Destination input ...

Page 118: ...acter will appear in the text window 2 Use the joystick to spell out the name as you would like to see in the address book To enter additional characters repeat this step To correct the last character select Delete 3 with the joystick and press When the new name is spelled out completely select Save with the joystick and press If don t wish to save the address select Don t Save and press P82 85 66...

Page 119: ...d or edit the phone number valid only for 7 or 10 digits When finished select Done with the joy stick and press Today s Plan Today s Plan will calculate the most efficient travel order for multiple destinations Up to 8 destinations can be stored in Today s Plan This function is useful for finding the easiest or most effortless route to travel if you require multiple destinations P82 85 5041 26 Des...

Page 120: ...allows you to add the destination to the Today s Plan Select Add to Today s Plan with the joystick and press The Today s Plan list is displayed and the added destina tion is highlighted Press the system returns to the Find Destination menu You can now add additional entries to Today s Plan by entering a destination P82 85 5099 26 P82 85 5115 26 Destination input ...

Page 121: ...appears Select Today s Plan with the joystick and press The Confirm Destination menu appears If you would like to visit this destination first select OK to Proceed with the joystick and then press To view the travel order select Today s Plan List and press If you are satisfied with the destination order press P82 85 5018 26 P82 85 6547 26 Destination input ...

Page 122: ...like to visit with the joy stick and press The system will recalculate the route and displays the Destination Confirmation menu The MCS calculates the new destination order and dis plays the confirmation screen If the new route is acceptable select OK to Proceed with the joystick and press If you wish to change the destination order again select Today s Plan list with the joystick and press P82 85...

Page 123: ...a destination from Today s Plan you may use this feature Press Select Option with the joystick and press The Option Select menu appears Select Edit Today s Plan with the joystick and press The Select Address menu appears Select the address to be deleted and press P82 85 5106 26 P82 85 5044 26 Destination input ...

Page 124: ...t Delete The selected address will not be deleted or changed You will return to the Option menu Recent Route editing Whenever a route is calculated or the current position is saved the address of the destination is stored into the Recent Route list The list holds the twenty most recently input destinations Any of the twenty previous destinations can be deleted from this list Press Select Option wi...

Page 125: ...o be deleted and press The Confirm Address menu appears After selection press Delete from Recent Route The address will be deleted Delete All All addresses will be deleted Don t Delete The selected address will not be deleted or changed You will return to the Option menu P82 85 5044 26 P82 85 5046 26 Destination input ...

Page 126: ...122 Introduction Audio Telephone Navigation Index System settings The principle of route guidance P82 85 4978 29 Route guidance ...

Page 127: ...6 Estimated remaining driving time to the destination 7 Current road and city name 8 Detailed map display 9 GPS signal strength icon 10 Next maneuver icon 11 Name of the street onto which you should turn 12 Compass Icon indicates the direction North 13 Distance to the destination 14 Direction to destination 15 Estimated remaining driving time to the destination 16 Current road and city name 17 Zoo...

Page 128: ...oute is calculated the display switches to the map mode The system announces Proceed to the highlighted Route and the display shows Please Proceed The route is now in progress Note After entering the destination you can change to an audio source If you have selected the Hybrid or Arrow mode see page 139 the Guidance Display comes up when a maneuver is started and simulaneously the voice instructio...

Page 129: ...row indicating the next maneuver By pressing the joystick to the right the next maneuver can be previewed Press the joystick to the left to return to the current maneuver The Detailed Map display shows a moving map with the recommended route highlighted in blue The display is changed by pressing the softkey MAP To activate the softkeys press any softkey P882 85 5049 26 P82 85 5050 26 Route guidanc...

Page 130: ...oucement Right turn ahead To repeat the verbal announcement press the key To set the volume see page 11 To mute the voice instructions see page 127 The maneuver list can be displayed by pressing the soft key LIST To activate the softkeys press any soft key To preview the arrow guidance screen for a particular maneuver scroll down the list and select a maneuver with the joystick and press After 10 ...

Page 131: ... des tination Mute voice instructions To mute the voice instructions press the softkey MUTE To activate the softkeys press any softkey The softkey MUTE will be highlighted To delete the mute function press the highlighted soft key MUTE To activate the softkeys press any softkey If you press the key the system will give the cur rent voice instruction regardless whether mute is on or off P82 85 5052...

Page 132: ...etail Press to zoom in Press to zoom out Break off route guidance To activate the softkeys press any softkey Press softkey STOP A window appears confirming the stop request To con tinue press If you don t wish to continue press or wait 10 seconds and the stop request will be cancelled The current destination is cancelled P82 85 5097 26 Route guidance ...

Page 133: ...e during guidance During a route guidance you can change the route cal culation mode Press Select Route with the joystick and press The Route Select menu appears Select Change Method with the joystick and press The Change Method menu appears on the display P82 85 6558 26 P82 85 6559 26 Route guidance ...

Page 134: ...ute that uses mostly surface streets Minimize Toll Roads The MCS will calculate a route that uses the least number of toll roads enroute to the destination The Continue Trip to menu appears select OK to Pro ceed with the joystick and press Viewing the Maneuver List during guidance During route guidance you can display a list of maneu vers to preview upcoming turns and street names Press the softke...

Page 135: ...ystem will auto matically return to the Guidance mode Road obstructed If you encounter a road block or would like to avoid con struction you may choose a different routing option or choose to avoid certain roads This selections only func tions during route guidance Press Select Route with the joystick and press The Route Select menu appears Select Avoid Road with the joystick and press P82 85 6560...

Page 136: ...nt to avoid with the joystick and press The Avoid Route menu appears Select Avoid Road with the joystick and press If you want to avoid more roads select Continue to Avoid Roads with the joystick and press You will return to the list If the new route is acceptable select Reroute with the joystick and press P82 85 5060 26 P82 85 6562 26 Route guidance ...

Page 137: ... con tinue on to your trip Note When you are traveling on an expressway or a freeway the system calculates a new route avoiding the current road for a distance of five miles On surface streets the system calculates a new route avoiding the current road fore a distance of one mile P82 85 5062 26 Route guidance ...

Page 138: ...r request To continue press If you don t want to continue press or wait 10 seconds the detour request will be can celled If you have pressed button the navigation system will recalculate the route around the upcoming detour Note When you are traveling on an expressway or a freeway the system calculates a new route avoiding the current road for a distance of five miles On surface streets the system...

Page 139: ...audible prompts you receive as you are guided along your route Press Select Setup with the joystick and press The Setup Select menu appears Select Guidance Setup with the joystick and press The Guidance Setup menu appears Select the Voice Prompt section with the joystick and press P82 85 5110 26 P82 85 5066 26 Navigation settings ...

Page 140: ...oaching an upcoming maneuver as well as voice instructions 1 2 mile before each maneuver on surfaces streets and one mile before each maneu ver on freeways and expressways Max The MCS will give voice instructions at all maneuver locations and 1 2 mile before each maneuver on surfaces streets and one mile before each maneuver on freeways and expressways In addition after completing a maneuver the M...

Page 141: ... joystick and press Setting type of guidance display The MCS allows you to choose the type of guidance dis play viewed while driving Press Select Setup with the joystick and press The Setup Select menu appears Select Guidance Setup with the joystick and press P82 85 5068 26 P82 85 5110 26 Navigation settings ...

Page 142: ... modes with the joystick After selection press Hybrid The MCS will display the Basic Guidance Display screen during a maneuver then return to Detailed Map Display screen or to the audio screen Arrow The MCS will display the Basic Guidance Display screen at all times Map The MCS will display the Detailed Map Dis play screen at all times P82 85 5066 26 P82 85 5069 26 Navigation settings ...

Page 143: ...ientation The map display can be selected so that north is always referenced towards the top of the display or the vehicle s direction is headed towards the top of the display Press Select Setup with the joystick and press The Setup Select menu appears Select Display Setup with the joystick and press P82 85 5068 26 P82 85 5066 26 Navigation settings ...

Page 144: ... modes with the joystick After selection press Heading Up The Map display will rotate such that the Present Vehicle Position icon is always pointing toward the top of the screen North Up The Map display will always show the map with north facing toward the top of the screen The Present Vehicle Position icon will rotate on the map P82 85 5071 26 P82 85 5072 26 Navigation settings ...

Page 145: ... by pressing and holding the key for longer then 2 seconds Setting points of interest icon options The MCS allows you to choose any 3 of 6 different Point of Interest icons for display on the detail Map Display Press Select Setup with the joystick and press The Setup Select menu appears Select Display Setup with the joystick and press P82 85 5032 26 P82 85 5065 26 Navigation settings ...

Page 146: ...appears Select the POI Icon section with the joystick and press Select one of the 3 modes Show Hide Edit with the joystick and press If you select Show in the Setup mode selected icons will be shown If you select Hide no icons will be shown P82 85 5071 26 P82 85 5075 26 Navigation settings ...

Page 147: ...ation Hotel Parking Restaurant and type of restaurant To save the setting select Return with the joystick and press The Display Setup menu will appear indicating your 3 POI icon selections To return to the Detailed Map Dis play select Return with the joystick and press Move the Present Vehicle Position icon to any of the vis ible POI icons press and the name and address will appear on the display ...

Page 148: ...ute calculation mode Press Select Setup with the joystick and press The Setup Select menu appears Select Guidance Setup with the joystick and press The Guidance Setup menu appears Select the Method section with the joystick and press P82 85 5110 26 P82 85 5066 26 Navigation settings ...

Page 149: ...ination Maximize Freeways The MCS will calculate a route that makes most efficient use of the freeways Minimize Freeways The MCS will calculate a route that uses mostly surface streets Minimize Toll Roads The MCS will calculate a route that uses the least number of toll roads enroute to the destination The Guidance Setup menu appears To save the setting select Return with the joystick and press P8...

Page 150: ...ecting the off route recalculation mode Press Select Setup with the joystick and press The Setup Select menu appears Select Guidance Setup with the joystick and press Select the Reroute section with the joystick and press P82 85 5110 26 P82 85 5066 26 Navigation settings ...

Page 151: ... continuing to recalculate the route If you selected Auto the MCS will after deviating from the suggested route automatically recalculate the route To save the setting select Return with the joystick and press Selecting the language Only possible with Canada CD Press Select Setup with the joystick and press The Setup Select menu appears Select Guidance Setup with the joystick and press P82 85 5077...

Page 152: ...cais with the joystick After selection press If you selected English all the voice instructions in the navigation mode will be in english If you selected Francais all the voice instructions in the navigation mode will be in french To save the setting select Return with the joystick and press P82 85 6544 26 P82 85 6543 26 Navigation settings ...

Page 153: ...n with the joystick and press The Option Select menu appears Select GPS Informa tion with the joystick and press The system will display the following GPS information Current Location Displays street city and state information Current Position Shows approximate latitude and longitude information Satellites Displays the number of satellite signals being received To return to the Option menu select ...

Page 154: ... information if you are requesting help from your Mercedes Benz Center Press Select Option with the joystick and press The Option menu appears Select Information with the joystick and press The CD ROM version information is displayed To return to the Option menu select Return with the joystick and press P82 85 5036 26 P82 85 5079 26 Navigation settings ...

Page 155: ...play elements System settings 152 Adjust sound settings 153 Switching between the light mode and the dark mode 155 Adjusting the brightness in the dark mode 155 Adjusting the brightness for navigation systems 157 Setting the display dimming characteristics 158 Contents System settings ...

Page 156: ...or lowering the volume page 11 4 Navigation menu Push joystick to Adjusting the parameters page 156 157 Push joystick to Adjusting the parameters page 156 157 Push joystick to Select mode page 156 157 Push joystick to Select mode page 156 157 5 Audio sources Softkeys for Selecting the parameters page 153 Adjusting the parameters page 153 Switching between dark and light mode page 155 Exit menu pag...

Page 157: ...M WB Tape deck CD CD Changer Each audio source has its own adjustments for sound system bass and treble levels The adjustment for balance and fader are the same for all audio sources Press the softkey ADJ in any audio menu e g Radio FM menu With the softkeys and you can select the parameter you want to adjust The selected parame ter will be highlighted P82 85 7156 26 System settings ...

Page 158: ...elected parameter Vehicles with sound system With the softkeys and select the parameter SOUND You can select with the softkeys and the desired sound impression Sound impressions available Standard the sound is set to linear for the centre of the vehicle Speech emphasises voices Driver the sound is set to the optimum values for the front seats Ambience recreates the sound of rooms Note Sound optimi...

Page 159: ...econds All parameters will be set to 0 and the sound system will switch to STAN DARD and the MCS will return automatically to the audio mode Switching between the light mode and the dark mode When the parking lights are turned on the display switches to the dark mode The display is illuminated in a low dimmed level P82 85 7160 26 P82 85 7156 26 System settings ...

Page 160: ...any softkey to activate the softkeys Then press the softkey LGHT To return to the dark mode in the audio modes radio tape or CD press the softkey ADJ and then press the softkey DARK If you are in the navigation mode press any softkey to activate the softkeys Then press the softkey DARK Adjusting the brightness in the dark mode You can adjust the brightness with the instrument clus ter illumination...

Page 161: ...g the joystick up or down and press The brightness menu will appear with the current set tings To darken the screen Push the joystick to To brighten the screen Push the joystick to Once you are satisfied with the brightness setting press A number corresponding to the brightness level will be displayed for reference To return to the navigation mode select Return with the joystick and press P68 20 2...

Page 162: ...menu by pushing the joystick up or down and press The display menu will appear with the current settings You have 3 choices of display modes Day mode The display colors are always bright Night mode The display colors are always dark Auto mode The display switches automatically between Night and Day mode when the parking lights are turned on and off After selecting the mode press To return to the n...

Page 163: ...hone 61 Break off route guidance 128 C CD track repeat 57 Changing sides 34 Changing the radio band 19 Changing the route calculation mode during guidance 129 D Detour function 134 Dialing a number from the phone book 72 Dialing a telephone number 70 Dolby B noise reduction 39 E Emergency call 76 Entering destination address 90 F Fast forward rewinding 35 G General information on CD playback 42 H ...

Page 164: ...onal and CD changer optional 48 Menu overview Tape deck 32 Music search 36 Music seek 55 Mute voice instructions 127 O Operating and display elements Navigation 85 Operating and display elements Radio 15 Operating and display elements Single CD player optional and CD changer optional 41 Operating and display elements System settings 152 Operating and display elements Tape deck 30 Operating and dis...

Page 165: ...points of interest icon options 141 Setting the display dimming characteristics 157 Setting type of guidance display 137 Setting voice prompt type frequency 135 Skip blanks 38 Speed dialing 75 Switching between the light mode and the dark mode 155 Switching CD operation on and off 50 Switching navigation operation on and off 88 Switching radio operation on and off 18 Switching tape operation on an...

Reviews: