background image

20

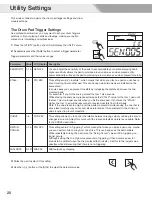
This mode contains two parts: the drum pad trigger settings and drum 

module settings.

The Drum Pad Trigger Settings

As a professional drummer, you may want to set your drum triggers 

carefully to fit your playing habits and feelings, making your perfor-

mance more interesting and professional. 

1. 

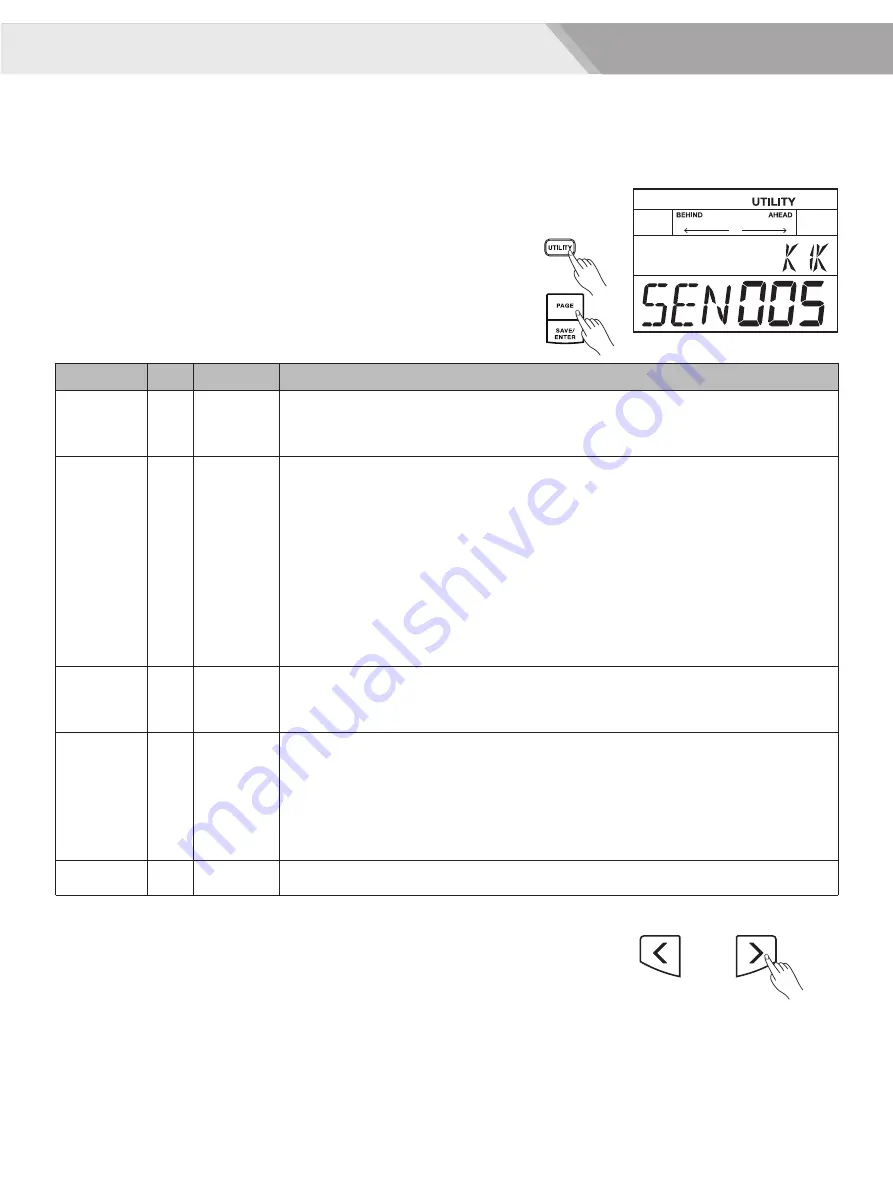
Press the [UTILITY] button, the LCD will display the UTILITY menu.

2. 

Repeatedly press the [PAGE] button to select a trigger parameter.


Trigger parameters and their value ranges:

3. 

Strike the pad to select it for editing.

4. 

Use the [<]/[>] button or the [DIAL] to adjust the parameter value.


Utility Settings

Parameter

SENSITIVITY

XTALK 

CURVE

RETRIG 

CANCEL

MIDI NOTE

Value

1~16

1~8

1~6

1~16

0~127

LCD Display

SEN XXX

XTK XXX

CUR XXX

RTG XXX

MID XXX

Description

You can adjust the sensitivity of the pads to accommodate your personal playing habit.

Higher sensitivity allows the pad to produce a loud volume even when played softly.

Lower sensitivity will keep the pad to producing a low volume even when played forcefully.

This setting avoids “crosstalk”, which means that when you play one pad you can hear a 

sound coming from another pad. This can happen when two pads are installed on the 

same stand.

In some cases you can prevent crosstalk by increasing the distance between the two 

mounted pads.

For example: If you hit the snare pad and the tom 1 also sounds.

While striking the snare pad, gradually increase the “XTALK” value for the tom 1 pad until 

the tom 1 pad no longer sounds when you hit the snare pad. If you raise the “XTALK” 

higher, the tom 1 pad will be less prone to receive crosstalk from other pads.

Note: If the value is set too high, and two pads are played simultaneously, the one that is 

struck less forcefully may not sound. Be careful and set this parameter to the minimum 

value required to prevent crosstalk.

This setting allows you to control the relation between playing velocity (striking force) and 

changes in volume. Adjust this curve until the response feels as natural as possible. Refer 

to the CURVE description.

This setting avoids “re-triggering”, which means that when you strike a pad once, maybe 

you can hear two hits coming from one strike. This can happen as the pad oscillate.

While repeatedly striking the pad, raise the “Retrig Cancel” value until re-triggering no 

longer occurs.

Although setting this to a high value prevents re-triggering, it then becomes easy for 

sounds to be omitted when the drums played fast (roll etc.). Set this to the lowest value 

possible while still ensuring that there is no re-triggering.

MIDI output key mapping

Summary of Contents for MZ528

Page 1: ......

Page 2: ...the designated AC adaptor to an AC outlet of the correct voltage Do not connect it to an AC outlet of voltage other than that for which your instrument is intended Unplug the AC power adaptor when no...

Page 3: ...12 Editing Voice Parameters 12 Saving User Drum Kit 13 Playing Along with a Song Playing Along with a Song 14 Muting the Drums in a Song 14 Click 14 Recording Prepare Recording 15 Start Stop Recordin...

Page 4: ...rance With a compact and elegant design this digital drum is the perfect partner for drum learning and nicely fits your home decor Amazing DBT Function The DBT double bass trigger function makes it ea...

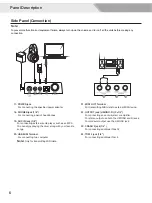
Page 5: ...top playing songs 6 CLICK Button Start stop the click function enter the click setting mode 7 LCD Display Display the names and settings information 8 TEMPO Button Adjust the tempo value 9 DBT DOUBLE...

Page 6: ...4 For connecting additional Tom 4 17 POWER jack For connecting the specified power adapter 18 PHONES jack 1 8 For connecting a pair of headphones 19 AUX IN jack 1 8 For connecting external audio playe...

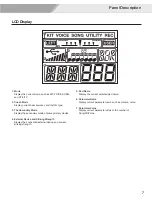
Page 7: ...e secondary mode of some primary modes 4 External Device and Striking Strength Display the connected external device and current striking strength 5 Pad Name Display the current selected pad name 6 Pa...

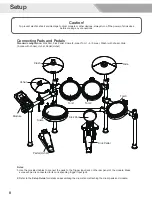
Page 8: ...g Pads and Pedals Standard configuration Kick Pad Kick Pedal Snare 2 zone Tom 1 3 2 zone Crash with choke Ride 2 zone with choke Hi hat Pedal Hi hat Notes 1 Use the provided cables to connect the pads...

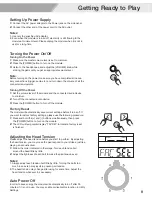
Page 9: ...turn off the module Factory Reset The module will automatically save current settings before it turns off If you want to restore factory settings please use the following procedure 1 Press and hold t...

Page 10: ...Drum Kit 1 Press the KIT button to enter the kit menu 2 Press the button or turn the DIAL to select your desired drum kit Refer to Drum Kit List Selecting a Voice While striking the pads you can enjoy...

Page 11: ...Cymbal Edge Shot Strike the edge area of the cymbal Choke Play Both Ride and Crash cymbals have cymbal choke But hi hat don t support cymbal choke Choking the crash ride edge with the hand immediately...

Page 12: ...Parameters Edit parameters of one pad will not affect others For example if you increased the volume of snare the other pads wouldn t change 1 Press the KIT VOICE button for 2 seconds and the LCD wil...

Page 13: ...nu press the SAVE ENTER button to save all changes 2 Use the button or turn the DIAL to select a user drum kit The user kit number will flash 3 Press the SAVE ENTER button again the LCD will display O...

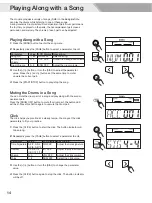
Page 14: ...to mute the drum part the button LED will be lit Press this button again to unmute the drum part Click The click helps you practice at a steady tempo You may set the click parameters to fit your pract...

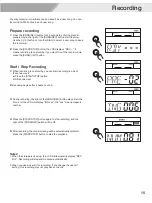
Page 15: ...start recording in one of these two ways Press the START STOP button Strike one pad 2 Recoding begins after 4 beats count in 3 During recording the light of the SONG REC button stays lit all the time...

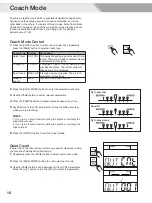
Page 16: ...t will play the click without sound 2 If you turn off score function during the practice it will play the click normally 6 Press the COACH button to exit the Coach Mode Quiet Count In quiet count the...

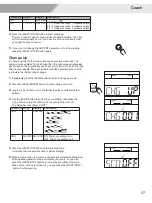
Page 17: ...change up mode 3 Use the button or turn the DIAL to select a suitable rhythm pattern 4 Use the PAGE button to switch to score editing then press the button or turn the DIAL to turn score function on o...

Page 18: ...o turn score function on off The default score setting is OFF 5 Press the START STOP button to start practicing It will play one measure of count in before starting 6 When score function is turned on...

Page 19: ...utton to adjust the tempo of click and song playback 1 Press the TEMPO button 2 Use the button or the DIAL to adjust tempo value 3 If there is no operation within 3 seconds it will go back to previous...

Page 20: ...same stand In some cases you can prevent crosstalk by increasing the distance between the two mounted pads For example If you hit the snare pad and the tom 1 also sounds While striking the snare pad g...

Page 21: ...ter change Curve 6 Very little dynamic response making it easy to maintain strong volume levels If you are using a drum trigger as an external pad these settings will produce reliable triggering Utili...

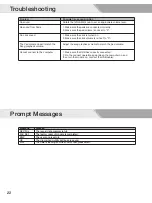
Page 22: ...Make sure the click is turned on 2 Make sure the click volume is not set to 0 Adjust the song playback volume to match the pad volume 1 Make sure the USB has correctly connected 2 Do the connect opera...

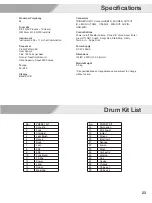
Page 23: ...s Power on off Master Volume Click Kit Voice Save Enter Drum Off DBT Coach Song Rec Start Stop Utility Tempo Page Dial Power Supply DC 9V 500mA Dimensions 125 W X 220 L X 55 H mm Module Weight 0 5 kg...

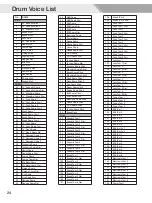
Page 24: ...Snare Stick Standard Snare Stick 1 Brush Snare Stick Standard Snare Stick 2 Rock Snare Stick 1 Rock Snare Stick 2 Live Snare Stick Room Snare Stick Fusion Snare Stick 808 Snare Stick 909 Snare Stick E...

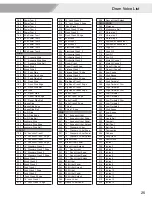
Page 25: ...thesis Percussion 1 Synthesis Percussion 2 High Q 1 High Q 2 Low Q 1 Low Q 2 Mute Hi Conga 1 Mute Hi Conga 2 Open Hi Conga 1 Open Hi Conga 2 Low Conga High Bongo Low Bongo High Timbale 1 High Timbale...

Page 26: ...A4 Marimba B4 Marimba C5 Marimba D5 Marimba E5 Marimba F5 Marimba G5 Marimba A5 Marimba B5 Marimba C6 Orchestra Timp E2 Orchestra Timp F2 Orchestra Timp Gb2 Orchestra Timp G2 Orchestra Timp Ab2 Orche...

Page 27: ...Jazz1 6 8Soul1 Fusion2 Dance funk Dance2 DJ House Ele Pop3 Hip Hop Pop3 Pop4 R B3 Reggae1 Rock2 Rock3 Blues Funk Fusion3 Cool Jazz Ballad Samba2 Vintage Hip Hop Nu Jazz Funk Soul R B4 Big Band 1 51 52...

Page 28: ...rash Cymbal 2 Vibra slap Ride Cymbal 2 High Bongo Low Bongo Mute Hi Conga Open Hi Conga Low Conga High Timbale Low Timbale High Agogo Low Agogo Cabasa Maracas Short Whistle Long Whistle Short Guiro Lo...

Page 29: ...bank 32 Jazz Kick 1 Jazz Snare 1 Jazz Snare 2 Brush bank 40 Brush Kick 1 Brush Tap Brush Slap Brush Low Tom2 Brush Low Tom1 Brush Mid Tom2 Brush Mid Tom1 Brush Hi Tom2 Brush Hi Tom1 Orchestra bank 48...

Page 30: ...Horn Brass Section Synth Brass 1 Synth Brass 2 Soprano Sax Alto Sax Tenor Sax Baritone Sax Oboe English Horn Bassoon Clarinet Piccolo Flute Recorder Pan Flute Blown Bottle Shakuhachi Whistle Ocarina...

Page 31: ...31 MIDI Implementation Chart O YES x NO 0 127...

Page 32: ...MZ528 _OM04EN...

Reviews:

Related manuals for MZ528