background image

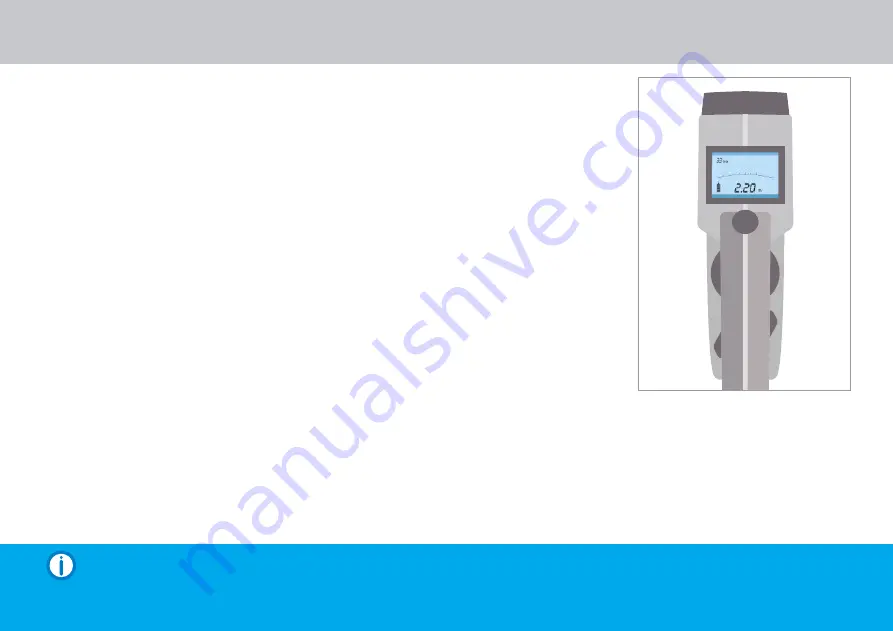
4. Press and hold down the depth button. The depth will be shown on the display,

measured in metres.

5. The depth can be verified by lifting up the Locator whilst keeping the depth button

depressed. The depth indication should increase by the same amount that the Locator

has been raised.

Limitations of Depth Measurement

There are some situations where it is not possible to gain accurate depth information:

l

A curve or bend in the route of the service.

l

Close to where the service changes in depth.

l

Near to a ‘T’ junction in the service.

l

At the very end point of a service.

l

At any point where the signal has coupled onto an adjacent service.

l

Close to any large metallic objects such as metal fences or vehicles.

l

Within 25  metres (82’) of the position of the Signal Generator if used on Induction Mode.

l

Under reinforced concrete.

l

The signal is of poor quality.

l

Too close to the Signal Generator or leads if used in Connected Mode.

Depth Measurement: Error Readings of Metallic Services

The Locator may show the following error codes when attempting a Depth Measurement:

1. 000 - The metallic service is too shallow for the Locator to obtain an accurate depth,

less than 0.2m (8inches). It should be possible to calculate the depth by raising the Locator a set amount

and then carrying out the Depth Measurement again.

2. 888 - The metallic service is too deep for the Locator to measure its depth or there is no signal at all present.

3. LO - The signal is not strong enough for the Locator to give a reliable depth measurement.

4. OL - Overload. The signal is too strong for the Locator to give a reliable depth measurement.

36

Depth Measurement of Metallic Services (DXL3 only  )

NOTE  The depth shown will be to the centre of the service and is not the depth of cover.

This is of greater significance on large diameter pipes. Reading is to the nearest 0.05m. Range is 0.2m to 3.0m (8” to 10’).

Summary of Contents for C.Scope CXL3

Page 1: ...CXL3 Cable Avoidance Tool DXL3 Depth Measuring Cable Avoidance Tool SGA3 Signal Generator INSTRUCTION MANUAL...

Page 2: ...ights Reserved Measure Quip Ltd make every effort to ensure that the information we provide about our products and their use is correct We do not accept responsibility for injury damage or consequenti...

Page 3: ...earching 24 25 Multiple Services 26 Inductive Sweep 27 Non Metallic Pipe Tracing Sonde 28 33kHz General Purpose Sonde Batteries 29 33kHz Duct Sonde Batteries 30 Tracing a Sonde 31 32 Plastic Pipe Trac...

Page 4: ...ate every service Use a Signal Generator wherever possible The Signal Generator leads MUST NOT be connected directly to a live service Beware of multiple services The Locators will not always indicate...

Page 5: ...nd DXL3 Cable Avoidance Tools Mode selected G P R Generator Power Radio frequency Depth display DXL3 model only Battery Condition Signal Strength Indicator Bar Graph The CXL3 and DXL3 Cable Avoidance...

Page 6: ...f high and low output power and can operate with a pulsed or continuous output signal High Power Control Low Power Control On Off Control Control Panel Direct Connection Socket Auxiliary Earth Lead So...

Page 7: ...electricity may not have a detectable power signal l Pot ended or capped cables These will never have any current flowing through them but are possibly still live l Disused or abandoned cables l A fe...

Page 8: ...o determine what the service is in Radio Mode only it s position l Radio signals do not favour one utility over another l The depth of the buried service cannot be judged by the strength of the radio...

Page 9: ...ied services l Direct Connection The Signal Generator is attached directly to the service using either the Direct Connection Leads or one of the accessories available for use with the Signal Generator...

Page 10: ...k to release the Battery Compartment door Remove ALL EIGHT used batteries and replace with new or recharged ones Be careful to insert the new batteries the correct way round in the holder Replace the...

Page 11: ...the Locator such that it moves away from the vertical Using the Locator Holding the Locator Correct Incorrect 90 Your middle or little finger should be used to squeeze and hold on the On Off trigger Y...

Page 12: ...owly and keep the Locator upright at all times and stationary by your side 5 As you approach the area in which there is a signal the Locator will emit an audible response and show a visual response on...

Page 13: ...cator traverses the service The Locator is positioned directly above the buried service when the display is at its highest peak reading 3 Carefully rotate the Locator over the peak reading until the v...

Page 14: ...depth of the service a T connection or the end of the service Finding Lost Signals 1 Locate in a circle at least 1 metre 3 3 around the point where the signal was lost This should locate the service i...

Page 15: ...he route of that service Signal Clamp The Signal Clamp is an accessory that allows the Signal Generator signal to be applied to a specific cable without having to make electrical contact with that cab...

Page 16: ...ct interrupted signal output Changing the Batteries l Remove the Accessory Tray l Undo the two round knurled retaining screws situated on the underside of the Signal Generator holding the Battery Cove...

Page 17: ...e Clip 3 Turn the Signal Generator on 4 Place the Earth Stake in the ground having first searched the area for buried cables with the Locator The ideal position for the Earth Stake is at right angles...

Page 18: ...Magnet from making a good contact with the pipe Alternatively it may be that your earth point is at fault Change the position of the Earth Stake or use an alternative earth point Using the Signal Gen...

Page 19: ...ethod Follow the same rules as for connecting the Signal Generator to a metal pipe except attach the red Direct Connection Lead to a metal part of the OUTSIDE of the lamp column street furniture WARNI...

Page 20: ...lly close The audible signal from the Signal Generator should drop in pitch indicating that the jaws have closed correctly WARNING NEVER attempt to place the Signal Clamp around electricity cables tha...

Page 21: ...tion NOTE On two wire Protective Multiple Earth PME systems it may be necessary to also provide an external earth using the yellow 10 metre Auxiliary Earth Lead and Earth Stake NOTE Using the Signal I...

Page 22: ...he Signal Generator 2 Adjust the sensitivity so that the Locator is just showing a visual response and just emitting an audible response 3 If possible walk in a complete circle around the connection p...

Page 23: ...as the normal tracing technique used on Power or Radio Modes except that the signal that the Locator is detecting will get weaker the further away from the Signal Generator that you go It will be nec...

Page 24: ...here you suspect the services are buried Make sure the Signal Generator is in line with the expected route of these services 3 Turn the Signal Generator on and check that the batteries are OK 4 The si...

Page 25: ...the signal induced onto the buried service 2 Stand so that you are roughly in line with the end of the Signal Generator and hold the Locator so that the side of the Locator is facing towards the Sign...

Page 26: ...rvice by improving the positioning of the Signal Generator Once the buried service has been pinpointed moving the position of the Signal Generator from side to side will give an increase or decrease i...

Page 27: ...y an induced signal onto just ONE specific buried service in order to trace it alone when other services are positioned in a close proximity NOTE An induced signal cannot be applied to a buried servic...

Page 28: ...emitting an audible response 4 Together slowly walk across the site staying the same distance apart and being careful to keep in line with each other When the Signal Generator gets close to a buried m...

Page 29: ...Sonde and therefore the location of the pipe can be pinpointed by using the Locator switched to Generator Mode The Sonde is inserted into and then moved along the pipe to the point at which the pipe n...

Page 30: ...being careful not to over tighten them The Sonde is now transmitting a signal 3 To turn the Sonde off the battery must be removed or reversed Non Metallic Pipe Tracing using a Sonde Batteries 29 NOTE...

Page 31: ...with the positive end down 2 Replace the battery cover fully using the screwdriver to secure The Duct Sonde is now transmitting a signal 3 To turn the Sonde off the battery must be removed Non Metall...

Page 32: ...sable Replace if necessary 2 Keeping the blade of the Locator in line with the Sonde move the Locator backwards and forwards over the length of the Sonde Adjust the Sensitivity until a clear peak resp...

Page 33: ...t signals are always weaker than the main signal and should not be mistaken for the true Sonde signal 5 Pinpoint the Sonde s exact position by moving the Locator first backwards and forwards and then...

Page 34: ...l of the Plastic Pipe Tracer Flexible Tracer Connect the black lead to the Earth Stake Leave the other terminal of the Plastic Pipe Tracer Flexible Tracer unconnected Non Metallic Pipe Tracing Plastic...

Page 35: ...ction The tip of the Plastic Pipe Tracer Flexible Tracer is then pinpointed using the same technique as for Sonde tracing with the Locator blade always in line with the Tracer Non Metallic Pipe Tracin...

Page 36: ...Mode and pinpoint the position of the buried service Make sure the Locator is directly over the buried service and at right angles to it s route Rest the Locator on the ground with the body vertical W...

Page 37: ...e signal is of poor quality l Too close to the Signal Generator or leads if used in Connected Mode Depth Measurement Error Readings of Metallic Services The Locator may show the following error codes...

Page 38: ...layed then the depth reading will not be accurate Depth Measurement Error Readings of Non Metallic Pipes using Sondes Plastic Pipe Tracer s Flexible Tracer The Locator may show the following error cod...

Page 39: ...tone should be heard and the display should read greater than 50 full scale Reducing the sensitivity should cause the displayed reading to reduce and the tone to cut out Radio Mode Select Radio Mode...

Page 40: ...ut Power Level insert the Direct Connection Lead and the 10 metre Auxiliary Earth Lead and then connect the red lead Crocodile Clip to the Auxiliary Earth Lead Crocodile Clip The pitch should change t...

Page 41: ...angles to the 20 metre 70 cable and earthed at the far end with the Earth Stake The plug should be inserted in the Direct Connection Socket of the Signal Generator The Signal Generator is turned on t...

Page 42: ...waste Please recycle where facilities exist Check with your local authority or retailer for recycling advice In the UK visit www recycle more co uk Conforms to EC safety requirements Tested to harmon...

Page 43: ...Accuracy 5 1m 3 3 DXL3 only Depth Measurement Range Line 0 2m to 3m 8 to 10 Depth Resolution Line 0 05m Depth Measurement Range Sonde 0 85m to 4 5m 2 9 to 15 depending on Sonde type Depth Resolution S...

Page 44: ...20mW into 1000 load Construction Case moulded from high impact plastic Designed to withstand 1m 3 3 drop onto a hard surface Incorporates clip on Accessory storage compartment Weight including batteri...

Page 45: ...rators incorporate weather proof seals however they are not guaranteed to prevent water ingress if the equipment is immersed Cleaning The equipment can be cleaned with a sponge dampened with warm wate...

Page 46: ...ed at least once a year by an Authorised Service Centre to ensure performance to specification Contact your supplier for information Repairs Before returning equipment suspected of being faulty please...

Page 47: ...XL3 DXL3 SGA3 Instruction Manual Part no B1093E Issue 1 Measure Quip Ltd Merlin Way Quarry Hill Industrial Estate Ilkeston Derbyshire DE7 4RA Tel 0115 9440399 Email hello measure quip com Web measure...

Reviews: