18
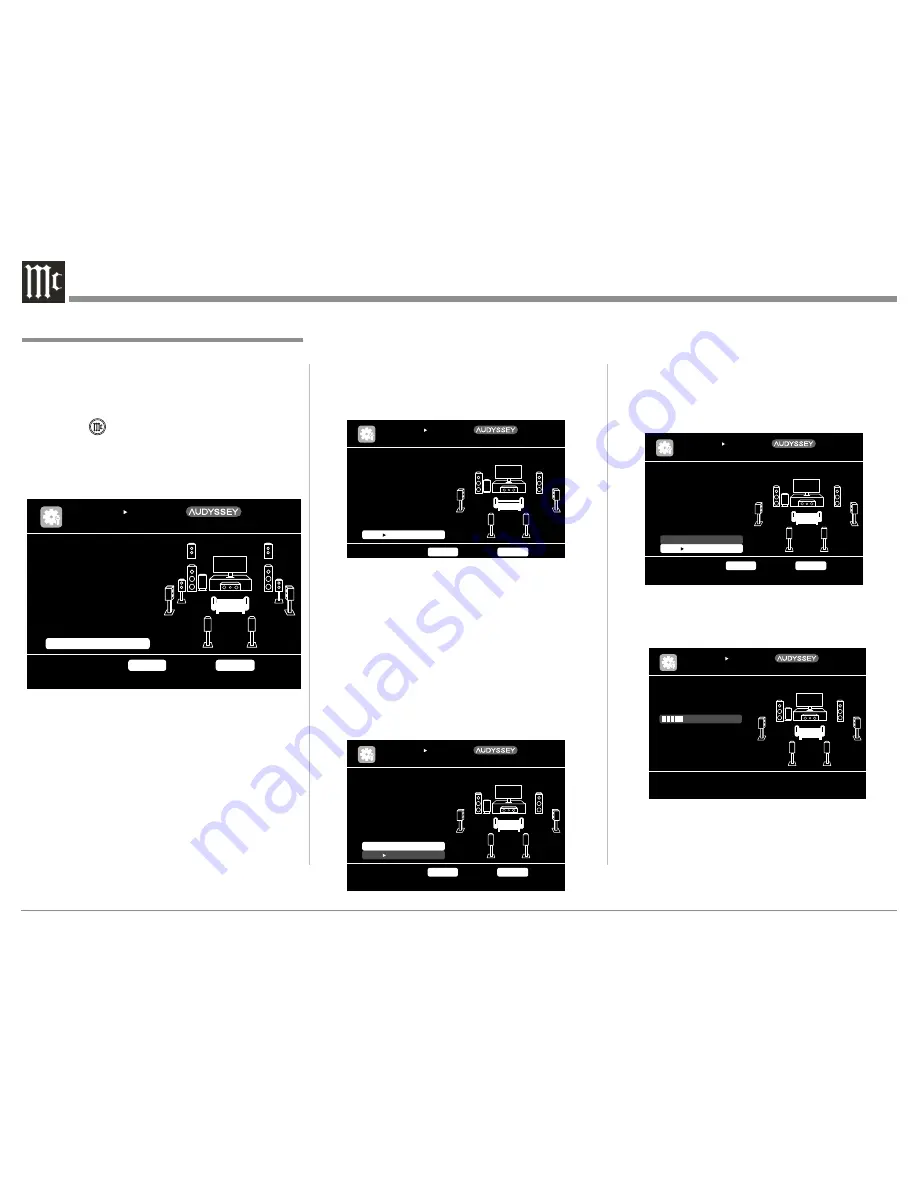
6. Continue following the On-Screen instructions
repeat the measurement process as outlined in
step 5 until all eight listening positions have been
measured. The On-Screen message will now indi-
cate the measurements are finished. Refer to the
illustration below:
7. Using the Remote Control Directional Push-But-
ton select "Next
Calculation" then press the EN-
TER Push-button. Refer to the Illustration below:
It will now take some time to process all the measure-
ments made and arrive at the corrections necessary
for each of the connected speakers to achieve the best
possible sonic results.
With the MX121 connected to a TV/Monitor, the sup-
plied microphone connected to the SETUP MIC Jack
on the Rear Panel and placed in the "Main Listening
location" perform the following steps along with the
instructions appearing On-Screen:
1. Press the Push-button, then press the MENU
Push-button.
2. Using the Remote Control Directional Push-but-
tons select first "Auto Setup" followed by "Audys-
sey Auto Setup. Refer to the illustration below.
Note: If your system contains less than 7.1 chan-
nels please refer to "Amp Assign" on page 24
before proceeding.
3. Press the ENTER Push-button to start the Audys-
sey Auto Setup Process. A test tone will be sent to
all channels, one at time to identify the channels
making up your system.
Notes: 1. Depending on the number of channels in
your system the illustrations in this Owner's
Manual might differ from the actual On-
Screen Graphics.
2. During the setup process On-Screen error
messages may appear, if they do refer to page
20 for assistance.
4. With the word "Measure" highlighted On-Screen
press the ENTER Push-button to start the Mea-
surement Process. A special audio test signal will
be sent to all previously detected channels, one at
a time. Refer to the illustration below.
Audyssey System will take measurements from eight
different locations in the room to achieve the best
possible sonic results. The additional measurement
locations are indicated by the small bars "▬" in the
room illustration, placed around the sitting area and
the Main sitting position is indicated by an asterisk/
letter m "*M". Refer to page 17.
5. Following the On-Screen instructions place the
microphone in the 2nd listening position and then
press the ENTER Push-Button to select highlight
"Measurement". Refer to the illustration below.
Audyssey
®
Auto Setup Procedure
[1/6]
STEP1 Preparation
Connect the speakers
and place them accord-
ing to the recommenda-
tions in the manual.
Set the following
items if necessary.
Start Auto Setup
Amp Assign
Channel Select
Auto Setup Start
AUTO SETUP
AUDYSSEY AUTO SETUP
MultEQ XT
ENTER
Enter
RETURN
Cancel
[2/6]
STEP2 Spkr Detect Check
Go to Step 3 (Measurement) after speaker check
Retry
Next Measurement
Front
Center
Subwoofer
Surround
S.Back
F.Height
F.Wide
Yes
Yes
Yes
Yes
2spkrs
No
No
AUTO SETUP
AUDYSSEY AUTO SETUP
ENTER
Enter
RETURN
Cancel
MultEQ XT
[3/6]
STEP3 Measurement
Please place the mic-
rophone at ear height
at 2nd listening
position.
Start next measurement. Test Tone will start
AUTO SETUP
AUDYSSEY AUTO SETUP
ENTER
Enter
RETURN
Cancel
Measure
Next
Calculation
MultEQ XT
[3/6]
STEP3 Measurement
Measurements finished.
Proceed to Step 4 (Analyze)
AUTO SETUP
AUDYSSEY AUTO SETUP
ENTER
Enter
RETURN
Cancel
Retry
Next Calculation
MultEQ XT
[4/6]
AUTO SETUP
AUDYSSEY AUTO SETUP
STEP4 Calculation
Now calculating...
Please wait.
25%
MultEQ XT
Summary of Contents for MX121
Page 31: ...31 Setup Mode con t...


