background image

© 2001 Mac Components Engineered

MCE, the MCE logo and Xcarét Pro are trademarks of Mac Compo-
nents Engineered.

Apple, the Apple logo, Mac, the MacOS logo, Macintosh, and Pow-
erBook, are registered trademarks of Apple Computer, Inc.

Products and company names are trademarks of their respective com-
panies, and are mentioned for informational purposes only and con-
stitute neither an endorsement nor a recommendation.

Every effort has been made to ensure that the information in this
manual is accurate.  All errors including photographic, printing,
typographical, and clerical are subject to correction.  Information
in this document is subject to change without notice and does not
represent a commitment on the part of Mac Components Engi-
neered.

Mac Components Engineered
Irvine, California, USA

Sales: (800)500-0622; [email protected]
Technical Support: (949)458-0800; [email protected]

http://www.mcetech.com

Rev. 011003

Summary of Contents for Xcaret Pro

Page 1: ...Xcar t Pro Expansion Bay Hard Drive Kit Installation Guide http www mcetech com...

Page 2: ...user s guide on the use and care of the MCE Xcar t Pro Expansion Bay Drive Kit The installation procedure involved with the Kit is a delicate process and if not performed properly could cause damage t...

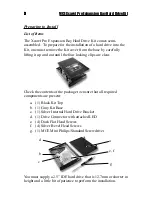
Page 3: ...and out until the four locking clips are clear Check the contents of the package to ensure that all required components are present a 1 Black Kit Top b 1 Gray Kit Base c 1 Silver Internal Hard Drive B...

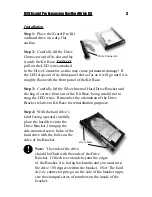
Page 4: ...ews from out of the Kit Base being careful not to snag the LED wires Remember the orientation of the Drive Bracket relative to Kit Base for reinstallation purposes Step 4 With the hard drive s label f...

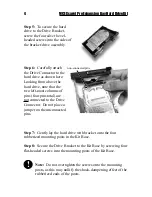
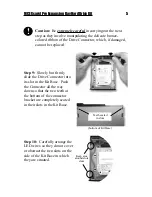
Page 5: ...eft most columns of pins four pins total are not connected to the Drive Connector Do not place a jumper on the unconnected pins Step 7 Gently lay the hard drive with bracket onto the four rubberized m...

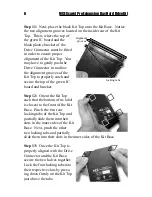
Page 6: ...Slowly but firmly slide the Drive Connector into its slot in the Kit Base Push the Connector all the way down so that the two teeth at the bottom of the connector bracket are completely seated in thei...

Page 7: ...nd secure the top of the green IC board and bracket Step 12 Orient the Kit Top such that the bottom of its label is closest to the front of the Kit Base Pinch the two rear locking tabs of the Kit Top...

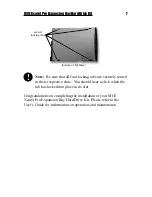
Page 8: ...their respective slots You should hear a click when the tab has locked into place in its slot Congratulations on completing the installation of your MCE Xcar t Pro Expansion Bay Hard Drive Kit Please...

Page 9: ...con stitute neither an endorsement nor a recommendation Every effort has been made to ensure that the information in this manual is accurate All errors including photographic printing typographical a...

Reviews: