MCE Xcarét Pro Expansion Bay Hard Drive Kit
5
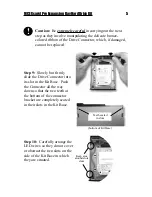
Caution: Be extremely careful in carrying out the next
step as they involve manipulating the delicate bronze-
colored ribbon of the Drive Connector, which, if damaged,
cannot be replaced.
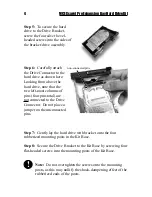
Step 9: Slowly but firmly
slide the Drive Connector into
its slot in the Kit Base. Push
the Connector all the way
down so that the two teeth at
the bottom of the connector
bracket are completely seated
in their slots in the Kit Base.
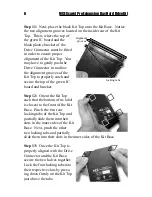
Step 10: Carefully arrange the
LED wires so they do not cover
or obstruct the two slots on the
side of the Kit Base in which
they are situated.
!
(bottom of Kit Base)
Teeth seated
in slots
Keep area
around slots
clear


