25
Basic Operations
25
EN
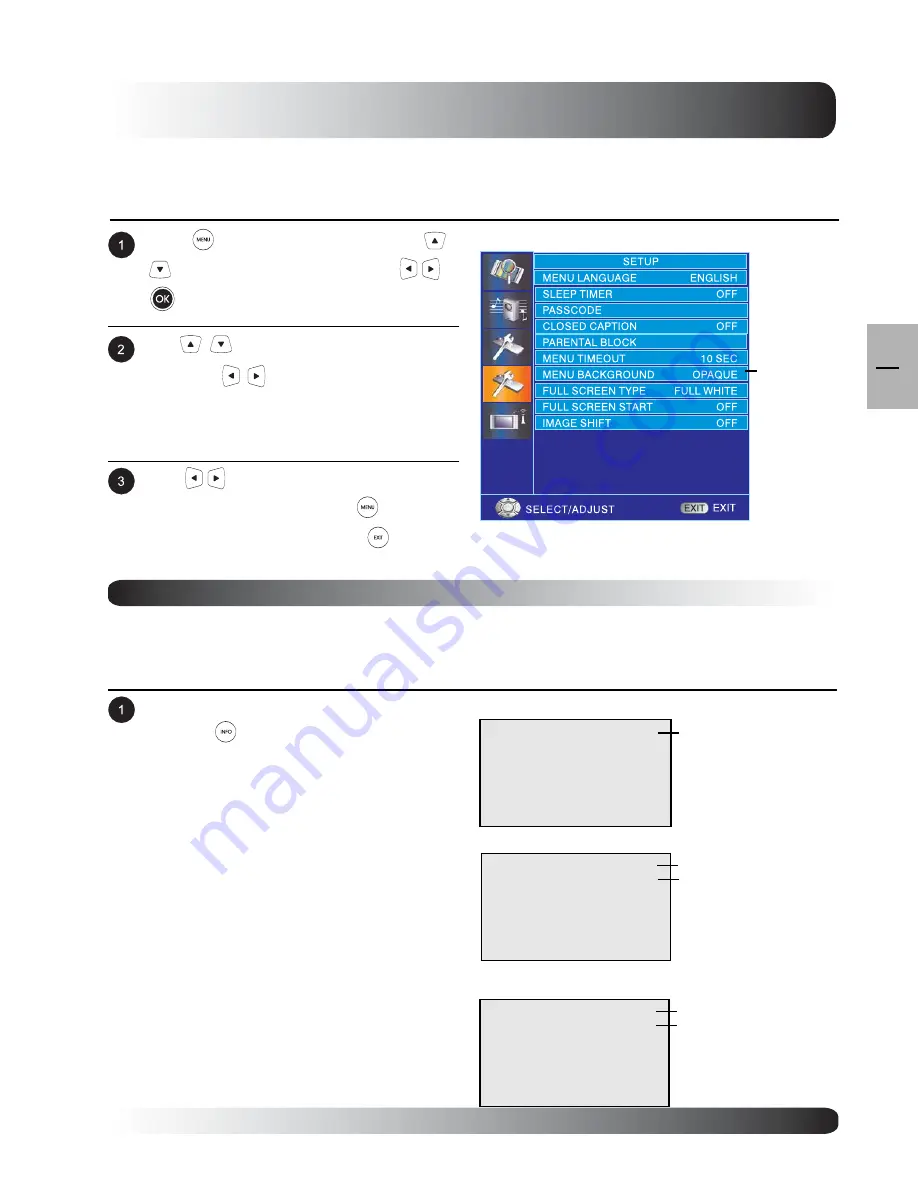
Press
to access the OSD menu. Use
keys to select SETUP then press
or
to enter SETUP menu.
On-Screen Status Display
Displaying Status
The On-Screen Status Display shows detailed information regarding the operational status of the TV. The status
display automatically appears whenever there is a change in the state of the TV such as channel change or input
change. The status display will automatically disappear after a period of time.
To manually show the Status Display, simply
press the
key on the remote control.
Note:
When using AV1 priority is given to the S-
Video input.
When using S-Video connection AV1 the
status display will denote “[S]” to indicate
the input source is using S-Video
connector.
OSD Menu Background Color Setting
The background color of the OSD Menu can be customized. To change the MENU Background color setting,
please follow the steps below.
COMPONENT1
1080I
Component/ HDMI Modes
Input Source
AV1
AV Mode
Input Source
PC Mode
PC
640x480
Signal Format
Signal Format
Input Source
Use
keys to change your settings. After
achieving disired setting, press
key to
return to previous menu or press
to exit
menu.
Use
keys to select BACKGROUND
then press
to enter MENU BACK-
GROUND COLOR setting.
MENU
BACKGROUD
Summary of Contents for 58"
Page 1: ...Owner s Manual l e n a P t a l F a m s a l P 58 Plasma TV ...
Page 7: ...7 7 EN Getting to Know Your TV Getting to Know Your TV ...
Page 13: ...13 13 EN Display Connections Display Connections ...
Page 21: ...21 Basic Operations 21 EN Basic Operations ...
Page 28: ...28 Basic Operations 28 EN ...
Page 29: ...29 Picture Controls 29 EN Picture Controls ...
Page 37: ...37 Audio Controls 37 EN Audio Controls ...
Page 43: ...43 Advanced Functions 43 EN Advanced Functions ...
Page 50: ...50 Advanced Functions 50 EN ...
Page 51: ...51 TV Functions 51 EN TV Functions Flat Panel TV ...
Page 66: ...66 TV Functions 66 EN ...
Page 67: ...67 Advanced 67 EN Advanced ...
Page 71: ...71 Appendix 71 EN Appendix ...
Page 73: ...73 Appendix 73 EN Wall Mount Instructions ...
Page 74: ...74 Appendix 74 EN Wall Mount Instructions ...
Page 83: ...TINSE2186Y1 ...


