11
ENGLISH
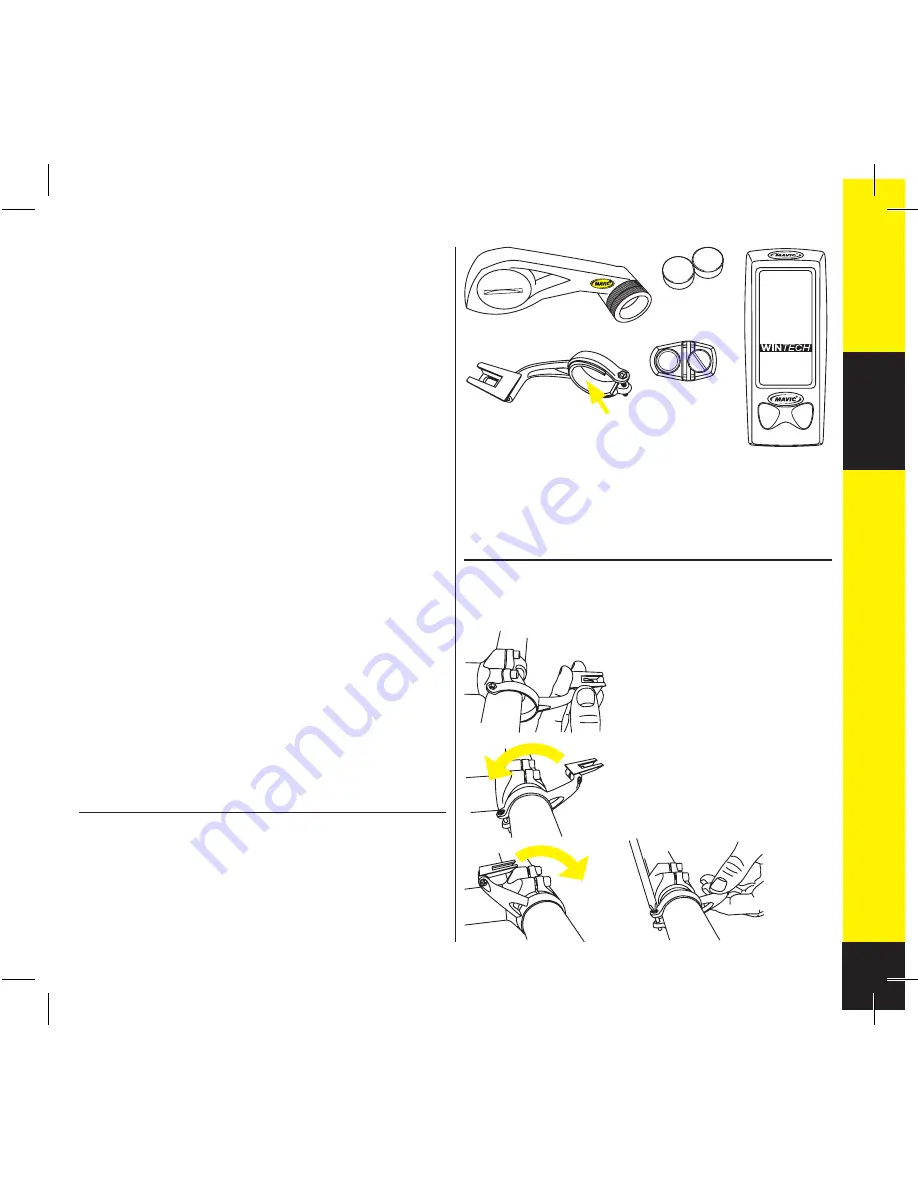
2. INSTALLING THE COMPUTER MOUNT
2.1.
Install the mount on the handlebar, to the right of the
handlebar stem.
To fix it to an oversize, 31.8
diameter handlebar, just remove the
25.4 adaptor.
2.2
Install the mount on the
handlebar.
2.3
The mount can be installed
in a variety of positions: with the
computer to the fore or over the
handlebar stem.
2.4
Once you have chosen the right
position, tighten the screw with a
cross-slot screwdriver.
The Mavic team has put all its passion, experience and skill
into the design and manufacture of your computer.
It will be an important aid to you in the improvement of your
performance.
Thank you for putting your trust in Mavic products.
SUMMARY
1.
DESCRIPTION
11
2. INSTALLING THE COMPUTER MOUNT
11
3. FITTING/REMOVING THE COMPUTER
12
4. INSTALLING THE SENSOR NUT
12
5. INSTALLING THE MAGNET
12
6. INSTALLING THE BATTERIES
12
7. DESCRIPTION OF THE DISPLAY
13
8. FUNCTION DISPLAY SEQUENCE
13
9.
DIGITAL PAIRING OF THE COMPUTER
WITH THE SENSORS
13
10. PAIRING THE SECOND BIKE
14
11. SETTING THE TIME
14
12. SETTING THE ODOMETERS
15
13. SETTING THE CIRCUMFERENCE
AND THE UNIT
15
14. TRIP ZERO RESET
16
15. USING THE INTERMEDIARY STOPWATCHES
16
16. CONSULTING THE INTERMEDIARY
STOPWATCHES 16
17. CONSULTING THE DIFFERENT ODOMETERS
17
18. MAINTENANCE
17
After installation and before you use your computer for the
first time, it is IMPERATIVE to perform the digital pairing
operation described in section 9 of this guide. If you don’t,
there will be no communication between the computer
and the different sensors and your system will not work.
1.6
1.2
1.1
1.4
1. DESCRIPTION
1.1
Computer
1.2
Sensor nut
1.3
Computer mount
1.4
25.4 handlebar mount adapter
1.5
All purpose magnet
1.6
Adjustment magnets
2.3.1
2.3.2
1.5
1.3
2.2
2.4
wintech-esbolt bis.indb 11
wintech-esbolt bis.indb 11
20/03/07 12:34:16
20/03/07 12:34:16
Cyan quadriMagenta quadriJaune quadriNoir quadri


