


Smart Device Control
Step 3 - Setting the target Pit temperature
3.1
From the home screen press the ‘Set Pit Temp’ button
3.2
Use the slide bar to raise and lower the desired temperature of your pit
3.3
Below the main temperature slide bar are two other slide bars. These allow you to set your min and max
temperature alerts. These will be used to alert you if your pit gets too hot or too cold.
3.4
You will notice that as you slide the bar through the temperature ranges the App will guide you through the
different zones of cooking (Smoking, Baking, Grilling and Searing).
3.5
When you have selected your desired parameters, press the ’Return’ button to save and go back to the
‘Home’ Screen.
Step 2 - Pair the Controller with your Device
2.1
Open the App on your phone after
downloading and installing it on your device.
2.2
Press the power button on your Air Controller to turn it on so it can pair to your device (ensure Bluetooth is
activated on your device).
2.3
On the App, press the ‘PAIR’ button on the top right hand side of the home screen. This will commence the
pairing process with your device.
2.4
From the menu that appears select your Air Controller from the list, it will be called “Radiant Pro”. If the
device does not appear we recommend trying to connect to the Controller using your devices standard
Bluetooth connection process.
2.5.
Once the device has been paired with your Air Controller, the Bluetooth symbol will appear on the top
right hand side of the controller’s LCD screen.
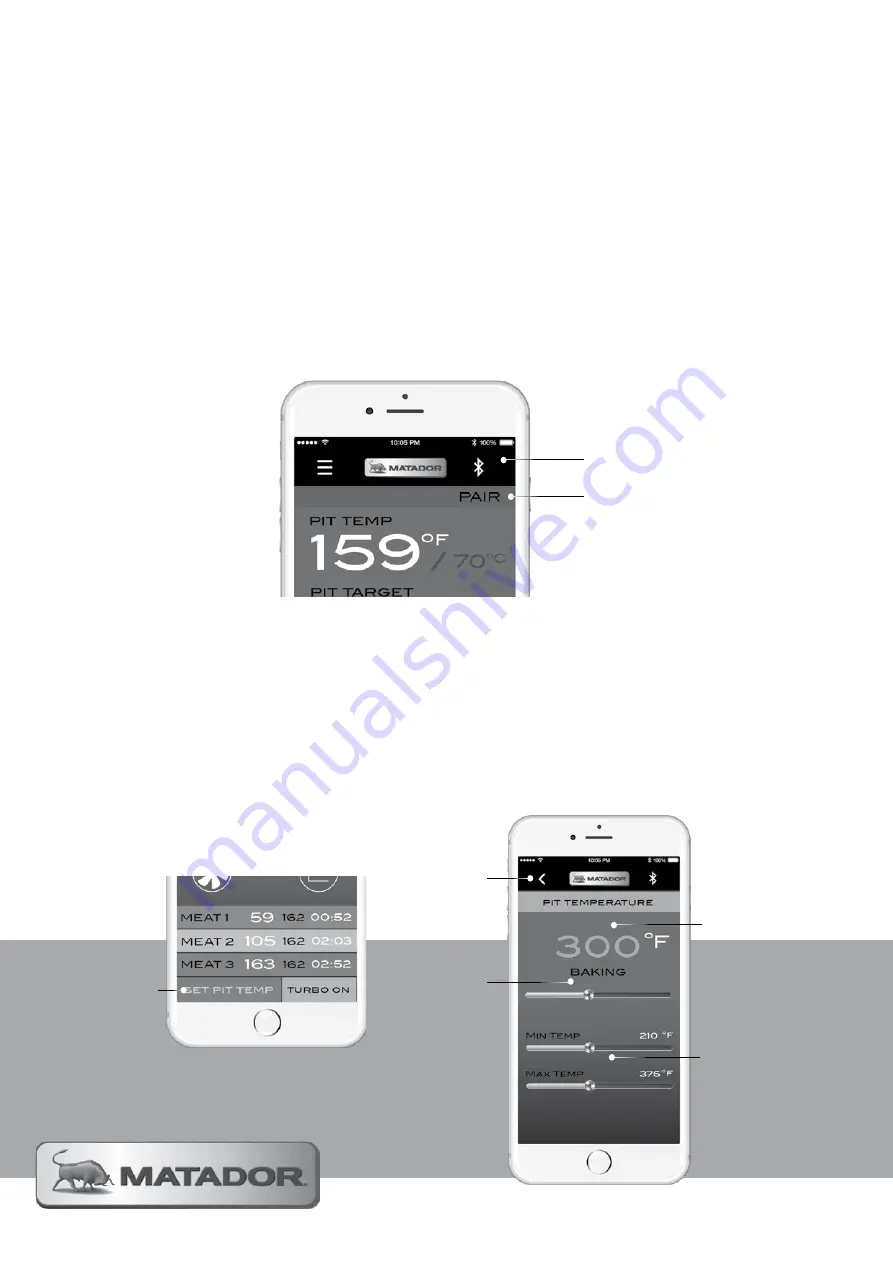
Pair Device Button
1.
Bluetooth Status Icon
2.
Set Pit Temp
Button.
1.
Slide the button
to the left or
right to increase
or decrease
desired pit
temperature.
2.
Slide buttons
to set the min /
max temperature
alerts for your
desired pit
temperature.
3.
Temperature
value updates
as slide button
adjusted.
Press ‘Return’
button to save
and go back to
home screen.
4.
Summary of Contents for Radiant Pro
Page 12: ......
Page 18: ...Hardware Needed A BOLT M6 X 30 2 D BOLT M6 X 12 2 G NUT M6 2 ...
Page 19: ...19 MATADOR INSTRUCTION MANUAL Hardware Needed L R CLIP 2 ...
Page 24: ......
Page 26: ...Hardware Needed G NUT M6 1 H WASHER M8 X 16 2 N SPRING 1 ...
Page 28: ......
Page 29: ...29 MATADOR INSTRUCTION MANUAL ...
Page 31: ...31 MATADOR INSTRUCTION MANUAL ...


