INSTALLATION
STARTUP PROCEDURE
Your spa is equipped with solid-state Comfort Controls specific to your spa model. (See
SPA
CONTROL OPERATION
for your specific spa model.)
NOTE:
Your spa has been filled and test-run
at the factory. The first time your spa is filled with water, some discoloration from residual test
water may appear. This will disappear when the spa is completely filled and the filtration system
is functioning.
THERAPY PUMP(S)
Startup procedure for all models
1. Place spa on a hard, flat, level surface. Make sure the power supply is off.
2. Make sure the suction guard(s) in the footwell are in place and undamaged.
3. Open the equipment door. Tighten all disconnects and open all shut-off valves.
NOTE:
Keep the drain valve closed at all times except when draining the spa (do not rely on the
cap to stop the flow of water). Not doing so could result in damage to the drain valve due to
freezing water.
4. Install filter cartridges. (See
INSTALLATION INSTRUCTIONS
, Filter Cartridges.)
5. Fill the spa with water to two-thirds of the way up the Vortex skimmer openings. The use of a
Fill Filter
is recommended, especially in areas with high mineral content in the water.
6. Turn the power on.
WARNING:
Spa must be completely filled with water before turning on power.
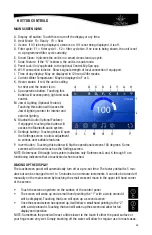
7. Your spa is now in “pump priming” mode and a “Priming Mode” message displays in the LCD
window of the control panel. While in this mode the spa appears idle, which lasts approximately
four to five minutes if not exited manually. To exit manually, press the back arrow in the lower left
corner of the display.
8. Allow the spa to circulate on high-speed (see SPA CONTROL OPERATION) for four to five
minutes to discharge air from the plumbing system. Do not expect hot water immediately
from the jets; the heater will take several hours to heat the water.
13


