background image

Part Number: 000006528 12/15 7

Installation Procedure

1.  Remove all packing material from bin.
2.  Remove all tape and temporary fastenings from door 

assemblies and outside of bin.

3.  Remove top from bin.
4.  Remove set of four legs and any other accessories 

packed inside bin.

5.  Lay bin on back, being careful to protect finish, and 

remove bolts holding skid to bin.

6.  Screw legs into tapped holes in bin bottom and tighten 

to seat legs well against bottom. 

7.  Set bin upright.
8.  Reinstall top onto bin.
9.  Remove protective paper from stainless steel exterior. 
10. Move bin to permanent location.
11. Adjust “foot” at bottom of each leg to level bin in both 

directions.

12. Mount ice machine(s) on bin in accordance with ice 

machine instructions.

13. Connect drain line to 1” FPT female fitting located in 

bottom of bin.

14. Make final connections to ice machine.

Drain Requirements

•  Bin drain termination must have an air gap.
•  Drain lines must have a 1.5 inch drop per 5 feet of run 

(2.5 cm per meter), and must not create traps.

•  The floor drain must be large enough to accommodate 

drainage from all drains.

•  Run separate bin and ice machine drain lines and 

insulate to prevent condensation.

Section 2

Installation Instructions

Summary of Contents for F Series

Page 1: ...t Number 000006528 12 15 Installation Use Care Manual This manual is updated as new information and models are released Visit our website for the latest manual www manitowocice com F Model Ice Storage Bins ...

Page 2: ......

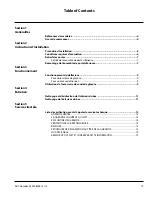
Page 3: ...peration Baffle Operation 9 For More Ice 9 For More Access 9 Using Ice Probe Tool Accessory 9 Section 4 Maintenance Cleaning and Sanitizing Interior Bin 11 Cleaning Exterior Bin 11 Section 5 Customer Support Before Calling For Service Checklist 13 Limited Warranty For Ice Storage Bin Dispensers 14 LIMITED WARRANTY 14 WHAT IS COVERED 14 EXCLUSIONS FROM COVERAGE 14 LIMITATIONS OF LIABILITY 14 REMEDI...

Page 4: ...4 Part Number 000006528 12 15 Table of Contents continued ...

Page 5: ... altered modified from that of original manufactured specifications This appliance is not intended for use by persons including children with reduced physical sensory or mental capabilities or lack of experience and knowledge unless they have been given supervision concerning use of theappliance by a person responsible for their safety Caution Avoid excessive tightening force when connecting to th...

Page 6: ...6 Part Number 000006528 12 15 General Information Section 1 THIS PAGE INTENTIONALLY LEFT BLANK ...

Page 7: ...ve protective paper from stainless steel exterior 10 Move bin to permanent location 11 Adjust foot at bottom of each leg to level bin in both directions 12 Mount ice machine s on bin in accordance with ice machine instructions 13 Connect drain line to 1 FPT female fitting located in bottom of bin 14 Make final connections to ice machine Drain Requirements Bin drain termination must have an air gap...

Page 8: ...bly 6 Pull forward on top of assembly and lift to remove ACCESS DOOR BAFFLE LOWER DOOR ASSEMBLY Reinstalling Lower Door Assembly 1 Reinstall lower door assembly in bin opening 2 Reinstall screws in hood at top of door assembly 3 Reinstall baffle in side panel tracks and push down to seat 4 With door in closed position insert one door stud through hinge bracket install washer screw and tighten NOTE...

Page 9: ... 1 Lock gate at higher level by pulling up and holding the baffle at correct level and pushing tapered end of catch into nearest hole in gate catch will automatically release when you pull up 2 To release catch pull up on the baffle Using Ice Probe Tool Accessory Ice probe tool is an optional accessory If your bin has been ordered with ice probe tool accessory mount probe for easy access on either...

Page 10: ...10 Part Number 000006528 12 15 Operation Section 3 ...

Page 11: ...or Sanitizer 1 Remove upper inspection windows by sliding windows to one side Grasp the end of the front window and pull toward you as the window is slid to the opposite side Repeat for rear window REAR WINDOW FRONT WINDOW 2 Mix a solution of cleaner and warm water Depending upon the amount of mineral buildup a larger quantity of solution may be required Use the ratio in the table below to mix eno...

Page 12: ...12 Part Number 000006528 12 15 Maintenance Section 4 ...

Page 13: ...rate drains Correct drain installation Water cooled condenser and bin do not have separate drains Correct drain installation Drain obstructed Clear drain Ice in bin does not drop Baffle is incorrectly positioned Refer to Section 3 Operation Ice forming ice bridge Refer to Section 3 Operation Ice falls on floor when bin door is opened Baffle is incorrectly positioned Refer to Section 3 Operation Ic...

Page 14: ...in no event be greater than the actual purchase price paid by purchaser for the Ice Storage Bin or Dispenser EXCLUSIONS FROM COVERAGE Repair or replacement of parts required because of misuse improper care or storage negligence alteration use of incompatible supplies or lack of specified maintenance shall be excluded Normal maintenance items Failures caused by adverse environmental water condition...

Page 15: ...utor Dealer Model Number and Serial Number Installation Date All warranty service must be preformed by an approved Manitowoc contracted or authorized Service Representative To schedule a service appointment contact your local Manitowoc Service Representative or visit us at www manitowocice com to find a Service Representative near you GOVERNING LAW This Limited Warranty shall be governed by the la...

Page 16: ...16 Part Number 000006528 12 15 Customer Support Section 5 THIS PAGE INTENTIONALLY LEFT BLANK ...

Page 17: ...Part Number 000006528 12 15 17 Section 5 Customer Support THIS PAGE INTENTIONALLY LEFT BLANK ...

Page 18: ...18 Part Number 000006528 12 15 Customer Support Section 5 THIS PAGE INTENTIONALLY LEFT BLANK ...

Page 19: ...du déflecteur 9 Pour obtenir plus de glaçons 9 Pour un accès additionnel 9 Utilisation de l accessoire de sonde de glaçons 9 Section 4 Entretien Nettoyage et désinfection de l intérieur du bac 11 Nettoyage de l extérieur du bac 11 Section 5 Service clientèle Liste de vérification avant d appeler le service technique 13 GARANTIE LIMITÉE 14 LA GARANTIE COUVRE CE QUI SUIT 14 EXCLUSIONS DE GARANTIE 14...

Page 20: ...20 Part Number 000006528 12 15 Table of Contents continued ...

Page 21: ...iginales de fabrication auront été altérées modifiées Le présent appareil ne doit pas être utilisé par des personnes enfants y compris ayant des capacités physiques sensorielles ou mentales diminuées ou ayant un manque d expérience et de connaissance à moins que celles ci n aient reçu une formation sur l utilisation de l appareil par une personne responsable de leur sécurité Attention Éviter de se...

Page 22: ...22 Part Number 000006528 12 15 Généralités Section 1 ...

Page 23: ... Déplacer le bac dans son emplacement permanent 11 Ajuster le patin au bas de chaque pied pour mettre le bac de niveau dans les deux sens 12 Monter la ou les machines à glaçons sur le bac conformément aux instructions de la machine à glaçons 13 Connecter la conduite d évacuation au raccord femelle de 1 pounce FPT situé au bas du bac 14 Effectuer les dernières connexions à la machine à glaçons Cond...

Page 24: ...haut de l ensemble et relever pour retirer PORTE D ACCÈS DÉFLECTEUR ENSEMBLE DE PORTE INFÉRIEURE Remontage de l ensemble de porte inférieure 1 Remonter l ensemble de porte inférieure dans l ouverture du bac 2 Remonter les vis dans le capot en haut de l ensemble de porte 3 Remonter le déflecteur dans les rails de panneaux latéraux et appuyer pour installer 4 Une fois la porte en position fermée ins...

Page 25: ...rieur en relevant le déflecteur et en le maintenant au niveau adéquat et en enfonçant l extrémité conique du taquet dans le trou le plus proche de la barrière le taquet se libère automatiquement lorsqu on relève 2 Pour libérer le taquet relever le déflecteur Utilisation de l accessoire de sonde de glaçons La sonde de glaçons est un accessoire facultatif Si le bac a été commandé muni de la sonde de...

Page 26: ...26 Part Number 000006528 12 15 Fonctionnement Section 3 ...

Page 27: ...r les regards supérieurs en les faisant glisser sur un côté Saisir l extrémité du regard avant et tirer vers soi lorsque le regard est glissé sur le côté opposé Répéter pour le regard arrière REGARD ARRIÈRE REGARD AVANT 2 Mélanger une solution nettoyante avec de l eau chaude Selon la quantité de dépôt minéral une quantité plus importante de solution peut être requise Utiliser le rapport dans le ta...

Page 28: ...28 Part Number 000006528 12 15 Entretien Section 4 ...

Page 29: ...tallation de l évacuation Le condenseur refroidi par eau et le bac n ont pas d évacuations séparées Rectifier l installation de l évacuation Évacuation obstruée Dégager l évacuation Les glaçons dans le bac ne tombent pas Le déflecteur est mal positionné Se reporter à la section 3 Fonctionnement Glace formant le pont de glace Se reporter à la section 3 Fonctionnement Les glaçons tombent par terre l...

Page 30: ... de la présente garantie ne sera en aucun cas supérieure au prix d achat réel payé par l acheteur pour le bac de stockage ou distributeur de glaçons EXCLUSIONS DE GARANTIE La réparation ou le remplacement des pièces requis en raison d une mauvaise utilisation d un entretien ou d un entreposage inadéquat de négligence d altération d utilisation de fournitures incompatibles ou du manque d entretien ...

Page 31: ...er cette information Distributeur Revendeur Référence de modèle et Numéro de série Date d installation Tout service au titre de la garantie doit être effectué par un représentant du service technique sous contrat ou autorisé homologué de Manitowoc Pour prendre rendez vous pour tout service contacter le représentant du service technique local de Manitowoc ou consulter notre site à www manitowocice ...

Page 32: ...32 Part Number 000006528 12 15 Service clientèle Section 5 THIS PAGE INTENTIONALLY LEFT BLANK ...

Page 33: ...Part Number 000006528 12 15 33 Section 5 Service clientèle THIS PAGE INTENTIONALLY LEFT BLANK ...

Page 34: ...34 Part Number 000006528 12 15 Service clientèle Section 5 THIS PAGE INTENTIONALLY LEFT BLANK ...

Page 35: ......

Page 36: ... level of service that meets your operational needs from one restaurant to multiple locations StarCare Warranty lifetime service certified OEM parts global parts inventory performance audited ExtraCare CareCode 24 7 Support online mobile product information LifeCare Install equipment orientation planned maintenance KitchenConnect MenuConnect Talk with KitchenCare 1 844 724 CARE www mtwkitchencare ...

Reviews: