3-15
A3 - FUEL LEVEL
CHECK
Keep the fuel tank full, to reduce as much as possible any condensation due to the
atmospheric conditions.
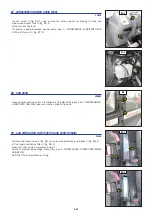
- Remove cap 1 (fig. A3).
- Fill the fuel tank with clean fuel (see: 3 - MAINTENANCE: LUBRICANTS AND FUEL), filtered
through a strainer or a clean, lint free cloth, through filler por t 2 (fig. A3).
- Put the cap back 1 (fig. A3).
- Check visually that there is no leakage in the tank and pipes.
Never smoke or approach with a flame during filling operations or when the tank is open. Never refill
while I.C. engine is running.
The fuel tank is degassed via the filler plug. When changing it, always use an original part, with degassing
hole.
NOTE: A locking tank cap is available as an OPTION.
A4 - FUEL PRE-FILTER
CHECK
MLT 634 Turbo LSU Série F-E3
MLT 731 Turbo Série F-E3
MLT 735 Turbo LSU Série 6-E3
MLT 741 Turbo LSU Série 6-E3
MLT 1035 L Turbo LSU Série 6-E3
- Open the I.C. engine bonnet.
- Check for the presence of water in the pre-filter bowl 1 (fig. A4/1) and empty it out if
necessary.
- Place a receptacle under the drain plug 2 (fig. A4/1) and loosen it in two to three thread
turns.
- Allow the diesel fuel to flow out until it is free from impurities and water.
- Retighten the drain plug while the diesel fuel is flowing out.
A4 - FUEL PRE-FILTER
CHECK
MLT 634 -120 LSU Série F-E3
MLT 634 -120 LSU POWERSHIFT Série F-E3
MLT 735 -120 LSU Série 6-E3
MLT 735 -120 LSU POWERSHIFT Série 6-E3
MLT 741 -120 LSU Série 6-E3
MLT 741 -120 LSU POWERSHIFT Série 6-E3
- Open the I.C. engine bonnet.
- Check for the presence of water in the pre-filter bowl 1 (fig. A4/2) and empty it out if
necessary.
- Place a receptacle under the drain plug 2 (fig. A4/2) and loosen it in two to three thread
turns.
- Allow the diesel fuel to flow out until it is free from impurities and water.
- Tighten the drain plug.
- Pressurise the circuit with the hand pump 3 (fig. A4/2).
A5 - CYCLONIC PREFILTER
CLEAN
The cleaning inter val is given as a guide, however the pre-filter must be emptied as soon
as impurities reach the MAX. level on the tank.
- Loosen nut 1 (fig. A5), remove cover 2 (fig. A5) and empty the tank.
- Clean the pre-filter unit with a clean dr y cloth and reassemble the unit.
When cleaning, take care not to let impurities into the dry air filter.
A3
2
1
A5
1
2
A4/1
1
2
A4/2
3
1
2
Summary of Contents for 6-E3 Series
Page 2: ......
Page 4: ......
Page 5: ...1 1 1 OPERATING AND SAFETY INSTRUCTIONS...
Page 6: ...1 2...
Page 32: ...1 28...
Page 33: ...2 1 2 DESCRIPTION...
Page 34: ...2 2...
Page 111: ...2 79...
Page 124: ...2 92...
Page 125: ...3 1 3 MAINTENANCE...
Page 126: ...3 2...
Page 133: ...3 9...
Page 143: ...3 19...
Page 149: ...3 25...
Page 172: ...3 48...
Page 173: ...4 1 4 OPTIONAL ATTACHMENTS FOR USE WITH THE RANGE...
Page 174: ...4 2...
Page 176: ...4 4...
Page 191: ...5 1 5 SPECIFIC AUSTRALIA See also the operator s manual supplement 647065 AU...
Page 192: ...5 2...


