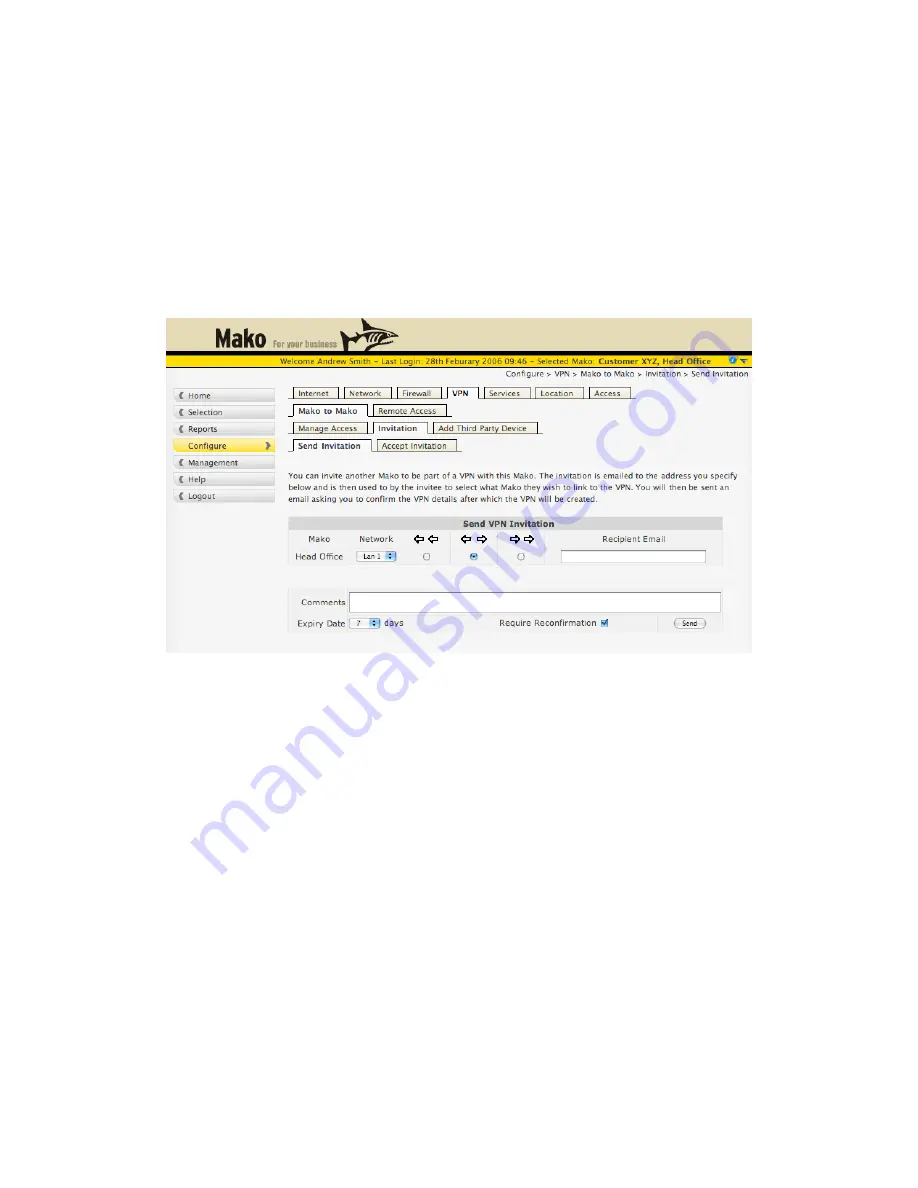
Invitation
If you wish to have a Mako to Mako VPN between your Mako and a Mako that belongs to
another company, you can do so with Mako VPN Invitations.
Invitation: Send Invitation
To create a VPN between a Mako you can administer and one you cannot, you need to know
the email address of the administrator of the other Mako.
The Mako you have currently selected will appear in the bottom left hand side of the Mako
Send Invitation page. Select which LAN you want to be your part of the VPN, select the
direction of the VPN in the same manner as Mako to Mako VPNs and enter the email address
of the administrator of the Mako you are wanting to connect to.
VPN, Mako to Mako, Invitation, Send Invitiation
The administrator of the other Mako will receive an email with a special key inviting them to
accept your invitation and create a Mako to Mako VPN with your Mako. If you like you can
add comments that will be added to the email. By default, the invitation will be valid for seven
days. After this time the key will not work and you will have to begin the invitation process
again. You can change the length of validity of the invitation by changing the Expiry Date.
The Require Confirmation box will also be checked by default. This is to add an extra layer of
security to the invitation process. With this box checked, after your invitation has been
accepted, you will receive a confirmation email with another key in it that you will need to
accept before the VPN is established. If you remove the check from Require Reconfirmation,
this process is skipped and the VPN is established once the invited party accepts.
Mako Networks Mako 7550-E Product Handbook v.1.1
Page 48


