6 ENGLISH
2.
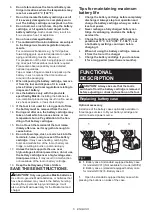
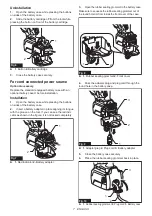
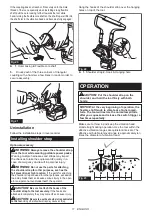
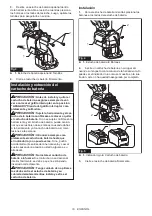
Loosen the screws securing the standard equipped
battery case, and slide the battery case off along the housing.
1
2
3
Fig.2
►
1.
Standard equipped battery case
2.
Screws
3.
Housing
3.
Slide an optional battery case into the tool. Open
the case while pressing the buttons on sides of the
case. Then tighten the screws to secure it in place.
1
2
Fig.3
►
1.
Optional battery case
2.
Screws
4.
Close the battery case securely.
Installing and removing battery cartridge
CAUTION:
Before installing and removing
battery cartridge, always make sure to set the
switch trigger back into the “OFF” position by
pulling the switch trigger fully and releasing it.
CAUTION:
Hold the tool and the battery cartridge
firmly when installing or removing battery cartridge.
Failure to hold the tool and the battery cartridge firmly may
cause them to slip off your hands and result in damage to
the tool and battery cartridge and a personal injury.
CAUTION:
Always install the battery cartridge fully
until the red indicator cannot be seen.
If not, it may accidentally
fall out of the tool, causing injury to you or someone around you.
CAUTION:
Do not install the battery cartridge
forcibly.
If the cartridge does not slide in easily, it is
not being inserted correctly.
CAUTION:
Take care not to trap your fingers
between the battery case and its front cover while
installing and removing battery cartridge.
Installation
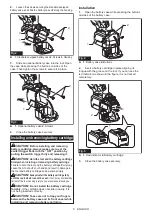
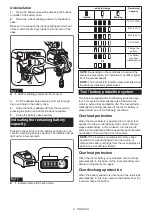
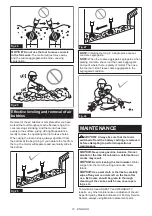
1.
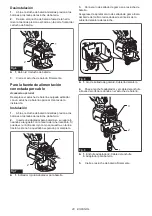
Open the battery case while pressing the buttons
on sides of the battery case.
1
2
Fig.4
►
1.
Battery case
2.
Buttons
2.
Insert a battery cartridge in place aligning its
tongue with the groove on the tool. If you can see the
red indicator as shown in the figure, it is not locked
completely.
2
1
1
Fig.5
►
1.
Red indicator
2.
Battery cartridge
3.
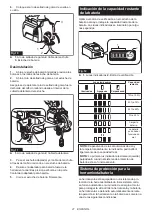
Close the battery case securely.
Summary of Contents for XGT GRV01
Page 27: ...27 ...

