REFERENCE
REFERENCE
20
21
PRINTING WITH MAKERBOT DESKTOP
PRINTING WITH MAKERBOT DESKTOP
HOW TO CHANGE FILAMENT
You can change filament at any time when the MakerBot Replicator Mini is not heating up
or printing .
•
• When the MakerBot Replicator Mini is in an idle state and the Action Button is white,
press and hold the Action Button to initiate a filament change . Alternatively, you can
click the status bar in MakerBot Desktop, and then click
Change Filament
in the
print monitor panel .
•
• If the MakerBot Replicator Mini senses loaded filament, the motor will turn
backward to unload it . Wait while the Smart Extruder unloads your filament . When
the filament stops backing out of the Smart Extruder, squeeze the tabs on the side
of the Smart Extruder and gently pull the filament free . If the MakerBot Replicator
Mini senses no loaded filament, the motor will turn forward to load new filament . Push
the filament until you feel the Smart Extruder pulling it in .
•
• Before removing the current filament spool, unclip the filament guide tube from the
spool pocket .
•
• Clip the filament guide tube back into place after inserting the new filament spool .
•
• During a filament change, pressing the Action Button will cancel the filament change .
•
• During a filament change, pressing and holding the Action Button will change the
motor’s direction .
HOW TO CHANGE THE SMART EXTRUDER
If you need to remove the Smart Extruder from your MakerBot Replicator Mini, first unload
any filament .
Wait for the Smart Extruder to cool, then pull it away from the extruder carriage . MakerBot Desktop
will detect that the Smart Extruder is no longer attached and will open a dialog box guiding you
through the process of reattaching the extruder or attaching a new one . Click
Attach Extruder
. When
MakerBot Desktop directs you to, press your extruder against the back of the extruder carriage, with
the connector pins facing the extruder carriage . Magnets will lock the Smart Extruder into place .
Warning:
Always use caution when handling the Smart Extruder . Never remove the
Smart Extruder during or immediately after printing, or when the Action Button is red .
Wait a few minutes before handling the Smart Extruder .
HOW TO TAKE A PHOTO
You can take a photo of your print at any time using the built-in camera in the MakerBot
Replicator Mini . Click the print monitor panel in MakerBot Desktop, mouse over the current
displayed photo, and click
Take a Picture
. MakerBot Desktop will take a picture and let you
save it to your local computer . You must be connected to a Wi-Fi network to use the camera .
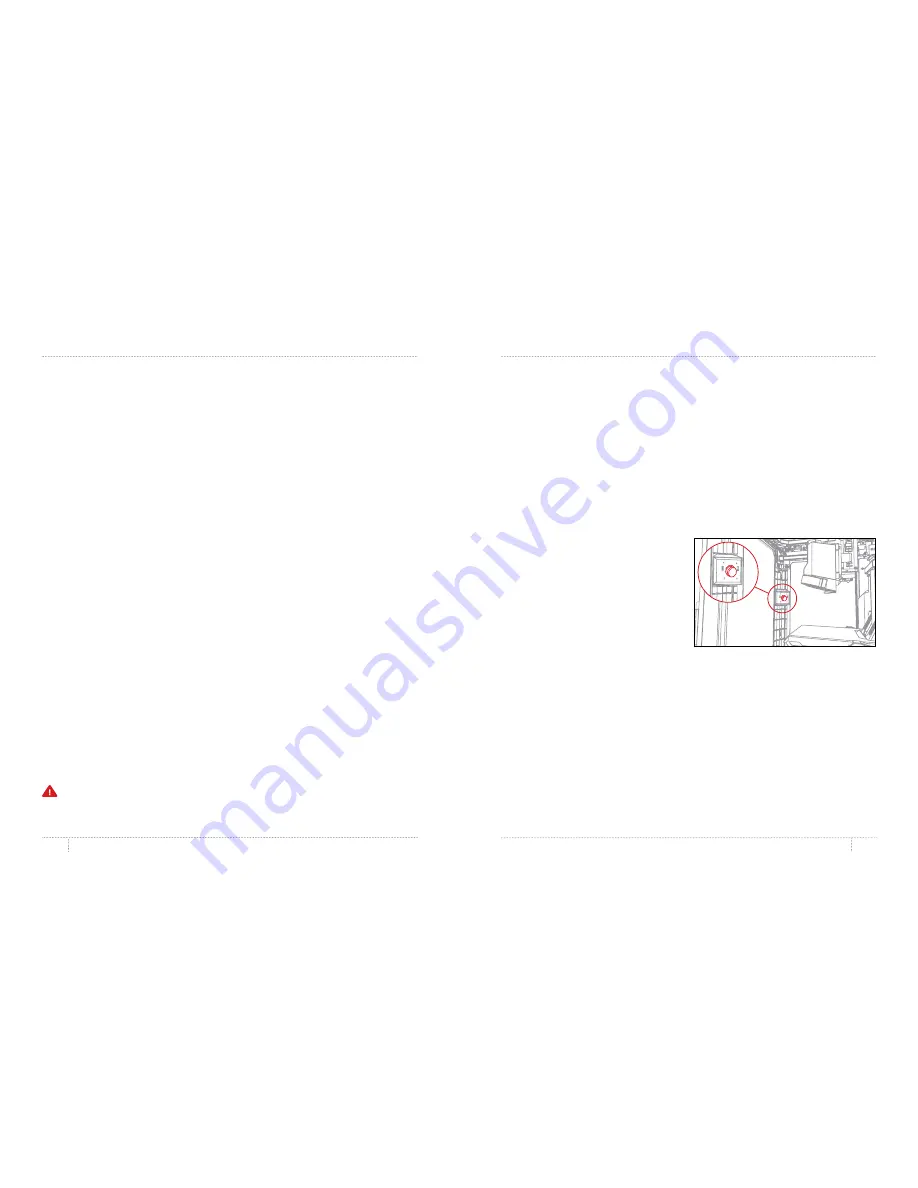
HOW TO FOCUS THE CAMERA
When you connect your new MakerBot Replicator Mini to MakerBot Desktop for the first time, the
camera image may be blurry . You will need to focus it manually to get the best image possible .
To focus the camera:
1 . Connect the MakerBot Replicator Mini
to MakerBot Desktop via a Wi-Fi network
and open the print monitor panel .
2 . Locate the camera . It is mounted inside the
left front corner of the MakerBot Replicator Mini .
3 . Grasp the plastic ring around the lens
and twist it slightly . Avoid touching the
camera lens itself .
4 . Check the camera feed and wait for the image to refresh . If the image is clearer than it
was before, continue twisting the lens in the same direction . If the image is less clear, start
twisting the lens in the opposite direction .
5 . Twist in small increments and check the camera feed frequently . When the image is clear
and twisting in either direction makes it more blurry, stop making adjustments . You have
successfully focused the onboard camera .
Summary of Contents for Replicator
Page 1: ...REFERENCE GUIDE...


