© 2016 Sensata Technologies
4
5.1”
(130 mm)
Installation
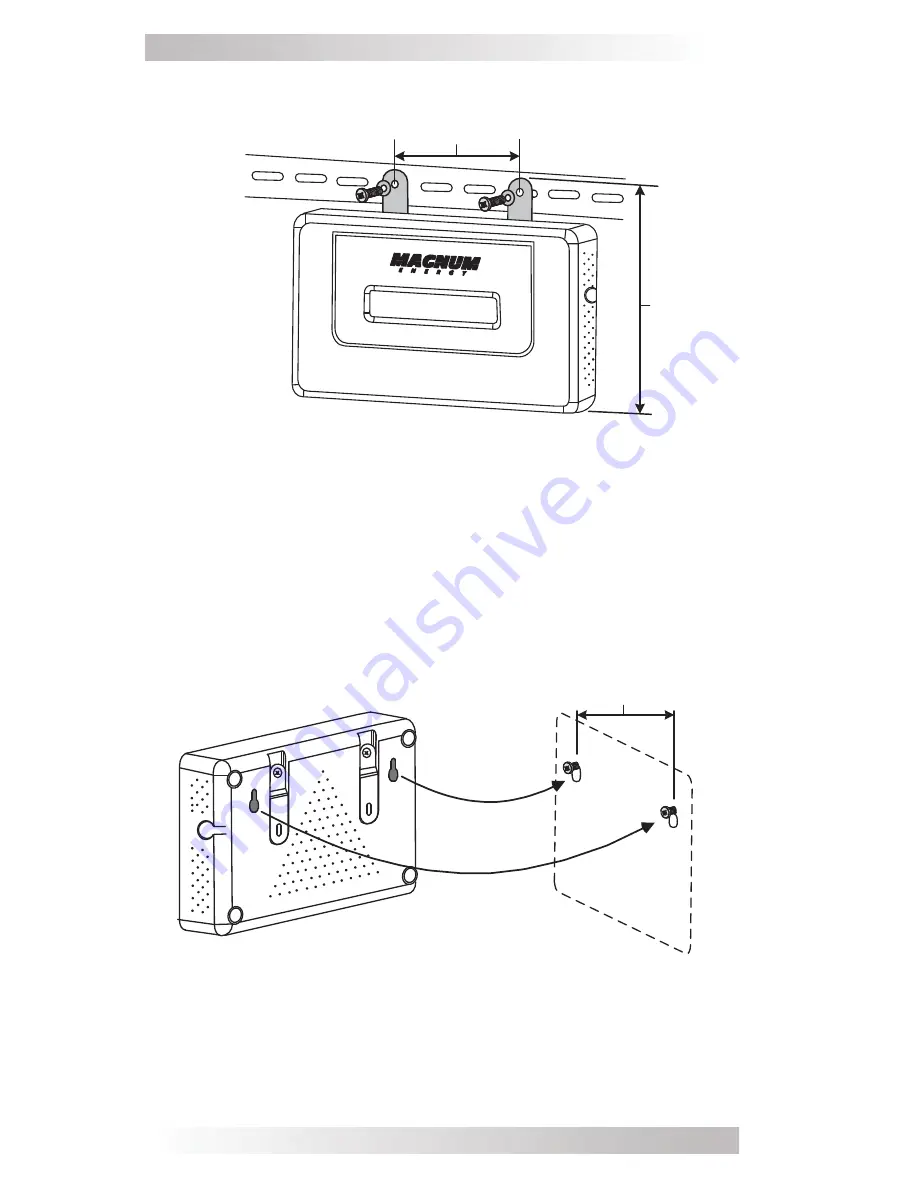
Figure 4, Mounting the MagWeb GT on a DIN Rail
2. Attach the MagWeb GT to the mounting rail with the appropriate-
sized screws (Figure 4).
Figure 5, Wall Mounting the MagWeb GT
2.2.2 Using a Wall Mount
When mounting the MagWeb GT on a wall, make sure to select a
cool, dry, indoor location.
1. Depending on the wall surface to which you are mounting the
MagWeb GT, use either two #8 drywall screws or two wall
anchors—installed 5.1” (130 mm) apart. The drywall screws and
wall anchors are NOT supplied with the MagWeb GT.
2. Align/slide the MagWeb GT onto mounting screws (Figure 5).
Best Practice: Install/connect the MagWeb GT to the Internet while
the rest of the array is being installed. Doing so allows the MagWeb
GT to automatically update its internal software while the installation
is underway. The MagWeb GT communicates with the microinverters
once the installation is complete and the array is energized.
ME
N
U
3.2”
(80 mm)
5.4”
(138 mm)
ME
N
U
Summary of Contents for MagWeb GT
Page 1: ...Owner s Manual MagWeb GT ...


