background image

5

 General Operations

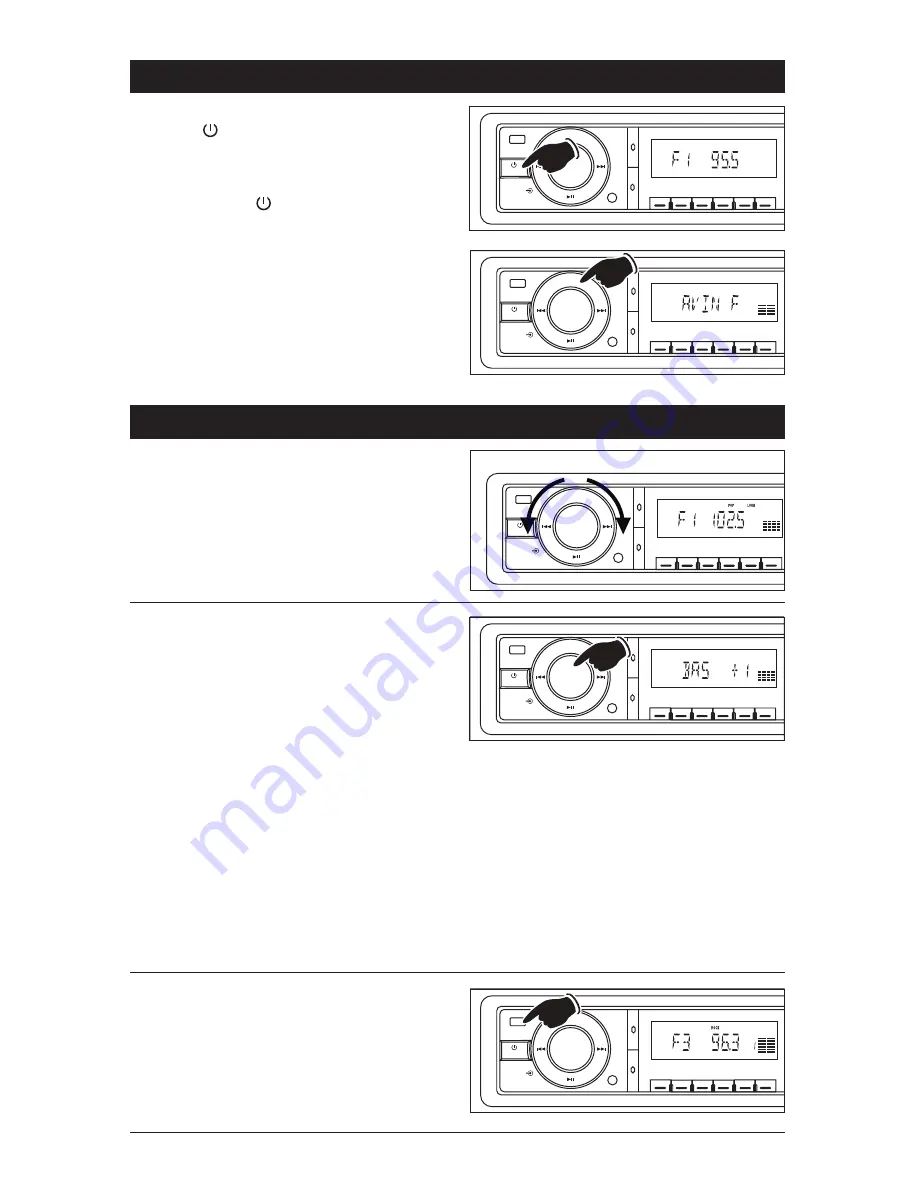
Turning the Unit On:

Press the   button to turn the unit On when the 

unit is off.

Turning the Unit Off:

Press and hold the   button to turn the unit Off.

Mode Selection: 

Press the MODE button to change the operating 

mode as follows: “AVIN F” Audio/Video In, Front  

> “AVIN R” Audio/Video In, Rear > “F1, F2, F3, 

AM1 or AM2” Radio > “LOAD” Music or Movie 

Disc > “USB” USB > “CARD” SD card*. 

*Available only when there is media inserted 

into Disc slot, USB slot or SD Card slot.

 Sound Controls

Volume:


• Increase the volume by rotating the knob clock-  

   wise.
• Decrease the volume by rotating the know counter-

  clockwise.

Sound Characteristics Menu:

  By pressing the VOL knob, the modes will be dis-

played in the following order: “BAS” bass, “TRE” 

treble, “BAL” balance and “FAD” fader.

Bass:

Press the VOL knob until “BAS” appears in the 

display. Turn the VOL knob clockwise to increase 

the bass and counterclockwise to decrease the 

bass.

Treble:

Press the VOL knob button until “TRE” appears 

in the display. Turn the VOL knob clockwise 

to increase the treble and counterclockwise to 

decrease the treble.

Increase

Decrease

10+

5

10-

INT

RDM

A-B

RPT

BAND

AMS

MODE

EQ

MUTE

SEL

VOL

AM/FM Multi-Media Receiver

6

4

3

2

1

Balance:

Press the VOL knob button until “BAL” appears 

in the display. Turn the VOL knob clockwise to 

increase the balance to the right and counter-

clockwise to increase the balance to the left.

Fader:

Press the VOL knob button until “FAD” appears 

in the display. Turn the VOL knob clockwise to 

increase the balance to the front speakers and 

counterclockwise to increase the balance to the 

rear speakers.

Equalizer:

The M3500DVD has pre-programmed audio set-

tings. Press the EQ button to switch the equalizer 

settings. The equalizer setting will appear in the 

display:  POP,  ROCK,  CLAS  (classic)  or  off.  The 

unit will leave equalizer programing after 5 sec-

onds of no button activity.

10+

5

10-

INT

RDM

A-B

RPT

BAND

AMS

MODE

EQ

MUTE

SEL

VOL

AM/FM Multi-Media Receiver

6

4

3

2

1

10+

5

10-

INT

RDM

A-B

RPT

BAND

AMS

MODE

EQ

MUTE

SEL

VOL

AM/FM Multi-Media Receiver

6

4

3

2

1

10+

5

10-

INT

RDM

A-B

RPT

BAND

AMS

MODE

EQ

MUTE

SEL

VOL

AM/FM Multi-Media Receiver

6

4

3

2

1

10+

5

10-

INT

RDM

A-B

RPT

BAND

AMS

MODE

EQ

MUTE

SEL

VOL

AM/FM Multi-Media Receiver

6

4

3

2

1

Summary of Contents for M3500DVD Operation and

Page 1: ...Operation and Installation Manual Model M3500DVD DVD CD Receiver with AM FM Tuner...

Page 2: ...eration with a negative grounded 12V DC battery system Never operate this product with other battery systems especially a 24V DC battery system If the product is used with the improper system it may c...

Page 3: ...y DVD CD SD or USB Press to skip up 10 tracks chapters 11 Multi Function Button 5 10 Radio Recalls a memorized radio station and programs a radio station into memory DVD CD SD or USB Press to skip dow...

Page 4: ...rd button to fast forward disc play or press the fast reverse but ton to fast reverse disc play Each time the button is pressed the speed changes To resume normal play press the play button ll 18 Tune...

Page 5: ...the treble and counterclockwise to decrease the treble Increase Decrease 10 5 10 INT RDM A B RPT BAND AMS MODE EQ MUTE SEL VOL AM FM Multi Media Receiver 6 4 3 2 1 Balance Press the VOL knob button un...

Page 6: ...1 Select a band F1 F2 F3 AM1 or AM2 2 Press one of the six preset buttons to select a stored station 10 5 10 INT RDM A B RPT BAND AMS MODE EQ MUTE SEL VOL AM FM Multi Media Receiver 6 4 3 2 1 10 5 10...

Page 7: ...res them in each preset number for the selected radio band The new stations replace stations already stored in that band 3 After the new stations are stored into memory the tuner will start playing th...

Page 8: ...ing at end of disc REPEAT 1 The track playing will continuously repeat REPEAT ALL The entire disc repeats continuously 10 5 10 INT RDM A B RPT BAND AMS MODE EQ MUTE SEL VOL AM FM Multi Media Receiver...

Page 9: ...o Scan Press the 4 INT button to play the first ten sec onds of each track Press it again to stop intro scan and listen to the track Track Skip Buttons Press the 5 10 button to skip down 10 tracks Pre...

Page 10: ...tton Press the button 2 times then press the ll button and the movie disc will start playing from the beginning POWER MODE MENU TITLE RANDOM REPEAT DVD Movie Disc Operation Loading a DVD 1 Press the O...

Page 11: ...resume normal play press the ll button Subtitle Language Menu Press the SUB TT button on the remote during playback Each time the button is pressed the subtitle language changes The selection of sub...

Page 12: ...Selection 1 Using the numeric keypad on the remote con trol enter the chapter number 2 Press the ENTER button to confirm Last Play Memory During disc play if you turn off the unit and turn it on again...

Page 13: ...GE SETUP OSD LANGUAGE AUDIO LANG SUBTITLE LAN MENU LANG VIDEO SETUP BRIGHTNESS CONTRAST HUE SATURATION SHARPNESS SPEAKER SETUP DOWNMIX FRONT You can adjust the value of brightness con trast hue satura...

Page 14: ...olet Black Wire Violet Wire Green Black Wire Green Wire Left Rear Speaker Blue Wire Power Antenna 12V Out Yellow Wire to 12 Volt Constant Black Wire Ground Red Wire to 12 Volt Ignition External Antenn...

Page 15: ...e unit then attach it with the supplied nut 3 Insert the unit into the sleeve until you hear a click 4 Finally place the trim ring over the unit Removing the Unit 1 Remove the trim ring 2 Insert the r...

Page 16: ...ction Additional Features Button Press Beep Confirmation If you want the M3500DVD to beep everytime a button is pressed follow the instructions below 1 Press the VOL knob until BEEP OFF appears in the...

Page 17: ...e rating The internal processor is not working due to noise or other factors Press the reset button to reset the unit to factory defaults The remote control does not work The unit does not operate eve...

Page 18: ...ing Dirt dust scratches and warping disc will cause non operation Do not place stickers on disc or scratch disc Do not place discs in the following places Direct sunlight dirty dusty or damp areas nea...

Page 19: ...rranty does not cover the cabinet appearance items or accessories used in con nection with this product or any damage to recording or recording tape or any damage to the products resulting from improp...

Page 20: ...Copyright 2012 Magnadyne Corporation M3500DVD UM Rev A 5 14 12...

Reviews: