12
5
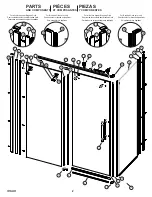
Parts required:
Pieces requis:
Partes requeridas:
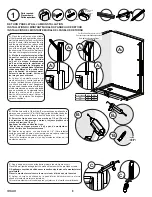
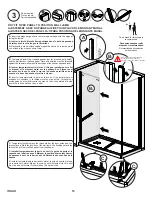
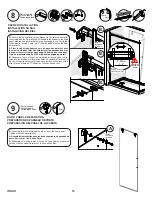
FIXED PANEL INSTALLATION
INSTALLATION DU PANNEAU FIXE
INSTALACIÓN DEL PANEL FIJO
A
3
6
x 1
A.
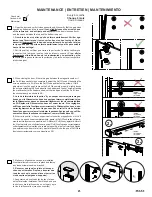
Place the door panel inside the shower.
Slide the U-shaped gasket in the wall jamb
with the long side facing the outside (not for
brushed gold finish). Insert glass inside wall
jamb. From within the shower,
install the I-
shaped gasket between the glass and the
wall jamb (see also image for brushed gold).
A. Mettre le panneau de porte à l'interieur
de la douche. Faites glisser le joint d'étan-
chéité en U dans le montant mural avec le
côté long vers l'extérieur (Ne pas installer
pour le fini or brossé). Insérer le verre à
l'intérieur du montant mural. De l'intérieur
de la douche, installer le joint d'étanchéité en
I entre le verre et le montant mural (voir aussi
l'image pour or brossé).
A.
Colocar el panel de puerta dentro de la
ducha. Deslizar la junta de estanqueidad en
U dentro de la jamba mural con el lado largo
mirando hacia fuera (no instalar para el aca-
bado oro cepillado). Inserte el vidrio dentro del
montante mural. Desde el interior de la ducha,
instalar la junta de estanqueidad en I entre
el vidrio y el montante mural (ver también la
imagen para oro cepillado).
A
2
INSIDE
INTÉRIEUR
INTERIOR
A
4
9 x1
7 x1
10 x1
100%
6
Parts required:
Pieces requis:
Partes requeridas:
13
x 1
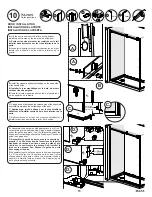
B.
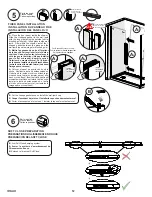
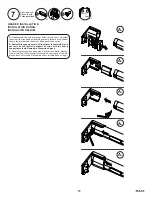
Arm Soft Close damping system.
B. Armer le système d'amortissement du
Glissement en douce.
B.
Extender el brazo del Soft Close.
SOFT CLOSE PREPARATION
PRÉPARATION DU GLISSEMENT EN DOUCE
PREPARACIÓN DEL SOFT CLOSE
7
x 1
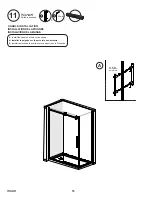
B.
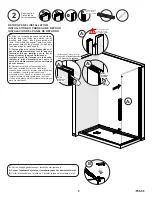
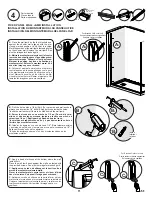
Cut the I-shape gasket excess. Install the wall jamb cap.
B. Couper l'excédent du joint en I. Installer le capuchon de montant mural.
B.
Cortar el excedente de la junta en I. Instalar la tapa del montante mural.
24h
B
A
1
39
x 1
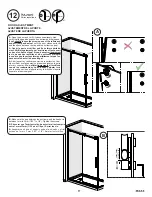
For Brushed Gold
Pour Or Brossé
Para Oro cepillado
NOT for Brushed Gold
Pas pour Or Brossé
NO para Oro cepillado
INSIDE
INTÉRIEUR
INTERIOR
A
4
For Brushed Gold color only
Pour la couleur or brossé uniquement
Solo para color oro cepillado


