41
ADVANCED FUNCTIONS
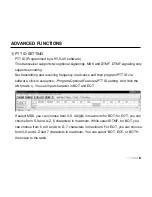
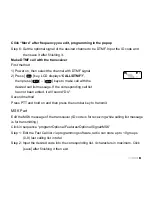
If select MSK, you can choose from 0-9, 4 digits in maximum for BOT; for EOT, you can
choose from 0-9 and A-Z, 6 characters in maximum. While select DTMF, for BOT, you
can choose from 0 to 9 and A to D, 7 characters in maximum. For EOT, you can choose
from 0-9 and A-Z and 7 characters in maximum. You can select “BOT, EOT, or BOTH,
then save to the radio.
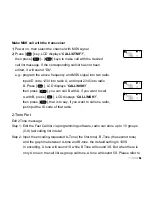
PTT ID (Programmed by AHT-9-UV software)
This transceiver supports two optional signalings, MSK and DTMF. DTMF signaling only
supports encoding.
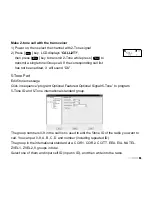
Set transmitting and receiving frequency in advance and then program PTT ID via
software, click in sequence: -Program-Optional Features-PTT ID setting. And click the
ANI (mark
•
). You can input character in BOT and EOT.
1) PTT ID SETTING
40
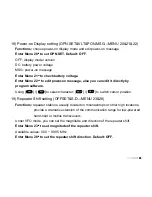
26) Voice Mode and Scrambler (SCR&APRO---MENU 35&36)
Functions:
only 2/5 tone version has this function.
AHT-9-UV has 8 groups of scrambler; it is accomplished by the addition of components to
the original signal in order to make extraction of the original signal difficult. And its voice
compand technology will make the voice more clearly in the noise environment.
Enter Menu 35
rd
to set scrambler group.
Enter Menu 36
th
to set voice mode.
Available Values: OFF/COMP/SCRA
23) Wide/Narrow band selecting (N/W---MENU 30)
Functions:
setting of wide/narrow bandwidth
Enter Menu 30
th
to set bandwidth.
Available Values: Wide---25kHz/Narrow---12.5kHz
24) Vibration (Optional) (DALARM---MENU 33)
Functions:
The vibration indication helps in working conditions where quiet operation is
required.
Enter Menu 33
rd
to set DALARM. Default: OFF
Under standby mode, when you set this function on, long press [MONI] key for 3S,
60Hz tone will be transmitted, receiveing part will vibrate.
25) Man Donwn (Optional) (VIBRATE---MENU 34)
Functions:
This feature qutomatically summons assistance when the radio falls over for
a predetermined time period when you set it on and
Enter Menu 34
th
to set VIBRATE. Default: OFF
Summary of Contents for AHT-9-UV
Page 2: ......
Page 4: ......
Page 6: ......
Page 7: ...Professional FM Transceiver User s Manual USING TIPS UNPACKING AND CHECKING EQUIPMENT...
Page 8: ......
Page 10: ......
Page 11: ...05 05 AHT 9 UV 1500 7 4V CHARGING BATTERY PACK Charging Precaution...
Page 12: ......
Page 14: ......
Page 15: ...09 Picture 5 Picture 6 Installing Belt Clip PUSH PUSH...
Page 16: ......
Page 17: ...Professional FM Transceiver User s Manual GETTING FAMILIAR...
Page 18: ......
Page 20: ......
Page 22: ......
Page 24: ......
Page 26: ......
Page 28: ......
Page 30: ......
Page 32: ......
Page 34: ......
Page 36: ......
Page 38: ......
Page 40: ......
Page 42: ......
Page 44: ......
Page 46: ......
Page 48: ......
Page 50: ......
Page 52: ......
Page 54: ......
Page 56: ......
Page 58: ......
Page 60: ......
Page 62: ......
Page 64: ......
Page 66: ......
Page 68: ......
Page 70: ......
Page 72: ......


