background image

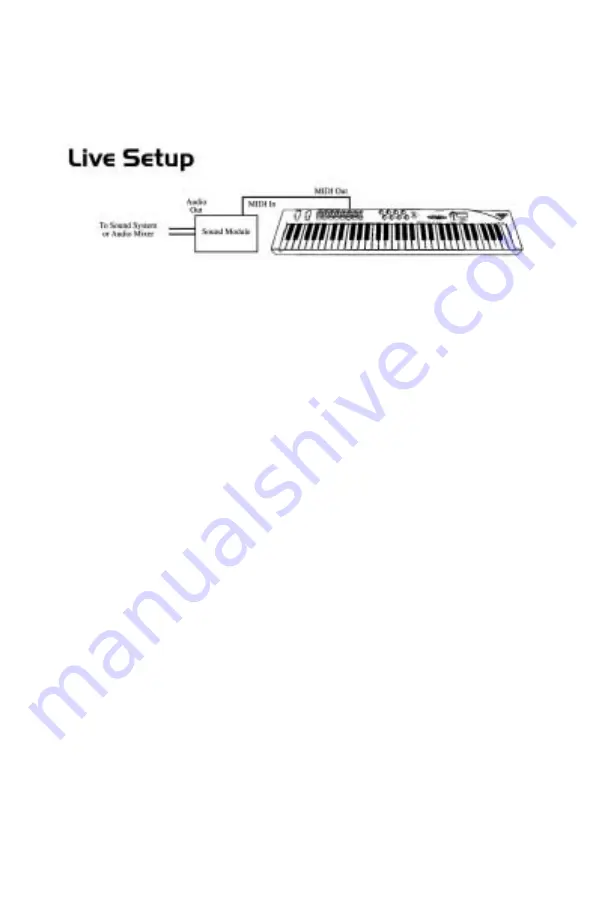
receive power from a power supply, by switching the power setting on from the
rear panel. Also, you will want to use the MIDI out port that is labeled
“Keyboard.” A setup such as this may be used in a performance situation, or
when you wish to use the keyboard without the computer.

Using the Radium with Your Application Software

Once the Radium driver has been installed, you will need to configure your MIDI
application software to utilize the Radium. The manner in which this is done
varies between applications, so we can just cover the basics here.

Generally with both the Mac and PC, most MIDI applications have a MIDI port
configuration or settings dialog box, sometimes called “MIDI Devices” or “MIDI
Setup.”  It is within this dialog box that you will select or enable your MIDI input
and output devices.

If the Radium drivers are properly installed, then the port selection in this case
will be the KEYSTATION SERIES (or “Port 1” on the Mac) in the input column,
and then KEYSTATION SERIES (or Port 1) in the output column. KEYSTATION
SERIES will appear twice under the inputs and outputs. You must choose the
second selection for each time it is listed in order for OMS to properly process
the flow of MIDI information to and from the computer. Make sure that those
items are highlighted or checked. The output port that you select on a specific
MIDI track within your sequence will output MIDI information to the keyboard
or sound module that is attached to that port.

MIDI Functions

MIDI is the acronym for Musical Instrument Digital Interface, which makes all
digital musical instruments equipped with this standardized interface able to
exchange their MIDI data or “talk to each other.” 

To  explain how MIDI works on your instrument in more detail, the following
descriptions outline the MIDI functions of the Radium, which allow you to
connect the keyboard to other MIDI instruments and to your computer. The
versatile MIDI capability of the Radium will offer you tremendous power in a
MIDI environment.

10

Summary of Contents for Radium

Page 1: ...etting Up Your MIDI Studio 9 Using the Radium with Your Application Software 10 MIDI Functions 10 Standalone Mode 11 Default Settings 11 Operation Panel Features 12 Utilizing the Programming Assignmen...

Page 2: ...pment For ease of use of MIDI implementation we strongly recommend that you have the manual at hand when you are using the keyboard especially if you are new to the world of MIDI What s in the Box Inc...

Page 3: ...Radium may be powered by one of two sources an external power supply or parasitically from the voltage it receives from the USB port For the most consistent performance we recommend using a power supp...

Page 4: ...ot around your computer station to place the Radium The USB port on your computer is a small 1 8 x 3 8 rectangular connector A and is usually found in a group of two The other end B of your USB cable...

Page 5: ...lick Next to continue 9 Windows HardwareWizard will ask you what you want to do next The Search for the best Driver for your Device should already be checked Click Next 10 Windows will ask you for the...

Page 6: ...d New Hardware wizard will prompt that it has found a USB Controller Click Next to continue 3 When prompted click Continue Anyway to continue 4 Windows will search the computer s CD ROM drive and inst...

Page 7: ...folder the Extensions folder is inside your System folder This file is named M Audio USB Support The installer will also place the file M Audio OMS Support in the OMS folder which also resides in you...

Page 8: ...to the keyboard icon flashes Clicking on the keyboard icon with the mouse pointer will send a tone cluster to the Radium output port The sound module connected to the Radium MIDI Out port should play...

Page 9: ...be plugged directly into a sound system or into a mixer which is then connected to a sound system In the setup pictured below the Radium is being used as a MIDI controller as well as a MIDI interface...

Page 10: ...YSTATION SERIES or Port 1 on the Mac in the input column and then KEYSTATION SERIES or Port 1 in the output column KEYSTATION SERIES will appear twice under the inputs and outputs You must choose the...

Page 11: ...the power switch to the the 9vDC setting 2 Make sure that the MIDI port transmit channel within you music application matches the MIDI receive channel of the other instrument 3 Refer to the diagram in...

Page 12: ...tensity of effects such as Vibrato pitch change Tremolo change in volume and Modulation change in tone The Modulation Wheel produces a vibrato effect shortly after the sound is generated and is most e...

Page 13: ...rogramming Assignment Keys This section contains the information you will need to program the Radium and to send MIDI parameter data from the keyboard You may set the data slider to send MIDI controll...

Page 14: ...a variety of MIDI devices The default assignments for the sliders and knobs which load when the Radium is powered on have been selected in order to work well with General MIDI instruments They are li...

Page 15: ...LECT button the RESET key and then the Enter key will send out a message to send an All Notes Off message and return all external MIDI instruments to their default setting This can be useful if notes...

Page 16: ...y use of the MIDI SELECT button and PROGRAM key in combination with the numeric and ENTER keys you can select any patch number between 1 and 128 This is done using the following sequence If for exampl...

Page 17: ...rce from the computer when software is set to Radium MIDI Out and is used to send MIDI messages to another MIDI instrument such as sound module 4 USB Port This USB connector jack is used to connect th...

Page 18: ...Entry Chorus Send LevelAssignment Pan Pot Assignment CC 10 Volume Assignment CC 07 Numerical Keys x 10 Enter Cancel Pitch Bender Wheel Modulation Wheel Data Entry Slider Rear Terminals MIDI Out jacks...

Page 19: ...th Octave Change True Voice x Velocity Note ON o x Note OFF x x After Touch Key s x x Ch s x x Pitch Bender o x Control Change o x Prog Change True 1 128 x CC 00 x CC 32 0 127 x System Exclusive x x S...

Page 20: ...it will assess a fair repair or replacement fee The customer will have the option to pay this fee and have the unit repaired and returned or not pay this fee and have the unit returned unrepaired The...

Page 21: ...nd Controller 4 Attack Time 0 127 74 Sound Controller 5 Cutoff 0 127 75 Sound Controller 6 Decay Time 0 127 76 Sound Controller 7 Vibrato Rate 0 127 77 Sound Controller 8 Vibrato Depth 0 127 78 Sound...

Page 22: ...facturers vary from the MIDI Manufacturer s Association standard referenced in this table All synthesizers and modules are trademarks of their respective owners and these owners are in no way associat...

Reviews: