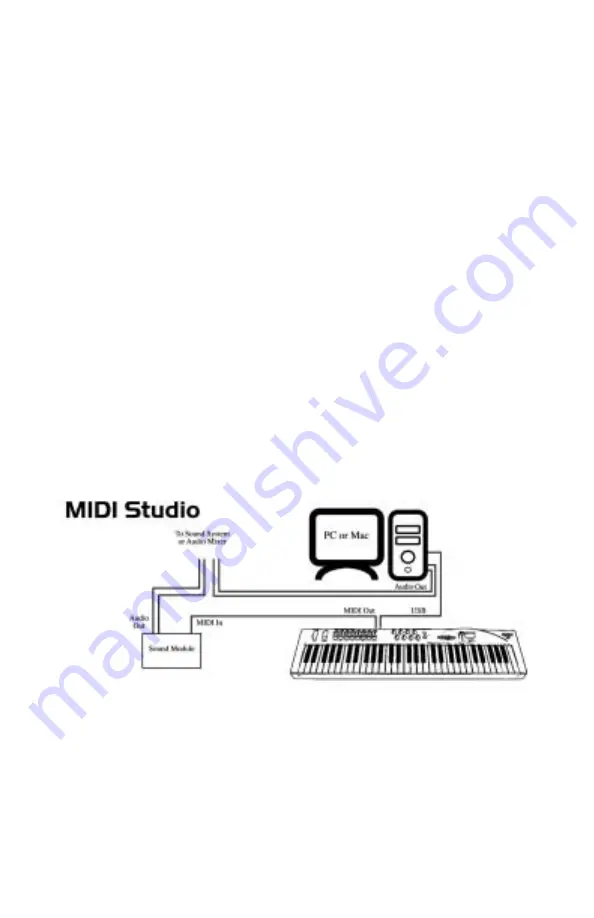
Setting Up Your MIDI Studio
A typical MIDI system set-up would include your Radium, a computer, MIDI
sequencing software and/or a MIDI compatible sound module. This type of
set-up can be connected as follows:
1. The Radium is connected to the computer via the USB port connectors,
using the supplied USB standard cable.
2. The Radium can play the synthesizer that is part of an internal sound card,
as well as any software synthesizers that are installed in your system.This will
depend on how you set up your software (see the section “Using the Radium
in Your Application Software”). The audio output of the sound card can be
plugged directly into a sound system, or into a mixer, which is then
connected to a sound system.
3. The MIDI Output of the Radium is connected to the MIDI In of a sound
module. The audio output of the sound module can be plugged directly into
a sound system, or into a mixer, which is then connected to a sound system.
In the setup pictured below, the Radium is being used as a MIDI controller as
well as a MIDI interface, inputting MIDI data to the computer and its application
software, and outputting MIDI to a sound module from which sounds will be
produced. The Radium as a controller may also send MIDI information to an
existing internal soundcard’s MIDI synthesizer or any installed software
synthesizer, outputting the audio from the computer soundcard.
In this scenario, it may not be necessary to apply external power to the Radium.
With the power switch set to “USB Power,” the Radium receives power from
the USB port on your computer. It is recommended that you plug directly into
the USB port on the computer. You may also choose to use power from
batteries (Radium49 only) or an external power supply.
Additionally, the Radium may be used as a “standalone” keyboard controller,
independent of the computer and its USB port. In this case, the Radium must
9


