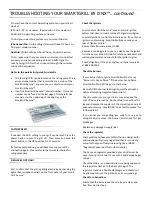
TO
CONNECT
A
BUILT
‐
IN
SIDEBURNER
FOR
INSTALLNG
A
SIDE
BURNER
ON
TO
A
FREESTANDING
SMARTGRILL
GAS
CONNECTIONS...
con nued
Shut
o
ff
the
gas
supply
at
the
main
valve.
Disconnect
all
plumbing
(if
already
a ached)
from
the
grill
and
the
gas
supply
valve.
Remove
all
the
fi
ngs
from
the
grill
manifold.
Install
the
side
burner
into
the
counter
top
cutout.
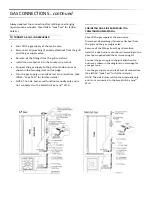
Connect
the
gas
supply
to
the
grill
and
side
burner
as
shown
in
the
two
diagrams
on
this
page.
Turn
the
gas
supply
on
and
leak
test
all
connec ons.
(See
INDEX:
“Leak
Test”
for
further
details.)
NOTE:
The
side
burner
will
func on
manually
only
and
is
not
connected
to
the
SmartGrill
by
Lynx™
Wi
‐
Fi.
Always
leak
test
the
connec on
a er
re
fi
lling
or
exchanging
liquid
propane
cylinders.
(See
INDEX:
“Leak
Test”
for
further
details.)
Shut
o
ff
the
gas
supply
at
the
main
valve.
Disconnect
all
plumbing
(if
already
a ached)
from
the
grill
and
the
gas
supply
valve.
Remove
all
the
fi
ngs
from
the
grill
manifold.
Install
the
side
burner
onto
the
cart
according
to
the
direc ons
supplied
with
the
cart
moun ng
kit.
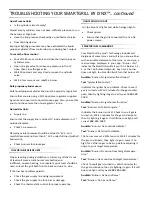
Connect
the
gas
supply
to
the
grill
and
the
side
burner
as
shown
in
the
diagrams
on
this
page
for
your
gas
type.
Turn
the
gas
supply
on
and
leak
test
all
connec ons.
(See
INDEX:
“Leak
Test”
for
further
details.)
NOTE:
The
side
burner
will
func on
manually
only
and
is
not
connected
to
the
SmartGrill
by
Lynx™
Wi
‐
Fi.
Summary of Contents for SMART30
Page 1: ...SMARTGRILL USER MANUAL...
Page 2: ...SmartGrill by LynxTM...
Page 35: ...WIRING DIAGRAMS 30 SmartGrill Electrical Diagram...
Page 36: ...WIRING DIAGRAMS 36 and 42 SmartGrill Electrical Diagram...
Page 37: ...EXPLODED PARTS DIAGRAMS...
Page 38: ...EXPLODED PARTS DIAGRAMS...
Page 39: ...EXPLODED PARTS LIST...
Page 40: ...EXPLODED PARTS LIST AND DIAGRAMS...
Page 41: ...EXPLODED PARTS LIST AND DIAGRAMS...
Page 42: ...EXPLODED PARTS LIST AND DIAGRAMS...
Page 47: ......


