
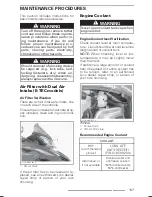


MAINTENANCE PROCEDURES
Drive Belt Installation
1. If necessary, open the driven pulley,
refer to
DRIVE BELT REMOVAL
.
2. Slip the belt over the drive pulley,
then over the driven pulley.
NOTICE
Do not force or use tools
to pry the belt into place, as this
could cut or break the cords in the
belt.
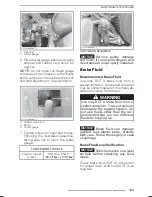
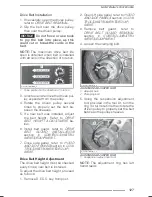
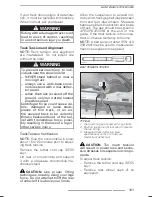
NOTE:
The maximum drive belt life
span is obtained when belt is installed
with arrows in the direction of rotation.
mmo2011-002-006_a
1. To be pointed in the direction of rotation
3. Unscrew and remove the driven pul-
ley expander from the pulley.
4. Rotate the driven pulley several
times to properly set the belt be-
tween the sheaves.
5. If a new belt was installed, adjust
the belt height. Refer to
DRIVE
BELT HEIGHT ADJUSTMENT
be-
low.
6. Install belt guard, refer to
DRIVE
BELT
GUARD
INSTALLATION
section
in
CONTROLS/INSTRU-
MENTS/EQUIPMENT
.
7. Close side panel, refer to
HOOD
AND SIDE PANELS
section in
CON-
TROLS/INSTRUMENTS/EQUIP-
MENT
.
Drive Belt Height Adjustment
The drive belt height must be checked
every time a new belt is installed.
To adjust the drive belt height, proceed
as follows:
1. Remove D.E.S.S. key frompost.
2. Open LH side panel, refer to
HOOD
AND SIDE PANELS
section in
CON-
TROLS/INSTRUMENTS/EQUIP-
MENT
.
3. Remove
belt
guard,
refer
to
DRIVE BELT GUARD REMOVAL
section
in
CONTROLS/INSTRU-
MENTS/EQUIPMENT
.
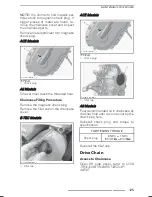
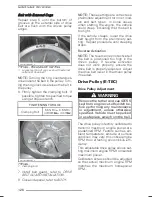
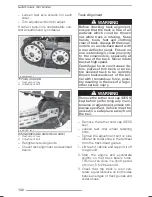
4. Loosen the clamping bolt.
mmo2011-003-010_a
ALUMINUM ADJUSTER HUB
1. Adjuster hub
2. Clamping bolt
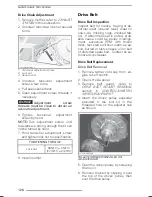
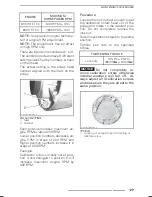
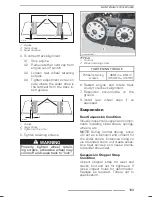
5. Using the suspension adjustment
tool provided in the tool kit, turn the
ring 1/4 turn at a time then rotate the
driven pulley to properly set the belt
between the pulley sheaves.
mmo2011-003-011_a
ALUMINUM ADJUSTER HUB
1. Suspension adjustment tool
NOTE:
The adjustment ring has left
hand treads
______________
127
Summary of Contents for 800R E-TEC
Page 9: ...SAFETY INFORMATION ________ SAFETY INFORMATION ________ 7 ...
Page 39: ...VEHICLE INFORMATION _______________ 37 ...
Page 111: ...MAINTENANCE INFORMATION ______________ 109 ...
Page 145: ...TECHNICAL INFORMATION ______________ 143 ...
Page 170: ...SPECIFICATIONS This page is intentionally blank 168 ______________ ...
Page 171: ...TROUBLESHOOTING ______________ 169 ...
Page 179: ...WARRANTY ______________ 177 ...
Page 186: ...This page is intentionally blank 184 ______________ ...
Page 187: ...CUSTOMER INFORMATION ______________ 185 ...
Page 190: ...CHANGE OF ADDRESS OWNERSHIP This page is intentionally blank 188 ______________ ...
Page 191: ...CHANGE OF ADDRESS OWNERSHIP ______________ 189 ...
Page 192: ...CHANGE OF ADDRESS OWNERSHIP This page is intentionally blank 190 ______________ ...
Page 193: ...CHANGE OF ADDRESS OWNERSHIP ______________ 191 ...
Page 194: ...CHANGE OF ADDRESS OWNERSHIP 192 ______________ ...
Page 195: ...CHANGE OF ADDRESS OWNERSHIP fmo2015 005 004 en ______________ 193 ...


