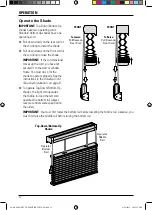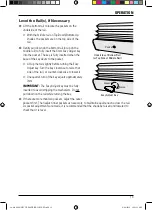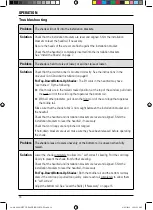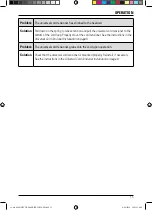
INSTALLATION
11
Face Mount
■
■
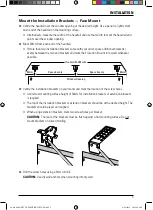
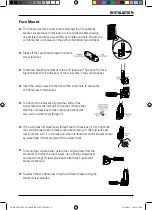
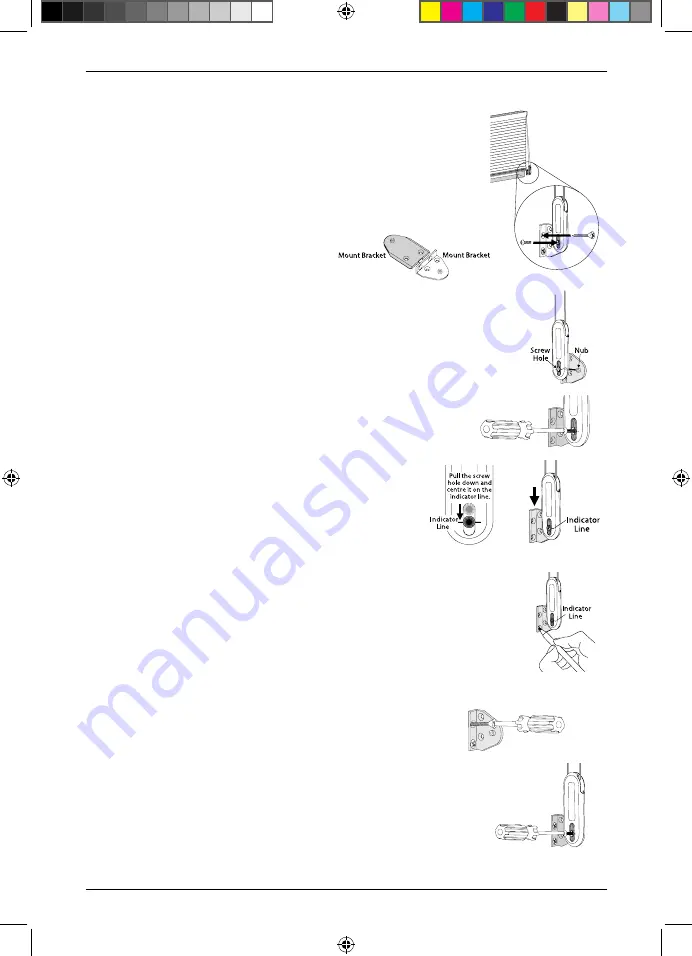
This option uses three screws and is attached to an Face Mount
bracket. Locate the cord tensioner as close to the window covering
as possible to minimise accessibility by children and pets. Be sure the
cord tensioner is not placed in the path of the bottom rail and fabric.
■
■
Break off the Face Mount bracket and mark
screw locations.
■
■
Attach the Face Mount bracket to the cord tensioner. The nub on the Face
Mount bracket fits into the back of the screw hole in the cord tensioner.
■
■
Insert the small screw into the front of the screw hole to secure the
cord tensioner to the bracket.
■
■
Pull down on the bracket, aligning the centre of the
screw hole with the indicator line on the cord tensioner.
Hold the cord tensioner firmly in place and check that
the cord can move freely through it.
■
■
If the cord does not move freely through the cord tensioner, it is too tight and
the cord tensioner and/or bracket should be moved up. If the cord tensioner
locks onto the cord, it is too loose and the cord tensioner and/or bracket should
be moved down. Mark and pre-drill the screw holes.
■
■
To mount the cord tensioner, detach the cord tensioner from the
bracket by removing the small screw. Use a Phillips screwdriver
and the two longer screws provided to attach the Face Mount
bracket to the wall.
■
■
Re-attach the cord tensioner to the Face Mount bracket using the
smaller screw provided.
Reveal
Face
18.019.008-DUETTE-EASYRISE-INSTALL.indd 11
4/06/2019 10:51:52 AM
Summary of Contents for EasyRise Duette
Page 21: ...NOTES 19 18 019 008 DUETTE EASYRISE INSTALL indd 19 4 06 2019 10 51 53 AM ...
Page 22: ...NOTES 20 18 019 008 DUETTE EASYRISE INSTALL indd 20 4 06 2019 10 51 53 AM ...
Page 23: ...NOTES 21 18 019 008 DUETTE EASYRISE INSTALL indd 21 4 06 2019 10 51 53 AM ...
Page 24: ...18 019 008 DUETTE EASYRISE INSTALL indd 22 4 06 2019 10 51 53 AM ...


