Using your Edger...Special case
3-69
LTO
3.3.3 C
HECKING
A
FINISHING
BEFORE
THE
LENS
IS
EDGED
3.3.3.1 P
RINCIPLE
You may wish to check the position of the desired finishing - bevel and groove - before beginning the lens
edging cycle.
You may also wish to position the finishing yourself when running a job.
You may be automatically redirected to this screen.
Example : The desired finishing position cannot be applied to the lens being edged.
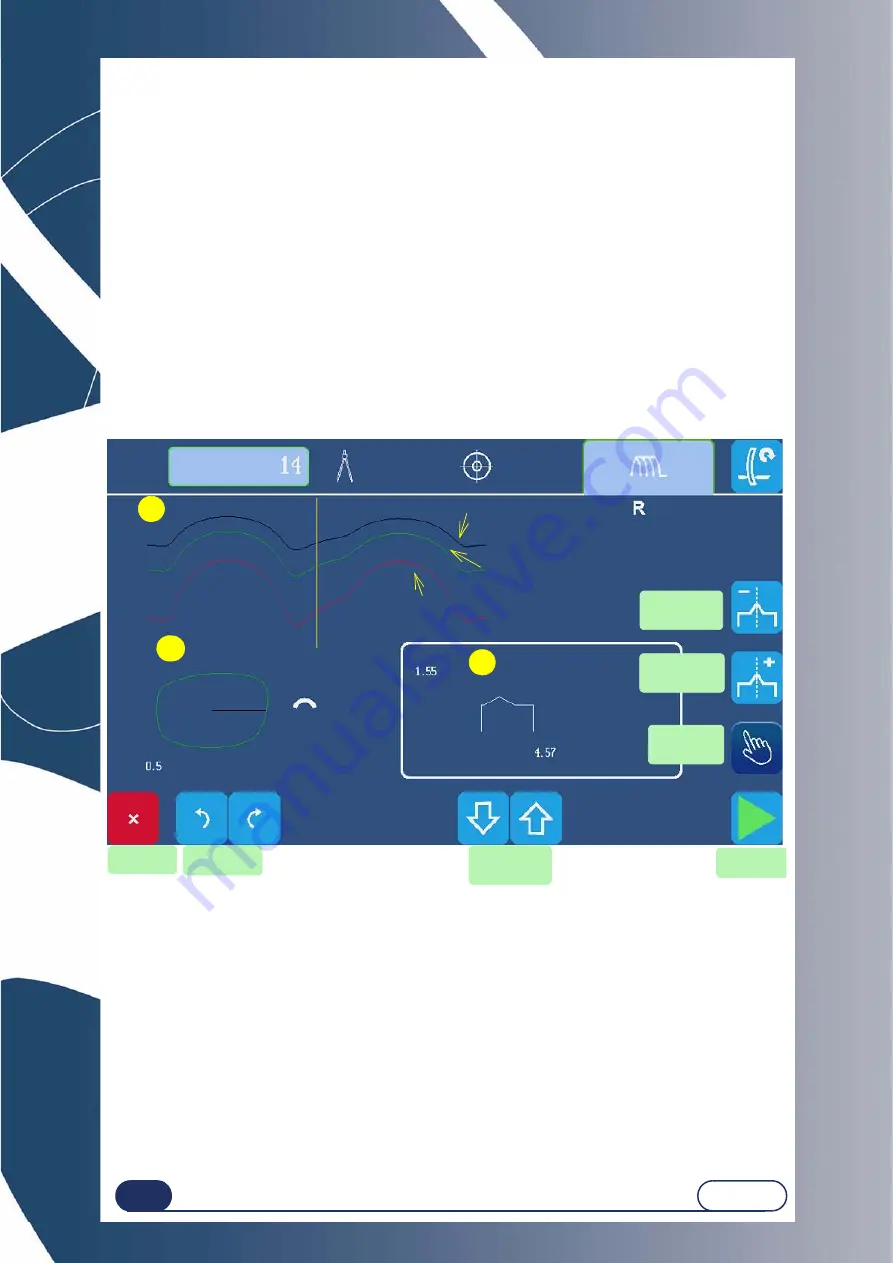
A special screen allows you to visualise the finishing and modify its position, if desired.
I
MPORTANT
NOTE
The indices of zones A and B indicate the same finishing angular position. When you move one, the other moves
as well.
3.3.3.2 P
RESENTATION
3.3.3.2.1 M
ANUAL
BEVEL
SCREEN
Screen 3-36 : Manual bevel screen
C
Angular position Index
Front face developed curve
Bevel apex developed
curve
Rear face developed curve
Lens section at
position of index
Lens thickness
A
B
Developed lens profile
Lens shape seen
from the front
Re-feeling
Displacement
of the bevel
forward
Displacement
of the bevel
backward
Modification
of the bevel
position
Stopping
the edging
Start of
finishing
Displacement
of a finishing
point
Movement of
the index
Summary of Contents for Briot emotion2
Page 1: ...Instruction Manual FC 00986 Rev00...
Page 7: ...LTO REVISION FOLLOW UP Revision 00 Page New Modified Item...
Page 8: ...1 INSTALLATION...
Page 19: ...2 PRECAUTIONS FOR USE...
Page 23: ...3 USING YOUR EDGER...
Page 53: ...Using your Edger Usual procedure 3 52 LTO Block support 5 6 Blocker head Blocker arm 7 9 8...
Page 81: ...4 CONFIGURATION...
Page 92: ...5 MAINTENANCE...
Page 131: ...Maintenance Adjustments 5 130 LTO Screen 5 8 Adjustment of the touch screen...
Page 153: ...6 TESTS...
Page 158: ...7 TECHNICAL SPECIFICATIONS...
Page 162: ...2 rue Roger Bonnet 27340 PONT DE LxARCHE FRANCE T l 33 50 232 989 132 Fax 33 50 235 020 294...


