DP16-910B-VS 11
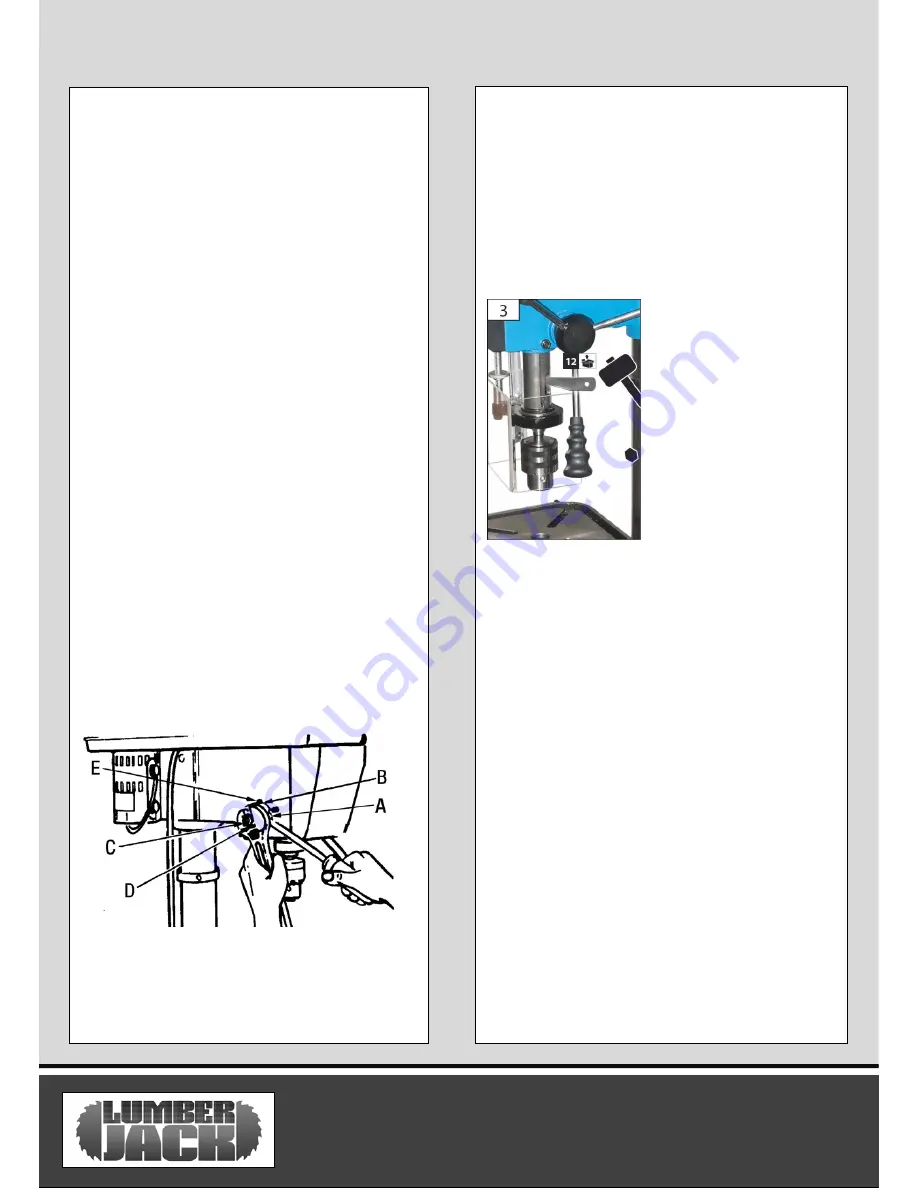
Adjusting the quill return spring
NOTE
: The return spring tension is set at the
factory and should not require further
adjustment.
1.With the chuck at its highest possible position,
turn the depth scale clockwise until it stops and
tighten the depth scale lock knob. This will
prevent the quill from dropping while tensioning
the spring.
2.Lower the table for additional clearance.
3.Work from the left side of the drill press.
4.Place screwdriver in the lower front notch
Fig.20 of the spring cap), and hold it in place
while loosening and removing the outer nut
(only).
5.With screwdriver remaining in the notch,
loosen inner nut (approx. 1/8”) until the notch
disengages from the boss on the head. Do not
remove this nut.
6.Carefully turn screwdriver counterclockwise
and engage the next notch in the boss. Do not
remove screwdriver.
7.Tighten nut with wrench only enough to
engage boss. Do not over tighten as this will
restrict quill movement.
8. Check tension while turning feed handles.
9.If there is not enough tension on the spring,
repeat step 4-8 moving only one notch each time
and checking tension after each repetition.
Removing the chuck & arbor
1. Align key holes in spindle and quill by rotating
the chuck by hand.
2. Insert drift key into key holes in the quill.
3. Tap key drift key lightly until the chuck and
arbor fall out of the spindle.
NOTE:
Place one hand below the chuck to catch
it when it falls out.
ADJUSTMENTS
Summary of Contents for DP16-910B-VS
Page 23: ...DP16 910B VS 21 Parts Diagram...


