background image

T7501  

Page 13-5 


Using the SP5 1-Line Rechargeable Alpha Numeric Pager 


Charging 

The SP5 uses the Charger 5 (CH-R5.)   
1.  Place the pager in the charger. 
2.  Allow unit to charge fully overnight. 
3.  Remove from charger, pager will vibrate or beep to show it is working. 
4.  LCD will show the pa

ger‘s ID 

5.  Replace the pager in the charger at the end of each day. 
 

Menus 

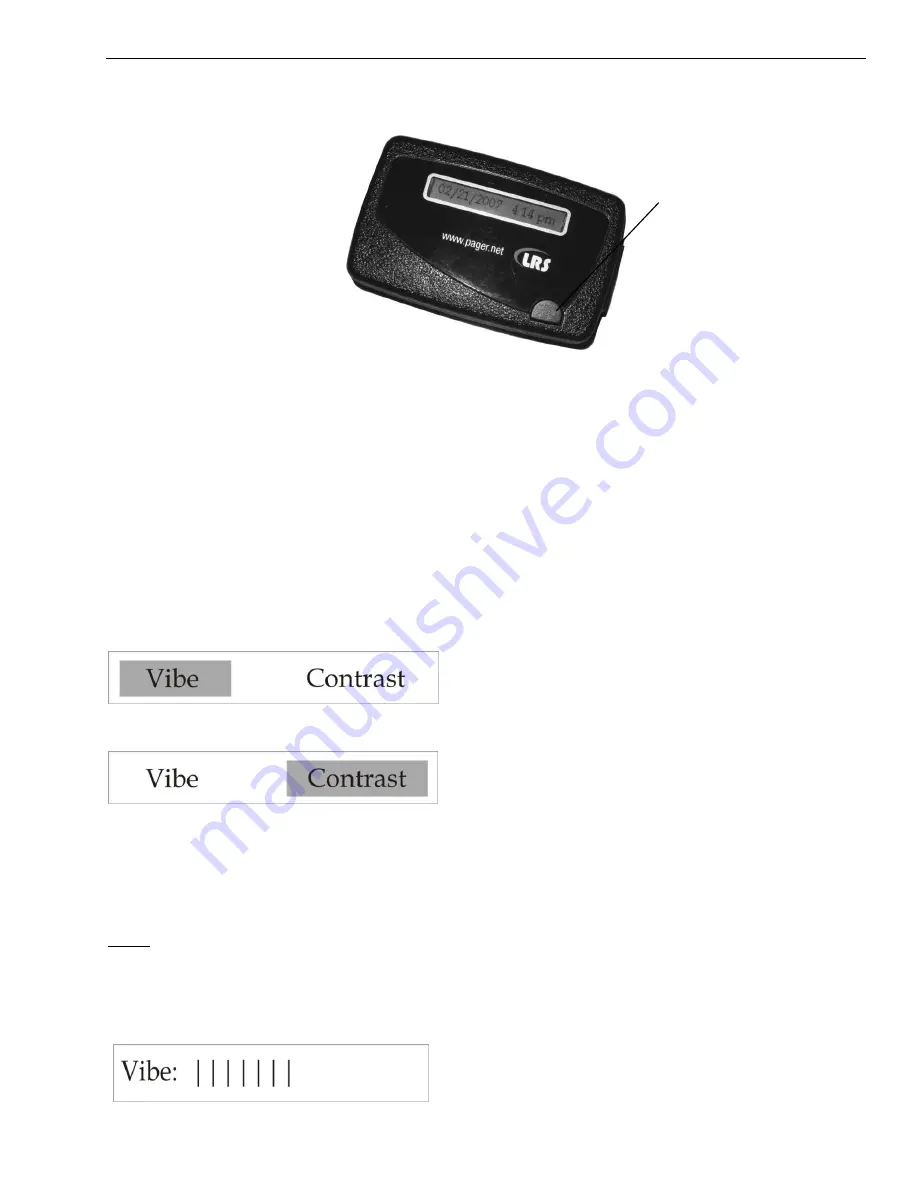
To  access  the  vibe/contrast  menu,  remove  the  pager  from  the  charger.    While 
vibrating  or  beeping,  press  and  hold  the  Select  button  for  8  seconds.    This  top 
level menu will display: 


If you PRESS and RELEASE the SP5 pager button the menu will change to: 


To exit this menu wait 8 seconds. 
 
To  re-enter  the  vibe/contrast  menu  at  any  time,  reset  the  pager,  and  then  hold 
the SP5 pager button. 
 
Vibe 
To set the Vibration Level 
1.  Enter the vibe/contrast menu as described above 
2.  highlight  the  Vibe  selection  then  PRESS  and  HOLD  the  SP5  pager  Button 

until the screen shows 


SELECT 
BUTTON 

Summary of Contents for T7501

Page 1: ...ng Range Systems Inc Long Range Systems UK Ltd Link House Leek Road Milton Stoke on Trent Staffordshire ST2 7AH 01782 537000 www lrspagers co uk www pagers co www hospitalpagers co uk User Manual With Installation Warranty and Service Information September 2008 ...

Page 2: ...ded displayed posted or transmitted in any form or by any means including but not limited to electronic mechanical photocopying recording or otherwise without the prior written permission of LRS Additional copies of this manual may be obtained by contacting LRS Screen displays keyboard layouts hardware descriptions or software are proprietary to LRS and are subject to copyright and other intellect...

Page 3: ...Pagers 2 1 Paging 2 1 On Premise and or Cell Phone Paging from the Wait List 2 1 Handing Out Pagers 2 1 Paging from the Wait List Basic View 2 1 Paging Using Touch Screen or Keyboard Mouse Seating Management View 2 2 Direct Staff Paging 2 2 Staff Paging Basic View 2 2 Staff Paging Using Touch Screen or Keyboard Mouse Seating Management View2 2 Preloaded Staff Pager Message Code List 2 3 Chapter 3 ...

Page 4: ...lation 5 1 T7501 Installation 5 1 T7501 Optional Equipment installation 5 2 External VGA Monitor Installation 5 2 External Keyboard and Mouse 5 2 Touch Screen Monitor 5 2 POS Printer 5 3 Network Connection Requirements 5 3 Basic System Tests 5 4 Initial T7501 Power Up 5 4 On Premise Guest and Staff Pager Range Tests 5 4 T7501 Custom Setup 5 5 Access Code 5 5 Setup Guest and Staff Pager Functions 5...

Page 5: ...se Operation 10 2 On Premise Operation 10 2 Chapter 11 Table Genie 11 1 Setting Up T7501 for Table Genie Operation 11 1 Setting Up and Associating the Table Genie with T7501 11 3 Associating With Network Connectivity 11 3 Mounting the Table Genie 11 4 Using the Table Genie 11 5 Using the Push For Service Monitor 11 6 Monitor 11 6 Controls 11 6 Alerts 11 7 Clearing an Order from the Service Monitor...

Page 6: ... the RX E 4 Line Alpha Numeric Pager 13 1 Menus 13 1 Selecting functions 13 1 Power On Off 13 1 Read Message 13 2 Delete Messages 13 2 Time Date Set 13 2 View Calendar Error Bookmark not defined Set Contrast 13 2 Auto ON OFF 13 2 Set Keytone On Off 13 3 Select Alert 13 3 Stopwatch Function Error Bookmark not defined Battery 13 3 Programming 13 3 Using the Star Pager 13 4 Charging 13 4 Programming ...

Page 7: ...ck of open tables guests on the wait list and waiting times When tables are available guests on the wait list are automatically paged and removed from the list based on the size of their party how long on list or other factors The wait list is compared to the number of names on the list tables available and average time of service to inform patrons of wait time The list can be displayed for the gu...

Page 8: ...it times and make reservations based on estimated arrival time Automatic telephone inquiries verify the reservations T7501 Keyboard Description Before using the T7501 please read the following descriptions Note that during operation keys are highlighted to indicate they are enabled and generally the other keys will not function Primary Keypad M1 A M2 B M3 C M4 D STAFF E 1 J 2 K 3 L 4 N 5 O 6 P 7 R...

Page 9: ...t information for parties on the list Edit Key Enables updating of wait list functions and setup functions Exit Key Cancels a process and returns the system to a previous state BKSP Key Backs the entry cursor to undo the last keystroke s Enter Key Completes a task Wait Key Enables the wait list entry function Reserve Key Opens a Reservation window on the display if Reservations mode is set active ...

Page 10: ......

Page 11: ...er the desired Guest pager number at the Guest screen 3 Press Enter On Premise and or Cell Phone Paging from the Wait List Note Two options are available on the T7501 The Basic view that shows only a wait list and the Table Management view that shows a restaurant layout and waitlist Handing Out Pagers Enter the guest party name and information from the T7501 waitlist feature and enter the number o...

Page 12: ...ting management will not let you seat the party 3 Choose Page to page the selected party or Seat to seat the party to remove them from the list Direct Staff Paging Note Two options are available on the T7501 The Basic view that shows only a wait list and the Table Management view that shows a restaurant layout Staff Paging Basic View In Basic view staff pagers are directly paged from the T7501 key...

Page 13: ...ee code list below or press M1 to enter a custom message from the keyboard For Star pager select message code 0 9 or vibration code M1 M3 then select one of the vibe settings 5 Select Enter Preloaded Staff Pager Message Code List Message codes send following preloaded messages to LRS Alpha text pagers Additional custom codes can be created see Pagers in Installation and Setup chapter ...

Page 14: ...r 009 Isle 035 Table ready 061 Bus 010 Void 036 No Special 062 Bay 011 Stamps 037 Hole 063 Lo batt 012 Change 038 Kitchen 064 error 013 Station 039 Bar 065 Exit 014 Machine 040 Door 066 Fax 015 operator 041 Survey 067 Host 016 Emergency 042 T nnn Q xx 068 Space 017 XX Minutes 043 Break nnnn 069 Location 018 Tee 044 Fire 070 Nursery 019 Pro Shop 045 Unit 071 Teller 020 Starter 046 Window 072 Office...

Page 15: ... these lists can be added or removed using the T7501 keypad in TBL Stat mode When tables are open the Alert key on the T7501 is lit Wait List This section shows the guests waiting for seating Included in this list is I information Blank indicates the guest is on site and checked in N indicates a guest is on the reservation list but has not checked in A or number indicates the guest has been paged ...

Page 16: ...ait and press Enter to continue Exit to stop the entry and return to the Wait List display 4 Continue entering the Guest Information and press Enter each time 5 Select with arrow keys Guest Pager if handing out an on premise pager Mobile Phone to use the guest s cell phone as a pager 6 Enter a Guest pager or a Mobile Phone and press Enter Note that the guest is added to the wait list Add Guest Off...

Page 17: ...keys to select the name to edit 2 Press the Edit key 3 At the arrival menu either issue an on premise pager or verify the guest s cell phone number 4 Press Exit to return to the Wait List screen Removing or Changing Guest List Position on Wait List Guests are removed from or their order changed on the list with direct removal or with paging and seating Direct Removal To remove a guest from the wai...

Page 18: ... column Note The Pager Number would be seen in Seating Management View 4 When the guest arrives press the Seat key the guest is removed Check Wait List Information A guest s wait list information can be viewed in a more standard format Some additional information such as Frequent Diner Number or Special Needs can also be seen To view wait list information 1 Use the arrow keys to select the name to...

Page 19: ...yout The panel to the right of the wait list shows the layout of the restaurant The portion shown in the grid is the area that will be magnified if zoomed in either by Touchscreen or mouse Seat Avail Button that indicates a table is available for selected parties If a party is selected and no table is available the button is grayed out If a table is available the button is green This button can be...

Page 20: ...ve the view to the next portion of the restaurant When zoomed OUT the whole restaurant is shown Wait List The panel on the left shows the guests waiting for seating Included in this list is I information Blank indicates the guest is on site and checked in R indicates a guest on the reservation list has not checked in C indicates a Click Ahead guest reservation has not checked in Number indicates t...

Page 21: ...he guest is added to the wait list Add Guest Off Premise Using Click Ahead Seating Adding guest to the Wait List from an off premise location is done through an Internet connection A specialized system See Click Ahead Seating Chapter maintains a database shared with the T7501 Guests can choose a restaurant on the Internet note the wait time and add their name to the list Once added the name appear...

Page 22: ... Edit Wait List All of the items for a guest on the wait list may be edited at the T7501 or the Hostess Keyboard recommended The following directions are based on using the mouse keyboard Refer to the previous chapter for T7501 Editing General Editing To edit a guest s information Note A C or an R in the information column indicates the guest has not yet arrived 1 To edit a guest s information Dou...

Page 23: ...est is removed by mistake Use the Find Party Cancellations procedure to restore Change Order on List In some cases it is necessary to change the position of a guest on the wait list guest is delayed another party is late etc To move a guest 1 Double click on the name to move 2 Select Move Down at the pop up disk 3 Enter the number of minutes 4 Select Enter to make changes Paging and Seating Normal...

Page 24: ...Closed are red Bussed are orange Held are white and Drop Checked are yellow Table status is changed in several ways Note All of the tables may be opened or closed seated at one time by selecting the MORE button and then the appropriate choice Open Tables 1 Click on the table 2 Select Edit Table 3 Select Open Close Tables 1 Select a guest to seat Note If no guests are on the list the table will clo...

Page 25: ...s and tables Press DONE when finished Call LRS if additional Instructions are needed Layout Screen When selected the layout screen is shown This screen will show the existing layout All components can be added edited deleted or moved Pointer The pointer shows the position of the cursor In this mode single click on a table or wall on time to reposition Double click on a table to edit the table defi...

Page 26: ... in this mode all walls can be positioned To remove a wall select and click the delete button Door Addition Editing Removal not currently implemented The cursor changes to a Position the cursor where a door is desired and click A pop up menu allows selection of a door size and orientation To remove a door select and click the delete button Stand Addition Editing Removal not currently implemented T...

Page 27: ... perpendicular to the ground 3 Locate the unit convenient to 110V power and network outlet s 4 Plug the power supply into standard 110V outlet and the barrel connector end into the T7501 9v power jack a surge protector is recommended 5 Connect network external keyboard and monitor as required See page 5 2 of this section NETWORK INTERCONNECT 9 VAC POWER ADAPTER 110 VAC ELECTRICAL SUPPLY ANTENNA T7...

Page 28: ...s Enter 6 Press Exit key and Accept Changes with Enter key External Keyboard and Mouse For some system features an external keyboard and or mouse is recommended Three USB ports are provided for connection of a PC standard USB keyboard and a USB mouse The keyboard automatically operates however the mouse must be enabled To enable the mouse 1 Press Setup key 2 Enter the manager access code 3 Select ...

Page 29: ...rk Connection Requirements For systems using network communications e g systems using Click Ahead Seating a 10 100 BaseT connection must be available The DHCP protocol will normally locate the IP address automatically If the network does not support DHCP a local network administrator may be required to assign a static IP address Follow the instructions below or call LRS for instruction on this pro...

Page 30: ...matically set from the Internet service If not a pop up screen requires the local time to be set 3 The Wait List and Table Status screen appears 4 The INFO EDIT Up Arrow Down Arrow and Wait List Buttons are lit 5 The unit is ready for operation On Premise Guest and Staff Pager Range Tests NOTE Access Code is needed for Setup functions T7501 Custom Setup Perform this test to see if the pagers can b...

Page 31: ...functions below but not above Access codes for Admin and Manager are usually set at the Service level To set access codes 1 Press Setup 2 Select System and then select Access Codes 3 Select the level to change service admin or manager Note only the access levels appropriate for the entered code will be displayed 4 Enter the access code appropriate for the selected level 5 Press Enter 6 Enter the n...

Page 32: ...the Text all lower case Note the number assigned to use to send custom text to pagers Press Enter to save Set Edit T7501 Alarms NOTE Access Code is needed for Setup functions Pagers can be alarmed to alert staff of regular operations that must be performed 1 Press Setup 2 Select Pagers and press Enter 3 Select Edit Alarms and press Enter 4 Highlight the alarm to edit or select New 5 Select the Ala...

Page 33: ...inter Click Ahead Seating Enables or disables Click Ahead Seating Feature Party Warn Threshold Sets the number of people in a party to alert the staff of larger than normal groups Party Warn Limit How far down the list to look for a larger than normal party Purge Local Backup Clears the day s wait list done at start of or end of daily operations Alpha Pager Encryption Enable NOTE Manager Access Co...

Page 34: ......

Page 35: ...en new T900 s are added to the system Note T900 cannot be used on a T7501 Zigbee system Printer Used when the optional table ticket printer is used with the system This printer is connected through a network interface Printer address selects the IP address of the printer This address is found by a turn on feature of the printer see printer manual Printer type selects from a list of approved printe...

Page 36: ...ts the T7501 to the Internet and other devices To set up LAN a System administrator is recommended View LAN Configuration 1 Press Setup 2 Select Network 3 Select LAN Config 4 The current LAN configuration is displayed Setup LAN use Wizard 1 Press Setup 2 Select Network 3 Select the LAN Wizard 4 Follow the instructions and set up the LAN Setup LRSN This is an LRS Only Configuration Setup WPAN WPAN ...

Page 37: ...tem status is used to review the operational and program settings in the unit If properly authorized see authorization code the system settings shown in this display can be altered Diagnostics NOTE Access Code is needed for Setup functions These functions are used to determine and correct Guest Staff paging problems ID finder function ID finder searches the available system ID s if the ID of the s...

Page 38: ... LRS Guest and Staff pagers can have their identification number and system ID changed using the T7501 To Program pagers Pizzas Lobsters and AdverTeaser Guest Pagers 1 Press Setup 2 Select System 3 Select Diagnostics 4 Select Program Pagers 5 Press Enter to start 6 Select Coaster and Enter 7 Select Pager IDs if programming individual pagers Broadcast system ID if changing all the pagers to a new S...

Page 39: ...2 Remove pager from the charger all pagers if using Broadcast function and wait until they stop flashing vibrating then press Enter 13 Repeat with all pagers to be programmed Battery Operated Alphanumeric Staff Pagers 1 Press Setup 2 Select System 3 Select Diagnostics 4 Select Program Pagers 5 Press Enter to start 6 Select Alphanumeric and Enter 7 Enter the number to use on the pager and press Ent...

Page 40: ......

Page 41: ...erating Frequency Radiated Power 467 750 MHz 1W FCC Part 90 2 4 GHz ISM Band 100mW FCC Part 15 Operating Range Dependent upon pagers used Broadband Connection Cat 5 connection to 10 100BaseT Router connected to Internet Auxiliary TX RX Devices KeyCall Table Genie etc Operating Frequency 2 4GHz ISM Band US Required voltage Device Dependent Battery Powered Pagers Required voltage One AAA Alkaline ba...

Page 42: ......

Page 43: ...e Restaurant ID Use the ID finder function 1 Remove 2 or 3 pagers or coasters from the charger or turn on some battery powered pagers 2 Press Setup 3 Select Diagnostics 4 Select ID Finder 5 Press Enter to begin and the unit searches all of the ID codes beginning with ID 0 6 When it has paged all of the codes it asks Did Your Pager Work If your pagers paged select Yes and the unit will be set to th...

Page 44: ......

Page 45: ...r should you need additional paging supplies call Long Range Systems at 800 437 4996 Monday through Friday 8 30 am to 5 00 pm Central Time For weekend or night emergencies Long Range Systems has 24 7 live technical support available Please keep in mind that options are limited over the weekend ...

Page 46: ......

Page 47: ...k of on and off premise customers Automatic telephone confirmation of off premise reservations Cell phone paging and conformation of on premise customers LONG RANGE SYSTEMS RESTAURANT RESTAURANT WAIT LIST AND RESERVATION DATA BASE CAS CALL ENGINE CAS SERVER TELCO SERVICE STATUS INFORMATION CUSTOMER RESPONSE INFORMATION INTERNET T7501 T901 RESERVATION WAIT LIST INFORMATION T7501 INTERFACE WEB PAGE ...

Page 48: ...lls the customer to confirm If not confirmed voids the entry If confirmed a Enters the data at the database b Updates the T7501 at the selected restaurant On Premise Operation The restaurant display shows on and off premise customers on the waiting list Local wait list entries are added and removed from the list as described in the Wait List and Table management Chapters These entries and removals...

Page 49: ... a Push for Service Monitor Display Mode To access please contact LRS Service Department 1 Use setup procedures for an External Monitor from Chapter 6 External VGA Monitor 2 Press Setup and enter access code 3 Select Devices 4 Select 3BTX 5 Set User Preferences Mode Option to set the Table Genie messages be sent only to the Server Manager pager with Normal or show on the Push for Service Monitor w...

Page 50: ... Table Genie Message 2 Message sent from Button 2 on Table Genie Not used if Single Button is set ON Message 3 Message Sent from Button 3 on Table Genie Not used if Single Button is set ON Low Battery Sets alert if AA battery goes below a certain level Cancel Sequence Button sequence pressed on Table Genie to Cancel and order Toggle Mode Option for repressing a button to cancel a request ...

Page 51: ... will stay in associate mode for 300 seconds 5 minutes afterwards the user will need to restart the mode 6 Place the AA battery into the unit 7 The lights will flash back and forth and then flash rapidly 8 A pop up window will appear Enter the table number of the Table Genie 9 Repeat steps 6 through 8 until all Table Genies are associated 10 To exit select EXIT on T7501 11 Place the label that des...

Page 52: ...ble Genie Each unit can mount to a table using the Table Plate with either the double sided foam tape or 3 screws After mounting the Table Plate to the table slide the unit in the direction of the arrows onto the Table Plate until the latch clicks Directional Arrows to Slide Table Genie ...

Page 53: ...omputer monitor displays the request The pressed button on the Table Genie will flash Clear The button will flash and the monitor will show the request until cleared The server will obtain the patron s request The cancel sequence is pressed The buttons will flash in order then go out The request at the computer monitor will be cleared Button 1 Button 2 Button 3 ...

Page 54: ...st warning The color will change to Red and page the manager if the preset is exceeded The manager will be re paged at an interval until service is cleared Controls Top Will return to the top of the screen Pg Up Pg Dn Scroll through more Requests on the screen Cols Cols Decrease or increase the number of columns on the screen between 1 and 3 Manager Send a message to the Manager s pager Staff Send...

Page 55: ...attery will indicate a unit needing battery replacement Click on the Low Battery and a pop up window will list all of the Table Genie Units with their current battery levels Clearing an Order from the Service Monitor To clear an order Select one of the orders on the screen using the mouse on touch screen A window will pop up displaying Clear Order ...

Page 56: ...Page 11 8 T7501 Select Clear Order ...

Page 57: ...Use crossover CAT 5 cable to connect T7501 to PC 6 The monitor will start up on the KeyCallTX program 7 Connect power to the T7501 Minimum PC System Requirements Processor Pentium class or equivalent Memory 128 Megabytes Operating System Windows 2000 or Later Hard Drive Space 6 Megabytes Connection Spare Ethernet port Peripherals VGA monitor and mouse or Touch Screen Monitor Keyboard is recommende...

Page 58: ...teries 2 Pieces of Foam Tape 2 To assemble place the 3 AA batteries into the KeyCall 3 Place the Thread lock into the Housing with the teeth facing down 4 Place the Battery Cover over the Battery Compartment screw in place with the 2 4 40 x 3 16 Screws KeyCall Unit Thread lock Battery Cover Mounting Plate ...

Page 59: ...tteries To assign 1 Enter KeyCallTX program 2 Select the Tables tab type in Access Code 56789 3 Press the Assign to Table button 4 Position KeyCalls at least 6 feet from T7501 5 Insert and remove the Program Key from the KeyCall unit LED will blink Red several times and then Green when it associates On the screen note that a serial number entry is highlighted 6 Assign as a Clearing Unit Starter Un...

Page 60: ...ress Assign to Table when finished Mounting the KeyCall 1 Place the Mounting Plate on the desired location using the 2 pieces of double sided foam tape or using 4 screws 2 Place the KeyCall unit onto the Mounting Plate press down then turn the unit counter clockwise to lock unit should spin freely without pulling off the Mounting Plate Turn counter clockwise to lock ...

Page 61: ...T7501 Page 12 5 The KeyCallTX Program Setup Window The KeyCallTX software is set to activate on the start up of the PC The program will come up on the Orders window ...

Page 62: ...a default message to notify when an order goes beyond the Page After time interval 3 At the System Configuration section set the required parameters for a Restaurant ID This is the System ID of the restaurant ID is also used for the Manager and Server Paging b Manager Pager Pager number of the Manager This pager is notified when an order is overdue See section on Timing Interval c Server Pager Pag...

Page 63: ...of a Clearing Unit see description on page 12 14 or the Touch Screen monitor using the monitor on the PC to Clear Orders from the Orders window g Beep Error Enable Error beep on KeyCall unit and set Volume Level The Error Beep occurs when the KeyCall unit fails to connect to the T7501 or a Key is inserted incorrectly h Access Code Password used to enter system Change is NOT recommended Password mu...

Page 64: ...able unit The table unit transmits the patron s location to the central monitor The Order key number Table number and Elapsed Time are shown on the Order monitor The monitor for that table will change from white to yellow to orange and finally to red Once red the manager will be paged if the patron waits for their order beyond a preset critical time After the patron is served the server retrieves ...

Page 65: ... the Table for an Order Double click the Table number At the pop up window type in the new Table number Press Enter Close will exit the Order Info window Organizing the Orders Window The window comprises of 12 rows per column consisting of the Order Table and Elapsed Time in each cell The number of columns can change from 1 2 or 3 by pressing the buttons The arrangement in each cell will not chang...

Page 66: ... a customer using LRS Guest Pagers Press the Customer button Enter the pager number and press Page button All customer pagers should range from number 201 and above Manager or Server Paging To Page a manager or server using LRS Alpha Staff Pagers Press the Manager or Server button Enter a message and press Page button Note The drop down box contains 3 preset messages and stores the last 7 messages...

Page 67: ...was Cleared user can retrieve the information Transaction will resume from the initial start Key Key number of Customer Table Table number Key was used Delivered Day and time order was cleared Elapsed Time Complete service time to fulfill order To retrieve highlight a transaction and press the Recall button in the window ...

Page 68: ...act and check the battery status of each unit several times daily A green display for a unit indicates acceptable performance If the Last Contact column is red it would indicate contact with a KeyCall unit is lost and it should be checked A red indication in the Battery Level column indicates the batteries should be replaced ...

Page 69: ... of time to view Select the type of report to view Daily Summary Report Shows the average order delivery time and number of covers for the period selected Daily Detail Report Shows the detail order delivery time for every order Report CSV Saves the selected reports in CSV Comma Separated Values to a predetermined file see setup ...

Page 70: ... the transaction Service Button Alerts the Server by sending a page that a Table requires assistance This will also cause the LEDs at the top of the KeyCall unit to flash There is a one minute time limit between signals sent to the Server pager when the button is pressed to reduce unnecessary requests Key Holder Each KeyCall has four spaces two on each side to store Keys The KeyCall Keys Programmi...

Page 71: ...n to Table 3 Insert and remove any number key into the KeyCall unit 4 Note that a special serial number entry is highlighted on the table configuration window 5 Accept the table number as is by press Enter otherwise Edit or Delete 6 Repeat for all units to be reassigned 7 Press Assign to Table to end Low Battery Indicator Order Window If the LO BAT message appears on the Orders Window a KeyCall un...

Page 72: ...indow Check that the T7501 is powered on Check the crossover cable to the T7501 Enter the Setup Window go to the Network section see if Network states NO CONNECT and that the T7501 IP address is highlighted in red select Connect Check TCP IP settings of PC and T7501 1 On T7501 check going into Setup enter access code 5 6 7 8 9 2 Select System Network LAN Config 3 On PC select Start Control Panel N...

Page 73: ...ear as Computer TX 7501 IP inet addr 192 168 200 25 192 168 200 155 Netmask Mask 255 255 255 0 255 255 255 0 Gateway Bcast 192 168 200 254 192 168 200 1 Primary DNS 192 168 200 1 Notes DNS Server is not required on the PC The Secondary DNS is not required on the T7501 7 If Computer settings do not match the table correct 8 If T7501 does not match call LRS ...

Page 74: ......

Page 75: ...eys on the Main Keyboard or using the Staff Server or Manager virtual buttons viewed on the computer monitor during various applications Using the RX E 4 Line Alpha Numeric Pager Menus Selecting functions 1 To select Press Scroll Dn or Up until desired item shows 2 Press Scroll to select 3 Press Read Select to start finish Power On Off Set ON if unit is off 1 Press and hold Scroll Up until YES NO ...

Page 76: ...elete All 2 Press Scroll to select YES NO 3 Press Read Select button Time Date Set 1 Select Set Time Date 2 Press Read Select 3 Press Scroll to set each time or date segment and press Read Select to move through the segments Set Contrast 1 Select Set Contrast 2 Press Read Select 3 Scroll DN UP to adjust Auto ON OFF 1 Select Auto On Off 2 Press Read Select 3 Select ON OFF 4 Press Read Select and Sc...

Page 77: ...ct to set Select Alert 1 Select Set Alert Mode 2 Select Beep Select Loud or Soft Select Duration 3 Select Vibe or Off Select Strong or Weak Select Pulse Type Select Duration Battery The RX E 4 Line Alpha pager uses 1 AAA Battery Programming To program the pager see Chapter 6 Battery Operating Alphanumeric Pagers ...

Page 78: ...4 Replace the pager in the charger at the end of each day Programming To program the Staff Star Pager see Chapter 6 Rechargeable Star Staff Pagers Note A Guest version of the Star Pager is available and must be purchased separately from a Staff version To page a Star Guest Pager with the T7501 press the Page key on the 4 button keyboard or use the Guest virtual buttons viewed on the computer monit...

Page 79: ...ss the vibe contrast menu remove the pager from the charger While vibrating or beeping press and hold the Select button for 8 seconds This top level menu will display If you PRESS and RELEASE the SP5 pager button the menu will change to To exit this menu wait 8 seconds To re enter the vibe contrast menu at any time reset the pager and then hold the SP5 pager button Vibe To set the Vibration Level ...

Page 80: ...esired Contrast The level will increase to max NOTE screen could be dark and hard to read Release the Select Button and press or hold again to change the level back towards the minimum or to desired contrast 4 To exit wait 8 seconds And the pager will go back to the vibe contrast menu 5 To exit this menu wait 8 additional seconds Settings To view the current pager settings 1 Remove pager from the ...

Page 81: ...n length the middle lines will show the next line of the message 3 Press the Select Button to continue scrolling forward through the message or messages Time Pager will display the current time This feature is automatically updated by the T7501 transmitter If the time does not appear a flashing star will appear on the right side of LCD to show pager is operational Programming To program the pager ...

Page 82: ......

Page 83: ...Program Pagers Pizzas Lobsters and Adverteaser Guest Pagers Charging Any rechargeable pager will require use of an LRS charger 1 Place the pager in the charger For Coasters Pizza and Lobster pagers do not stack more than 10 pagers at a time on a Charger 2 Allow unit to charge fully overnight 3 Remove from charger and pager will vibrate beep and light all lights as a verification that it is working...

Page 84: ...Page 14 2 T7501 AdverTeaser Coaster Call Lobster Call Pizza Pager ...

Reviews: